
Table of contents
Just for you
How to create invoices from the QuickBooks Online API in PHP with OAuth2


QuickBooks is one of the most well-known accounting software solutions. Its ease of use, quick learning curve, affordable pricing, and simple interface has made it the solution of choice for over 3.4 million businesses worldwide, from independent contractors to growing enterprises. As a developer, you might have to integrate QuickBooks with other internal company software like project management or CRM solutions. The huge customer base of QuickBooks also offers great potential for countless SaaS integrations with other cloud-based business tools.
In this article, you'll learn how to create invoices using the QuickBooks API in PHP. The tutorial covers how to create a QuickBooks app, connect your software to QuickBooks, handle authentication using Oauth2.0, and create and fetch invoice information programmatically using the QuickBooks API. As a compliment to this specific, tactical, tutorial, you might find our strategic ebook on Accounting API integrations helpful.
You can find the code for this tutorial at this GitHub repository.
How to Create Invoices with the QuickBooks API in PHP
To follow along with this tutorial and the code examples, you need PHP 5.6 or higher, Composer, and Git client installed on your local machine.
Create an Intuit Developer Account
To connect your app to the QuickBooks API, you need to create an Intuit Developer account. Intuit is the company that created QuickBooks, and the developer platform is named after the parent company.
Create an App
Next, create an app on the Intuit Developer platform. This step is essential to generate the get that you'll use to connect to the OAuth 2.0 server, generate access tokens, and make API calls.
OAuth 2.0 is the authorization standard used to integrate your app with QuickBooks. Only registered apps can connect to the Intuit OAuth2.0 server, call the API, and integrate with a company QuickBooks account.
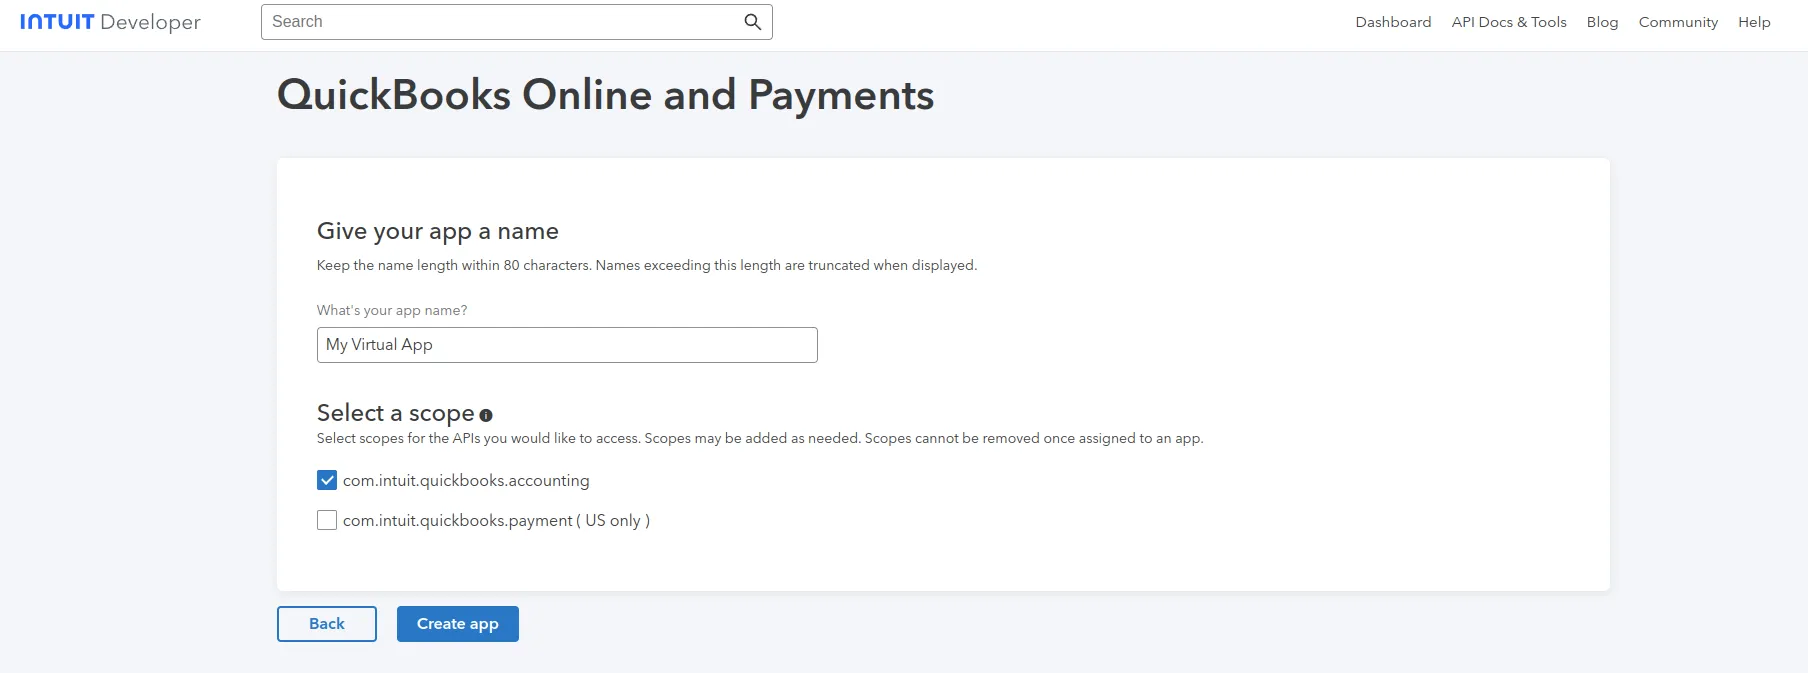
To create your app, log in to your developer account, click the Dashboard item in the navigation menu, then click Create an App. After you fill out the short form with your app info, you'll be directed to the dashboard of your newly created app.
Get Client Keys and Define Redirect URI
You now need to copy the client keys that you'll use to perform API requests. From the dashboard of your app, click Keys & credentials under Development Settings. These credentials are for your testing environment. When you publish your app, you'll need to replace those credentials with the ones under the Production Settings menu.
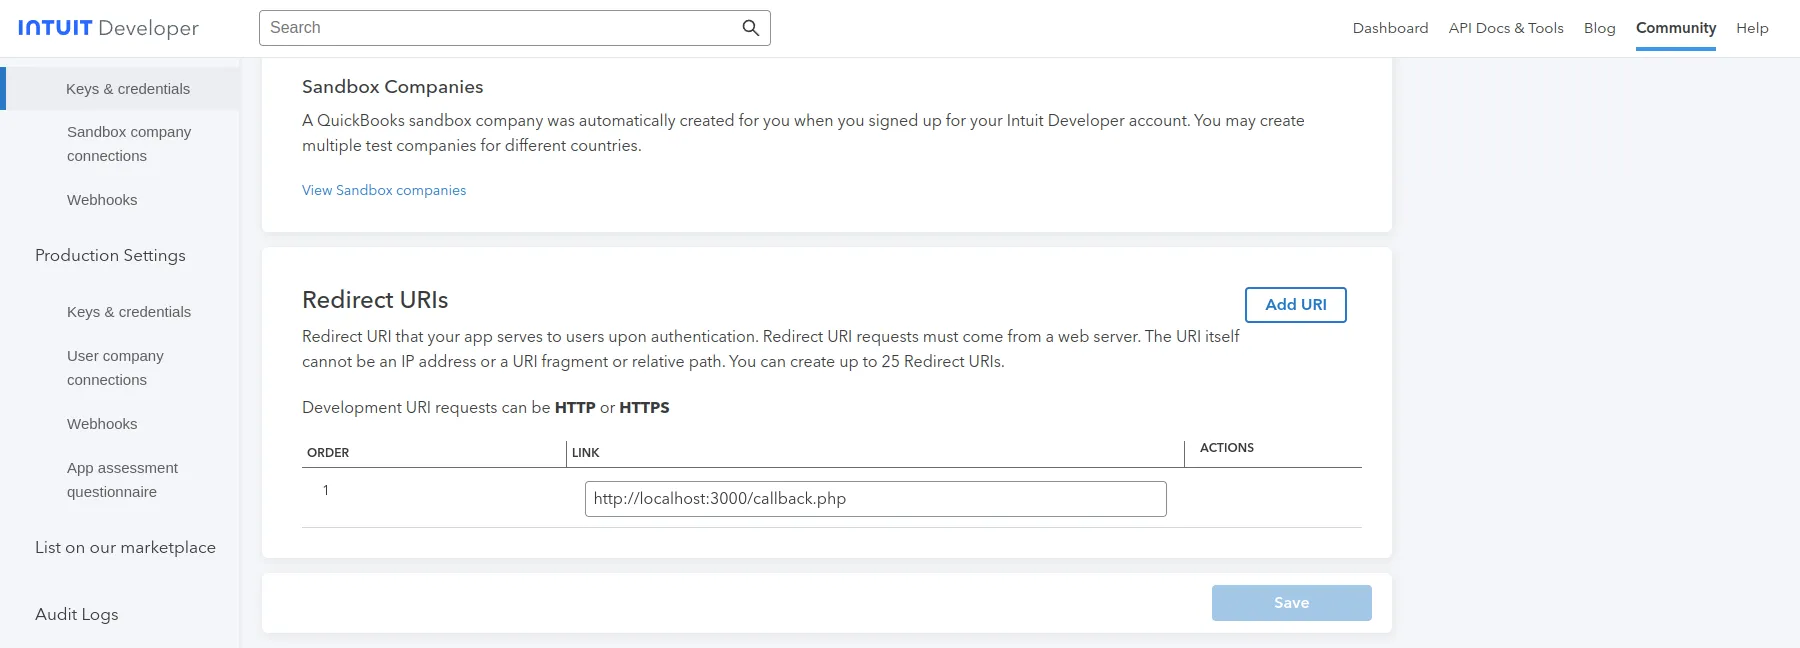
You'll also need to create at least one redirect uniform resource identifier (URI). These URIs handle responses from the OAuth 2.0 server and are called after the user authorizes the connection. For the scope of this article, you'll need one URI.
In this project, you'll use <code class="blog_inline-code">http://localhost:3000/callback.php</code> as the callback URI. Create a URI with this address as shown in the image below:
Related: QuickBooks Online integration examples
Project Structure
For this tutorial, you'll be creating a demo app to log in and connect a sandbox company using OAuth2.0, create invoices, and fetch created invoices for this sandbox company.
This sample project includes creating six PHP files:
- index.php: This is a homepage file that includes basic HTML and PHP code to display the access token data.
- connectCompany: This is used to log in and connect a sandbox company using OAuth2.0 and to generate and save the access token.
- callback.php: This is where the login request to the server is directed; it is the callback URI that you already set in the app settings.
- createInvoice.php: This contains the function that includes the invoice creation logic.
- getInvoices.php: This contains a function to fetch invoices.
- config.php: This is a file to store the environment variables you'll need to connect to the API.
Install QuickBooks PHP SDK
QuickBooks offers an official PHP SDK for the Online Accounting API. To install the QuickBooks Online PHP SDK via composer, run the following line in your terminal after navigating to your project folder:
Create a Config File
This config.php file will contain the environment variables that you'll use to connect to the QuickBooks servers. You'll use these variables later in every file for all the API requests' authentication.
After you create the config.php file, paste this code into it:
The environment variables included in this code are as follows:
- authorizationRequestUrl: This is the Intuit server OAuth2.0 URL.
- 'tokenEndPointUrl': This is the token endpoint on Intuit servers.
- client_id: Replace this with the Client ID key from your app settings.
- client_secret: Replace this with the Client Secret key from your app settings.
- oauth_scope: QuickBooks apps have two scopes: accounting and payments. Since the scope of this code is to handle creating and fetching invoices, the code uses the accounting scope.
- oauth_redirect_uri: This is the URI that you defined earlier in your app settings. It's where all the API responses will be handled.
{{this-blog-only-cta}}
Create an Index File
The index file is a homepage file with minimal HTML to help test your code.
Start by creating a file named index.php, then add this PHP code at the top:
The first three lines in this file are to load composer packages, the config.php file, and the DataService class from the QuickBooks API. You'll use this class in every step of this tutorial to connect with the API, handle authentication, generate and refresh the access token, and many other functions.
To create an SDK instance using the data service object, you need to provide the right parameter to the <code class="blog_inline-code">DataService::Configure()</code> function. You have set this up already in the config.php file, so the parameters used are all imported from the <code class="blog_inline-code">$config</code> array.
The following code inside the if statement checks if a token has already been generated and saved in the session variables. If a token is generated, the token information is stored in <code class="blog_inline-code">$accessTokenArray</code>. This array shows you the most important data that you need from the access token, which will be shown at the bottom of the HTML code below.
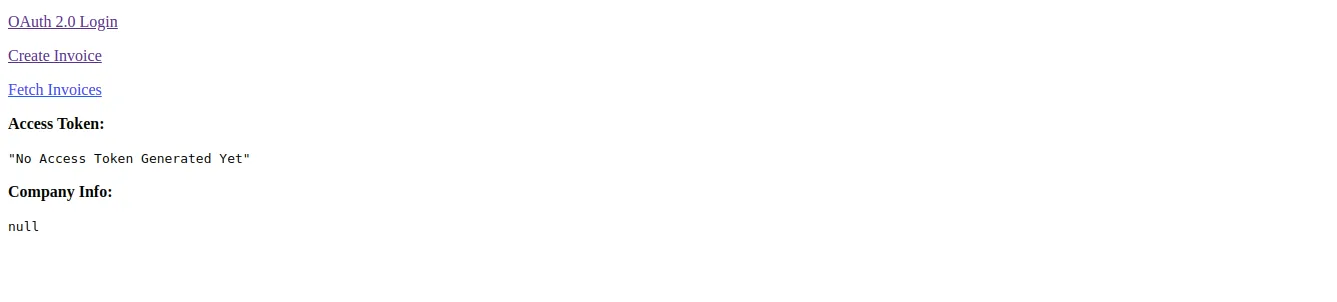
Next, add this HTML code:
This code includes three anchor links to handle the OAuth login, create invoices, and fetch invoices, followed by a code block to display the access token data when generated.
Log In and Connect Your Sandbox Company
Every developer account comes with a sandbox company. The invoices that you're going to create and fetch will belong to this company. Before creating invoices, you need to connect this company to your app using OAuth2.0 and get an access token.
To handle the OAuth2.0 login, create a file named connectCompany.php and add this code to it:
As for the previous file, it starts by loading composer and the config file and creating the SDK instance using the <code class="blog_inline-code">DataService</code> class.
OAuth2LoginHelper lets you connect to the OAuth2.0 server, which will allow you to generate the access token. Calling <code class="blog_inline-code">$OAuth2LoginHelper->getAuthorizationCodeURL()</code> generates the OAuth2.0 server authorization URL that the last line in this file redirects you to.
After being redirected to the authorization link, you will find a login page where you can log in to your developer account, then confirm connecting the sandbox company. After doing that successfully, you will be redirected to the callback URI. The URI will be something like this:
Notice that the URI <code class="blog_inline-code">http://localhost:3000/callback.php</code> is the same as the callback URI you previously created in the app settings and also set in the config.php file. The two extra variables in the link—<code class="blog_inline-code">code</code> and <code class="blog_inline-code">realmId</code>—are sent by the OAuth2.0 server for you to use to generate the access token in the next step.
Create the Callback Function
Since the callback URI is <code class="blog_inline-code">locahost:3000/callback.php</code>, create a file called callback.php to handle the response from the QuickBooks API and generate the access token.
Add the following code to this file:
In the <code class="blog_inline-code">processCallbackCode()</code> function, the first thing is to create the data service instance and then to load the <code class="blog_inline-code">OAuth2LoginHelper</code> object. To generate the access token, this object uses the <code class="blog_inline-code">exchangeAuthorizationCodeForToken()</code> method, which takes two arguments—the URI code and <code class="blog_inline-code">realmId</code> sent in the callback URI from the previous step.
The final step in this file is calling the <code class="blog_inline-code">processCallbackCode()</code> and redirecting to the index.php page. If this step was done correctly, you'll find your access token object displayed in the code block that you created in the index page. This is why the code to check for the access token was created in the index file.
Create an Invoice
By now, you should be able to connect and authorize your sandbox company to use your app. Next, it's time to create a file named createInvoice.php to handle invoice creation.
In addition to loading the composer packages and importing the <code class="blog_inline-code">DataService</code> class, import two facade classes—Customer and Invoice—using the following code:
Then, add the <code class="blog_inline-code">createInvoice()</code> function:
The function starts by creating the SDK instance, retrieving the access token from the session variables, and updating the token in the same way you did previously.
After the SDK instance creation, <code class="blog_inline-code">$dataService->Query()</code> is used to query the customers table and find whether a customer with the selected name exists. If it's found, the returned object is assigned to <code class="blog_inline-code">$customerRef</code> so that it can be used for invoice creation. If no customer was found with this name, then <code class="blog_inline-code">Customer::create()</code> is used to create the customer object, and <code class="blog_inline-code">$dataService->Add()</code> is used to add a customer with this name to your sandbox company. This function returns the customer object if it's been created successfully or an error if otherwise.
The next step is to create the invoice using the <code class="blog_inline-code">Invoice::create() </code>function and then to use <code class="blog_inline-code">dataService->Add()</code> to add it. In <code class="blog_inline-code">Invoice::create()</code>, two arrays are given. The first is the <code class="blog_inline-code">Line</code> array, which includes the invoice information. The second is the customer reference, which uses the customer ID returned from the customer creation.
To create an invoice, you need at least one line item and a customer reference. For more details about the invoice object, check out Intuit's documentation about it.
The final code is to print the created invoice ID and the full response in JSON format using the <code class="blog_inline-code">json_encode()</code> function.
Fetch Invoice Data
The last file to create in this project is getInvoices.php. In this file, you need to import the invoice facade class along with composer and the DataService class as follows:
Then, add the <code class="blog_inline-code">getInvoice()</code> function:
In this function, the <code class="blog_inline-code">$dataService->Query()</code> method is used to fetch all invoices. It's a powerful function that lets you run SQL queries to read data such as invoices, customers, items, and other accounting records from the user's company.
Here's an example of how to use it to query all invoices sent to a specific customer by customer ID:
The final code is to check if the invoice query returned any results by checking the length of the array, then to use the <code class="blog_inline-code">json_encode()</code> function to use it and print it to your page.
Finally, call the function at the end of the file:
Test Your Code
Congratulations! You're done creating all the functions necessary to log in and authorize a sandbox company, create an invoice, and fetch all invoices or a specific one.
To test your code, start the PHP server from your terminal window at port 3000 and use this command:
After you run the PHP local server, open your browser and navigate to localhost:3000. It will display the index.php page. Now you can see the homepage that you created in the index.php file.
Start by clicking the Connect Company link to log in to your developer account and connect your sandbox company. You will then be redirected to the index.php page and see the generated access token at the bottom of the page.

After generating the token, you can try creating an invoice by clicking Create Invoice. The result will appear as a JSON object in the createInvoice.php page. You can then test fetching all the invoices by clicking the Fetch Invoices link. The result will also appear as a JSON object.
Creating and Fetching Invoices Using a Unified API Solution
As you can see from the small project in this article, developing, testing, and maintaining an integration with the QuickBooks API can be time-consuming. An alternative is to use a unified API solution like Merge.
A unified API can be defined as an abstraction layer that provides connection to many APIs in one place. Its single data model that integrates with multiple platforms can help you save development time and expand your application to integrate with many other online accounting solutions.
For example, Merge has a single invoice object that works as a unified object for your API request to any accounting platform that you're integrating your application with.
Accounting Integration Resources and more
In this tutorial, you learned how to create and fetch invoices using the QuickBooks API and OAuth2.0 login in PHP. You also learned how a unified API accounting solution can help you expand your application with less time and effort. All the code for this tutorial is in this GitHub repository. As you continue your work with accounting integrations, you’ll find our ebook on Accounting API integrations helpful.
Merge is a unified API solution that provides a single programming interface to sync data from multiple third-party platforms, including Quickbooks, Netsuite, and Xero. It integrates with hundreds of HR, recruiting, and accounting platforms to help you reduce integration and debugging time and focus on building your core product.
Learn more about Merge by scheduling a demo with one of our integration experts.

.png)
.png)


