Table of contents
How to find your personal access token in Asana (7 steps)

Asana, the popular project management tool, helps teams of all sizes and departments manage their tasks more effectively and easily.
While the platform’s out-of-the-box features and capabilities are already powerful, they can provide even more value when you integrate Asana to your other internal applications or when you connect your product to customers' instances of the application.
Regardless of your integration use case(s) with Asana, you’ll need to create a personal access token (PAT) in the platform. We’ll help you do just that below!
Step 1: Create an account or log in
Your first step is to login or create an account (if you don’t have one already).

Related: How to get your access token in GitLab
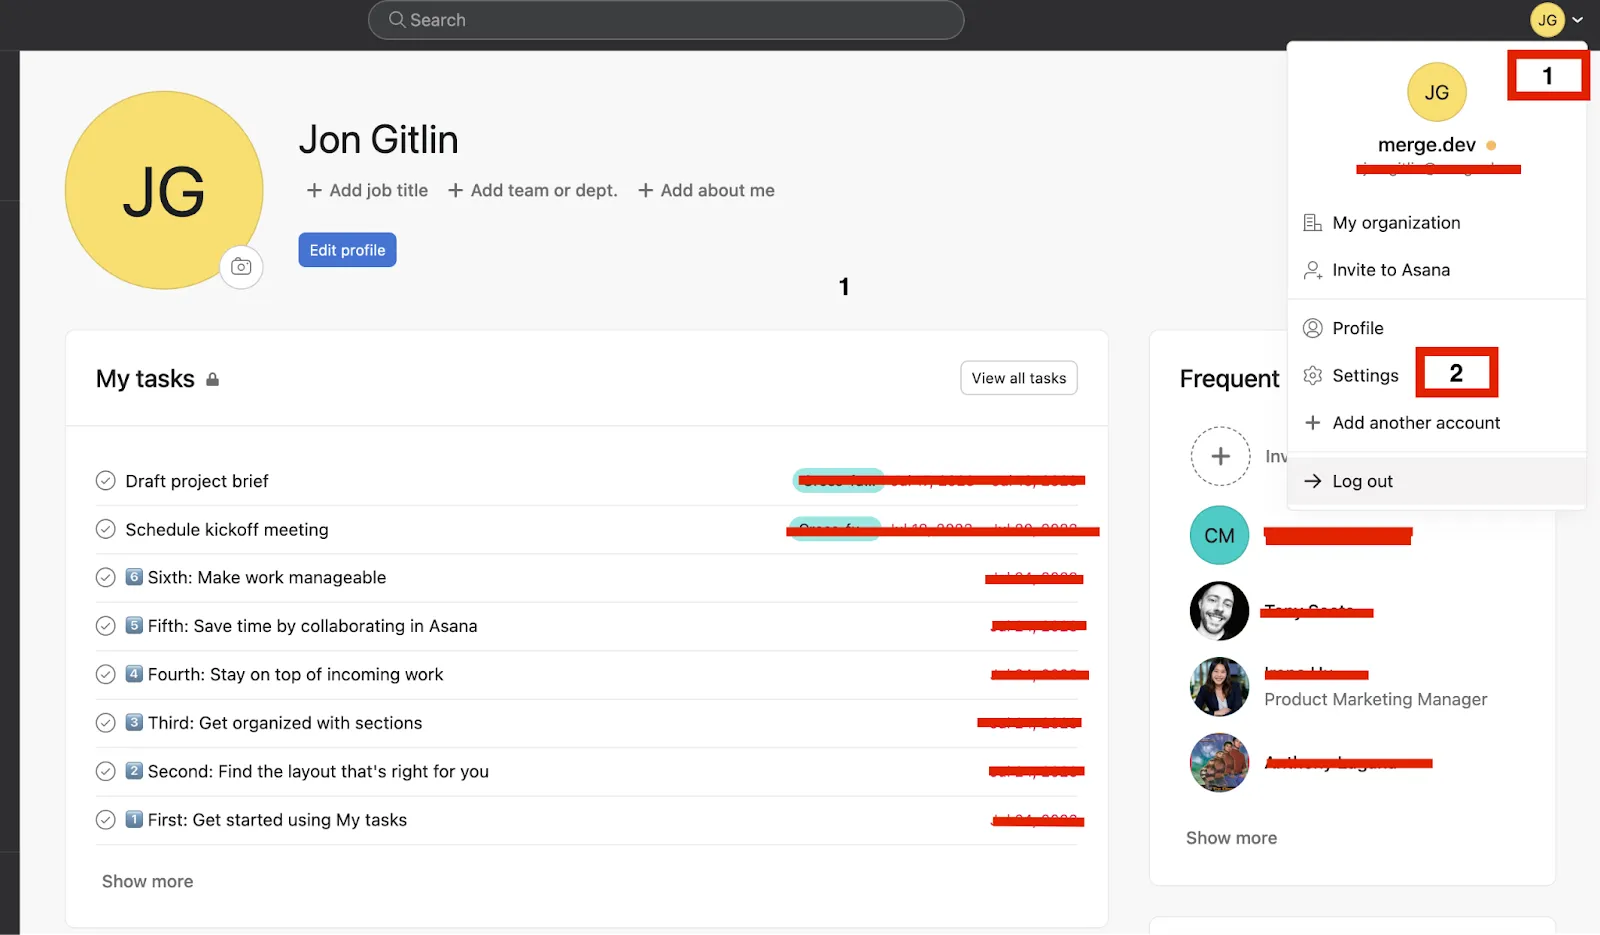
Step 2: Access your settings page
From your profile page, you can click on your initials on the top right corner. A drop down should appear; click on “Settings” from this dropdown.
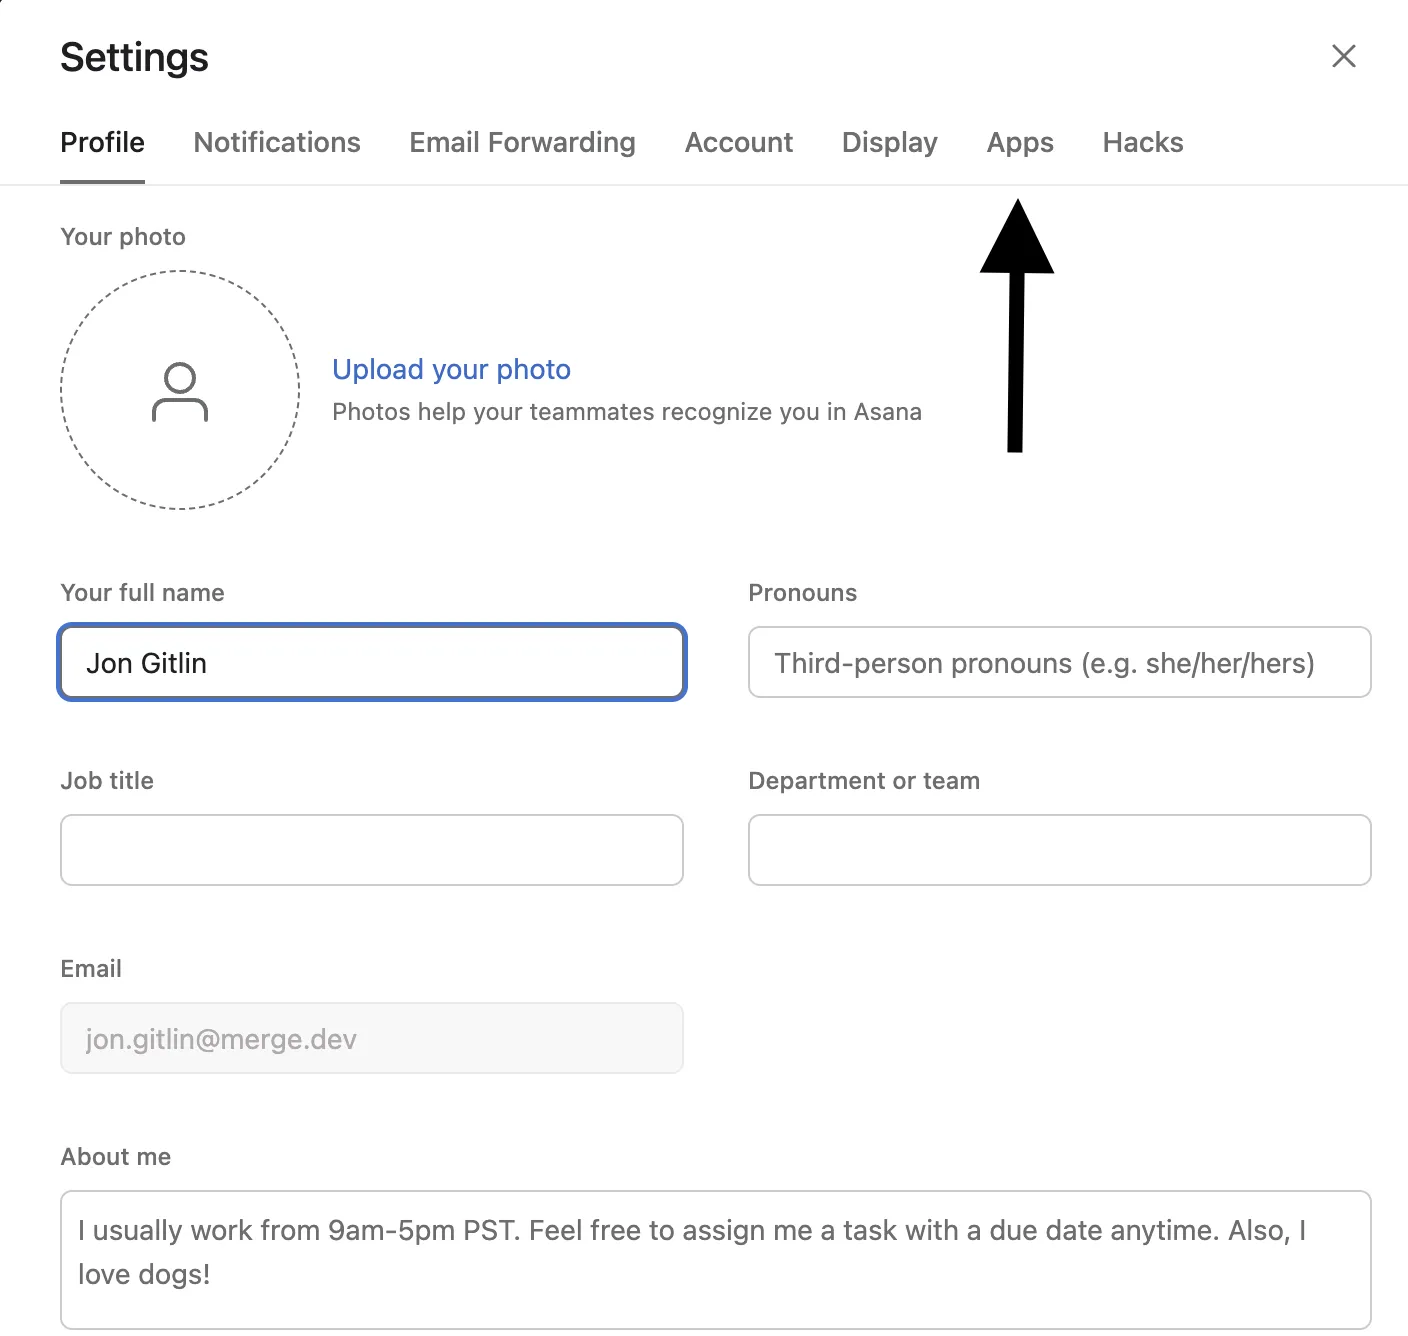
Step 3: Select “Apps” from the list of tabs
You should see "Apps" sandwiched between “Hacks” and “Display.”
Related: A guide to finding your Jira API key
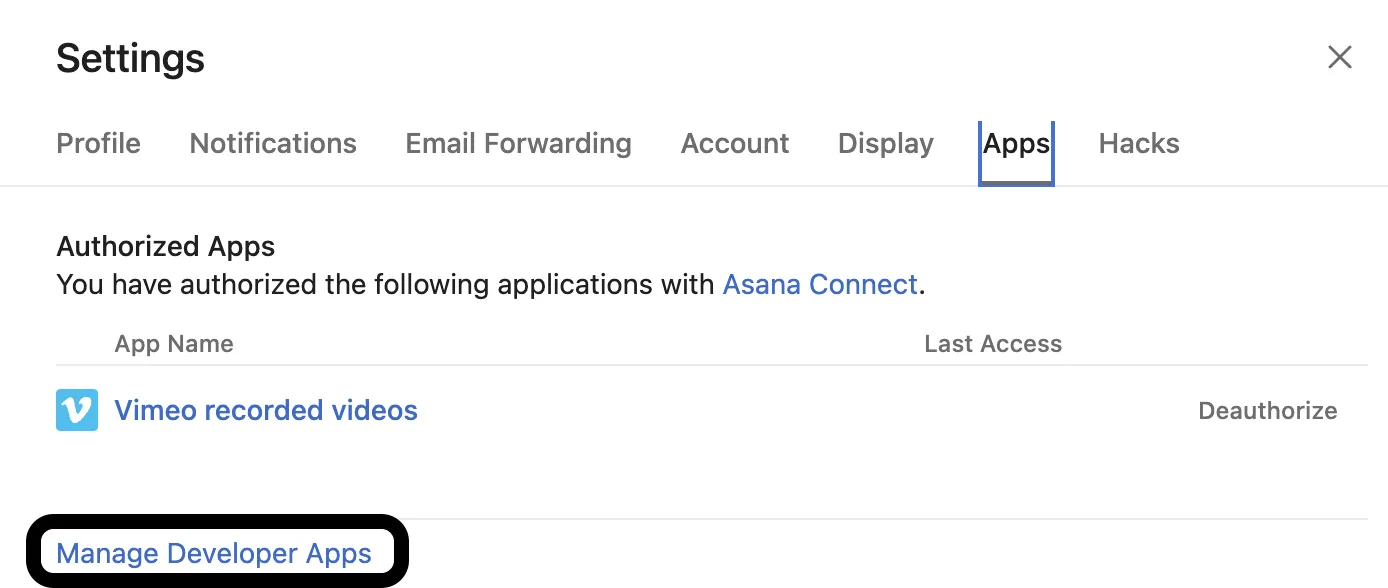
Step 4: Click on “Manage Developer Apps”
You should see “Manage Developer Apps” in small font at the bottom left side of the pop-up. Go ahead and click it.
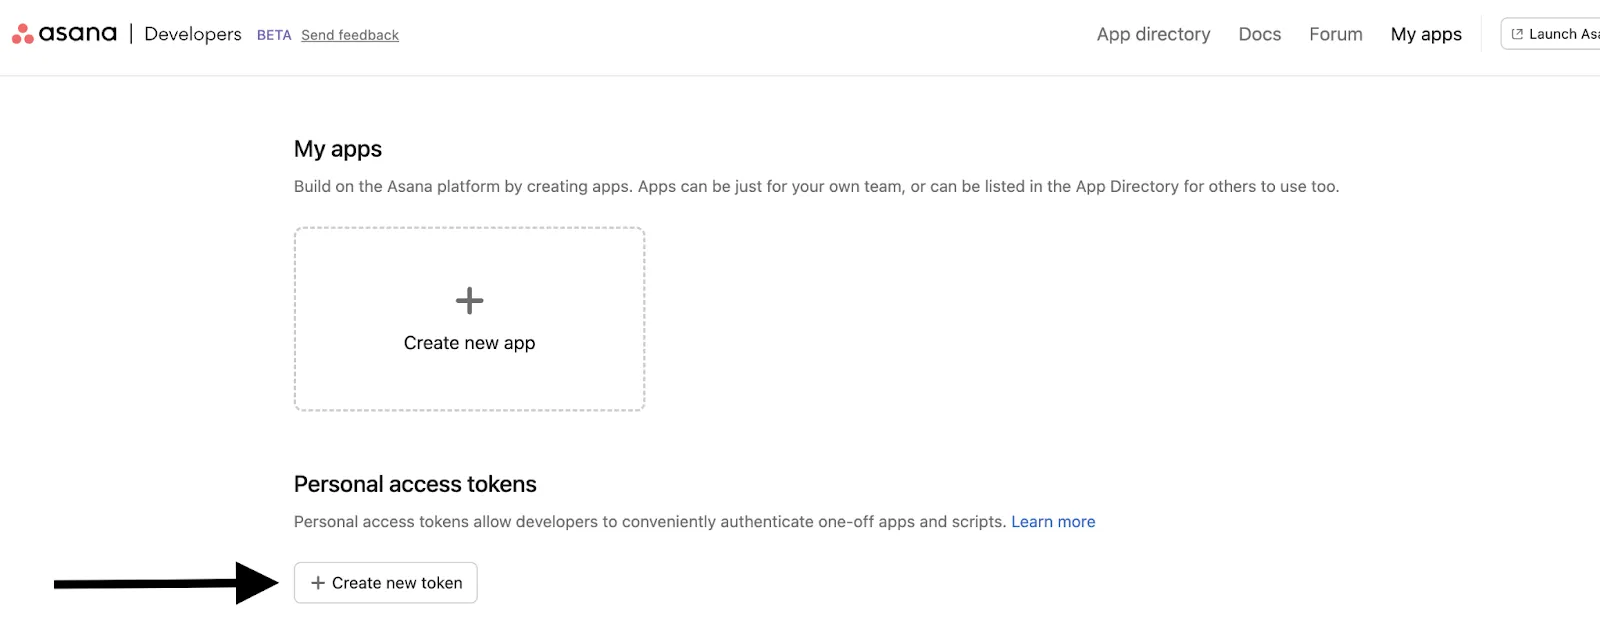
Step 5: Create a new token
You should now be in Asana’s Developer Console. From here, you can select a button that says “+ Create new token.”
Step 6: Give the token a name
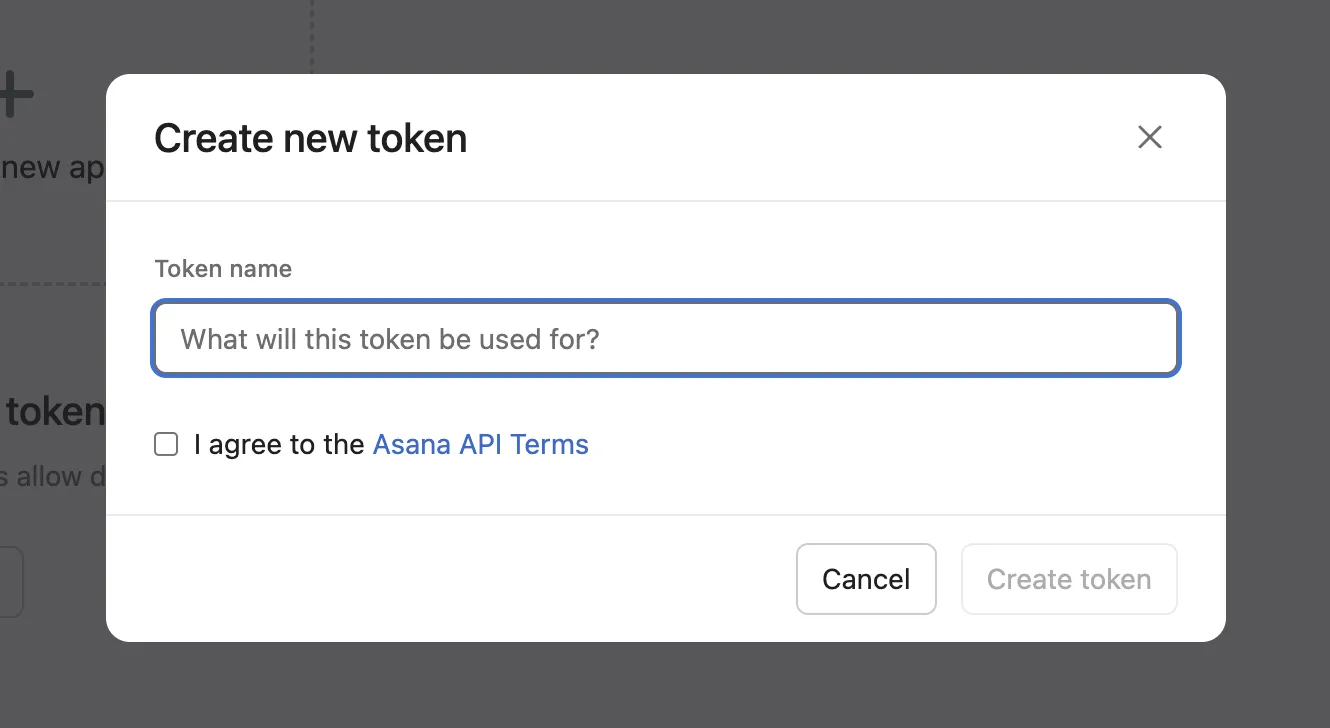
A pop-up should appear that gives you the opportunity to give the token a unique name. Make sure it’s specific so that you can easily remember what it’s used for.
You can then select the checkbox to agree to Asana’s API terms and click “Create token.”
Related: A guide to finding your API key in Trello
Step 7: Copy your token
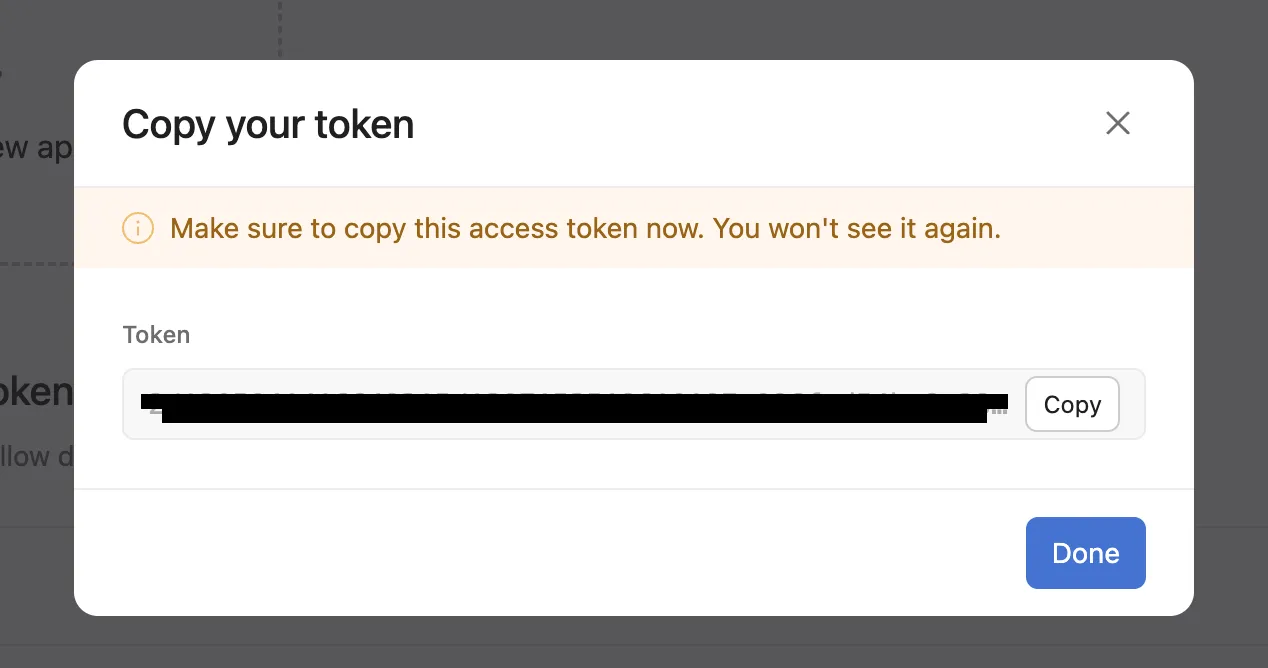
Your token should now appear! Make sure to copy it as it won’t be displayed again.
Other key considerations for building to Asana’s API
Before building to Asana’s API, it’s worth familiarizing yourself with the following.
Pricing
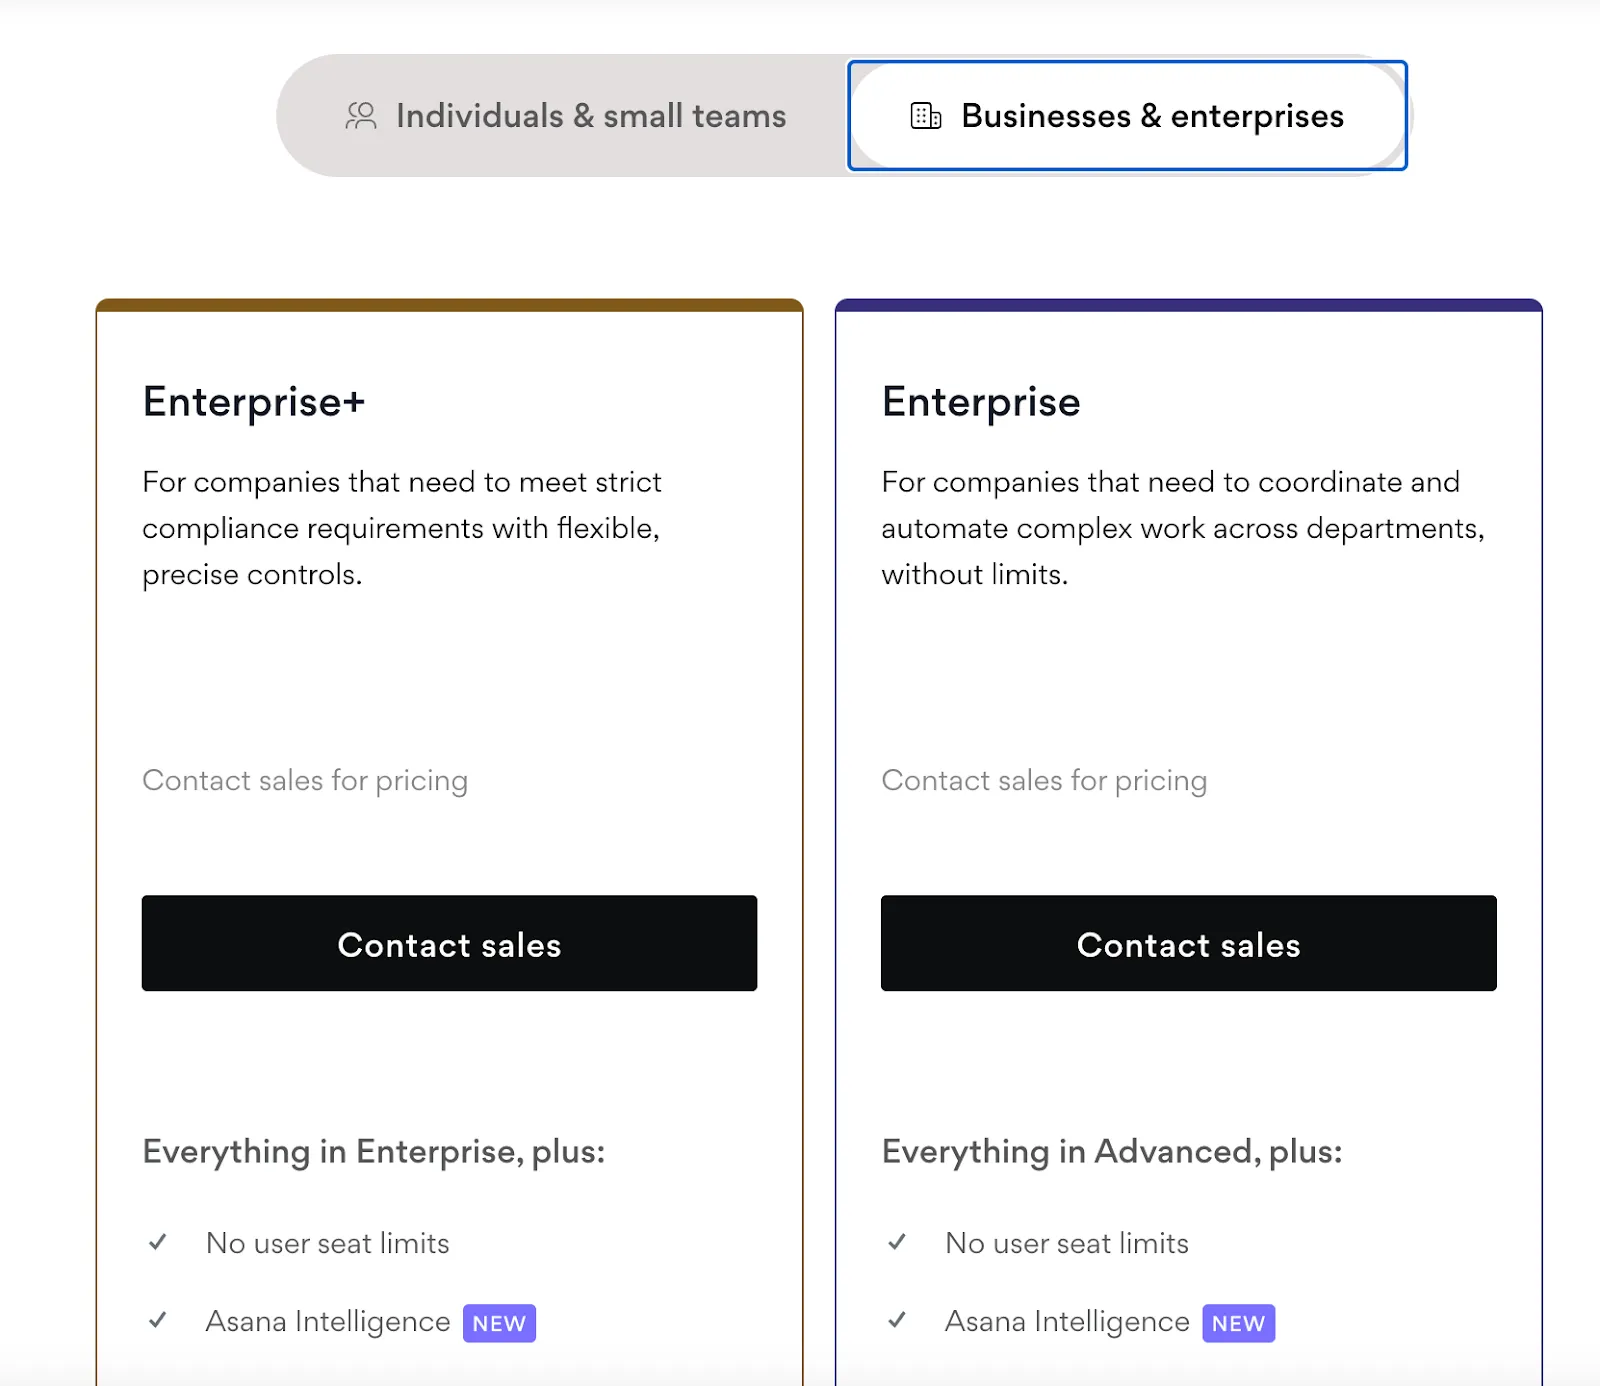
Asana offers two sets of pricing plans: “Individuals & small teams” and “Business & enterprises.”
In the case of the former, they have 3 plans: “Advanced”, “Starter”, and “Personal.”
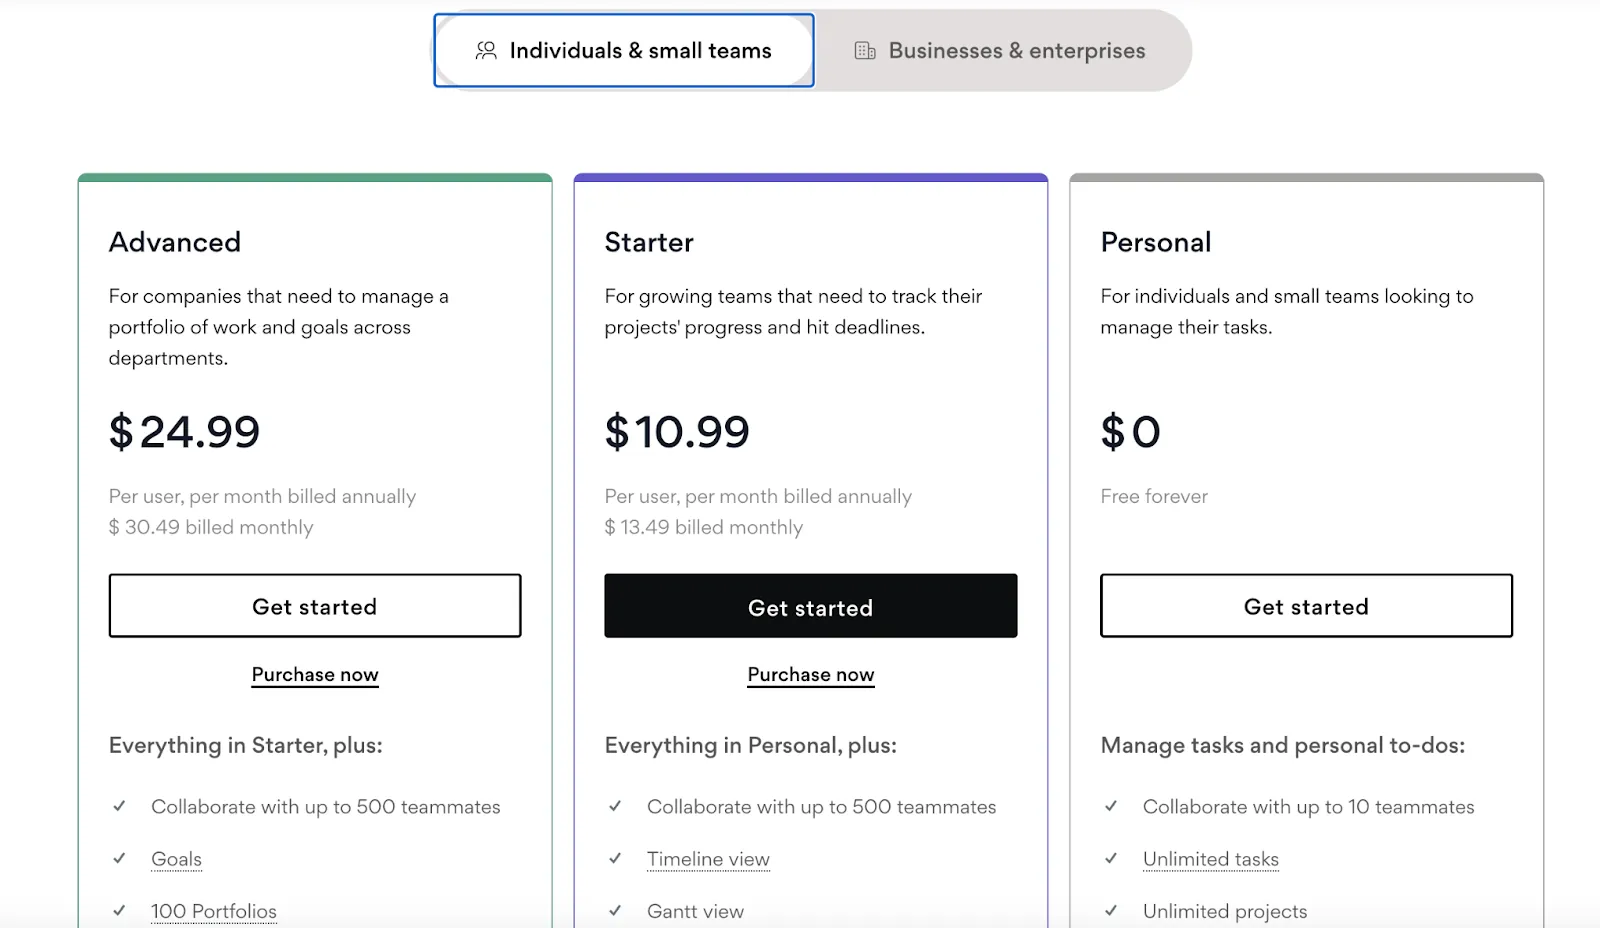
They all come with unlimited projects, messages, activity logs, file storage, assignees and due dates, among other features. However, as you move up in plans, you’ll be able to add more teammates and access additional features, like an Admin Console, the Workflow Builder, and advanced search functionality.
Asana’s enterprise plans include a wide range of additional features and functionality that enterprise organizations typically need. However, "Enterprise+" goes even further by providing Audit logs, Audit log APIs, custom password requirements, data residency options around the world, and more.
Learn more about Asana’s pricing.
Rate limits
Asana imposes rate limits per minute and they differ based on whether you’re on the free plan or one of their paid plans.
You’re allotted 150 requests per minute on their free plan, and 1,500 requests per minute on one of their paid plans. That said, certain endpoints may have their own rate limits. For instance, the search API has a rate limit of 60 requests per minute.
In addition, you’ll need to follow Asana’s concurrent request limits, which can vary depending on your HTTP method.

Learn more about Asana’s rate limit policies.
Errors
You’ll likely encounter a range of different issues from your requests. Here are just a few you might see:
- 400 bad request: this is likely due to a missing or incorrect parameter
- 401 Unauthorized: the personal access token doesn’t have permission to perform the desired action on the resource
- 402 Payment Required: The requested object is only available to premium organizations and workspaces
- 404 Not Found: the requested resource either doesn’t exist or the HTTP method and path for that resource don’t exist
- 429 Too Many Requests: you’ve exceeded the rate limit in the current window and need to wait for the next one
Final thoughts
Asana is a popular project management solution, but it isn’t the only one your clients use. They may also be using ticketing tools like Trello, GitLab, or GitHub—among countless others.
You can offer integrations with any of the tickets solutions your clients have by building to Merge’s Ticketing Unified API.
To learn more about the unified API, and Merge’s platform more broadly, you can schedule a demo with one of our integration experts!




.png)
