How to access your API key in Box (5 steps)
There are seemingly endless reasons why you’d want to integrate with Box.
Integrating the file storage solution with your product allows clients to easily retrieve up-to-date documents and information without having to leave your platform; while integrating the file storage solution with your internal applications can save your employee’s time, prevent documents from getting lost, and ensure that only employees with the right set of permissions can access certain documents.
Whatever your reasons for building to Box, your first step involves retrieving your API key. We’ll help you do just that by walking you through every step you need to follow.
Related: How to get your ChatGPT API key
Step 1: Create a Box Developer Account:
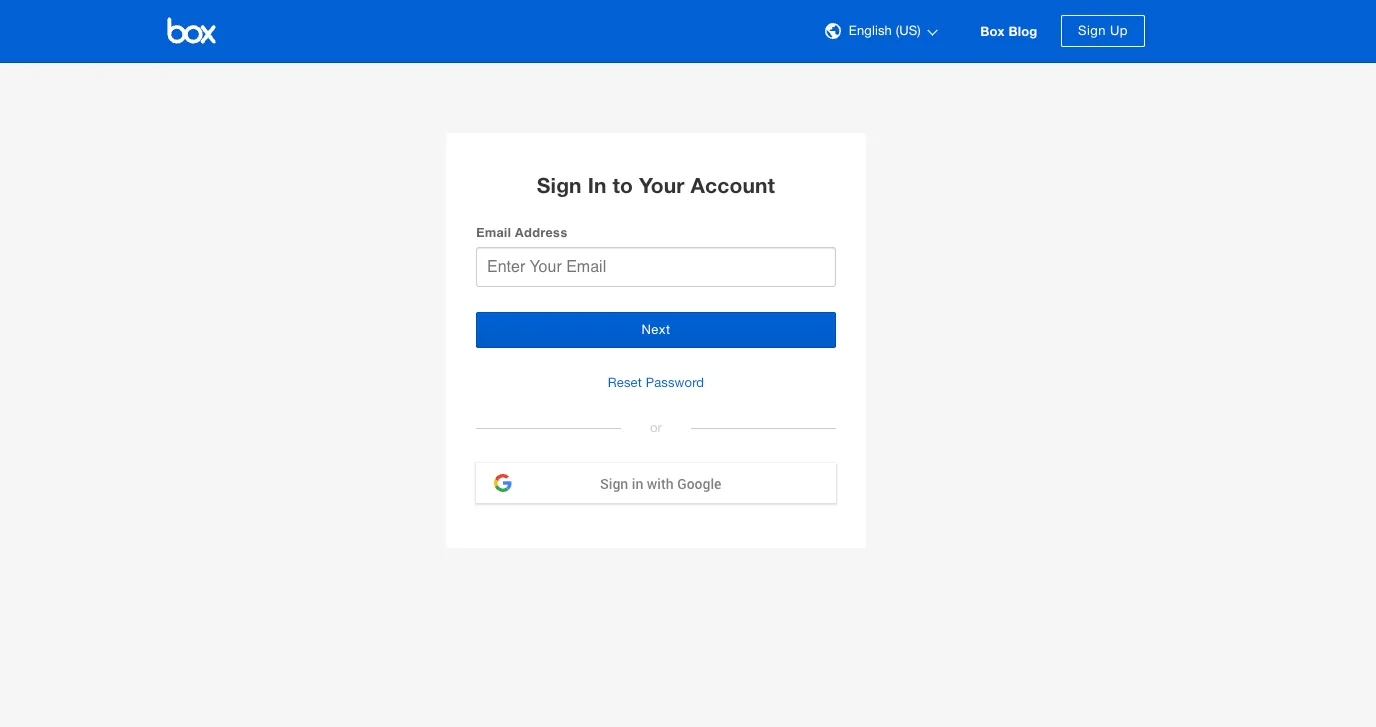
Go to the Box Developer website and click “Log In” at the top right. If you don’t have an account yet, click “Sign Up”.
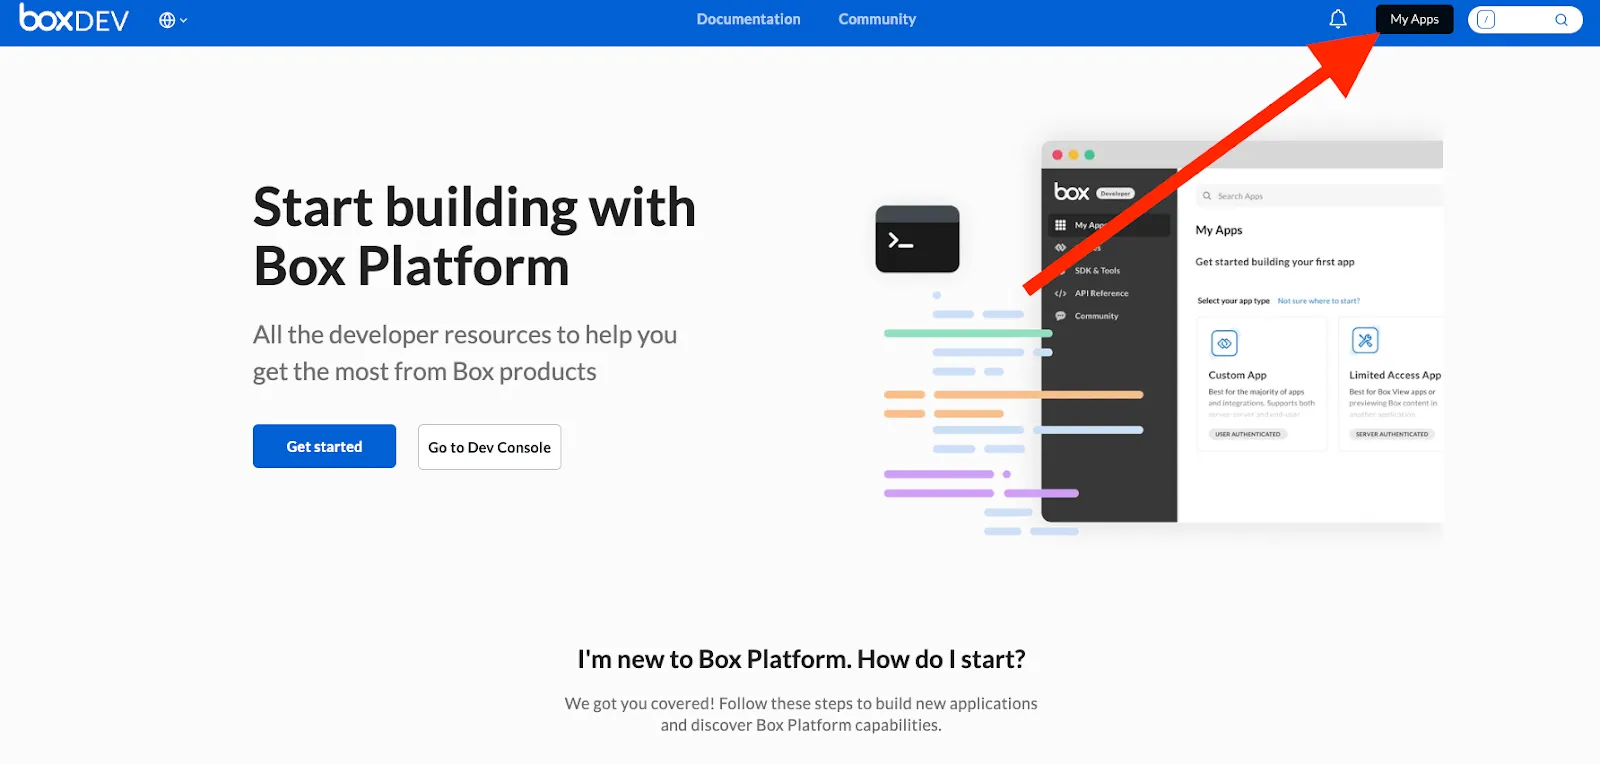
If you already have an account and you’re logged in, all you have to do is click “My Apps” at the upper right corner.
Step 2: Create a new app:
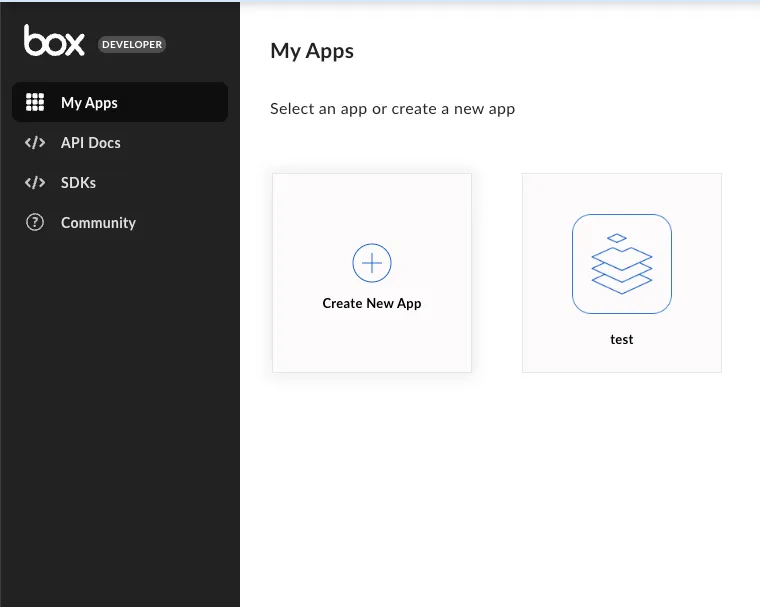
Inside the Developer Console, locate the option to create a new app. This will be in “My Apps”.
Related: A guide to getting your ClickUp API key
Step 3: Choose an app type
Select the type of application you're building. Box supports various application types, such as Custom App, Limited Access App, and Box Custom Skill.
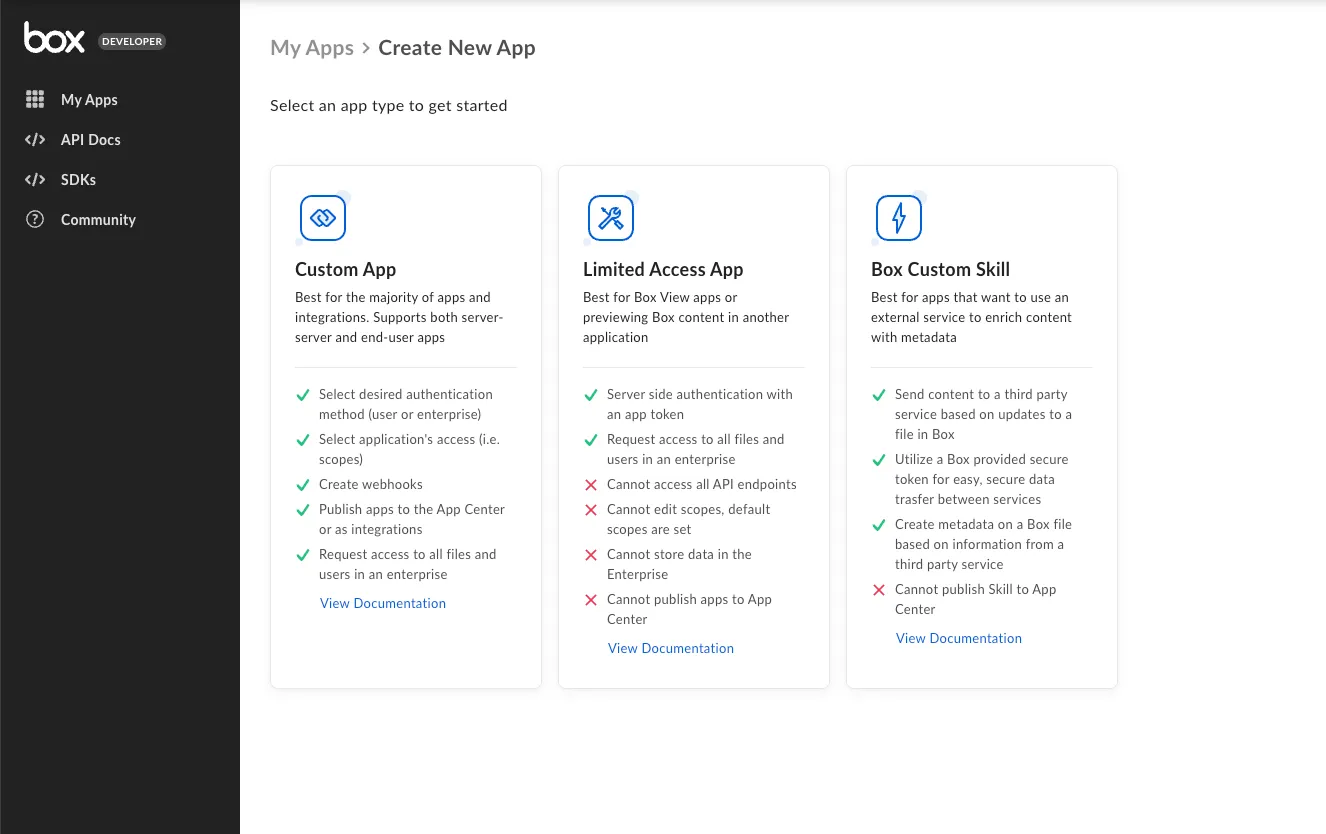
What’s the difference between these 3?
Custom App
This type of app is typically designed for a particular use case within an organization. It allows developers to build tailored solutions that meet specific business needs.
Limit Access App
The Limit Access App may refer to an application that enforces restrictions or limitations on user access to specific content within Box. This can be useful in scenarios where certain data or files should only be accessible to authorized users or groups.
Box Custom Skill
Using Box Custom Skill, developers can build applications that extract insights from content, automate processes, and enhance the overall intelligence of the Box platform.
Related: A breakdown of 7 popular file storage APIs
Step 4: Configure your app settings
After you’ve chosen your app type, go through the creation steps. It’s worth noting that these steps will look different depending on the app type you’ve selected.
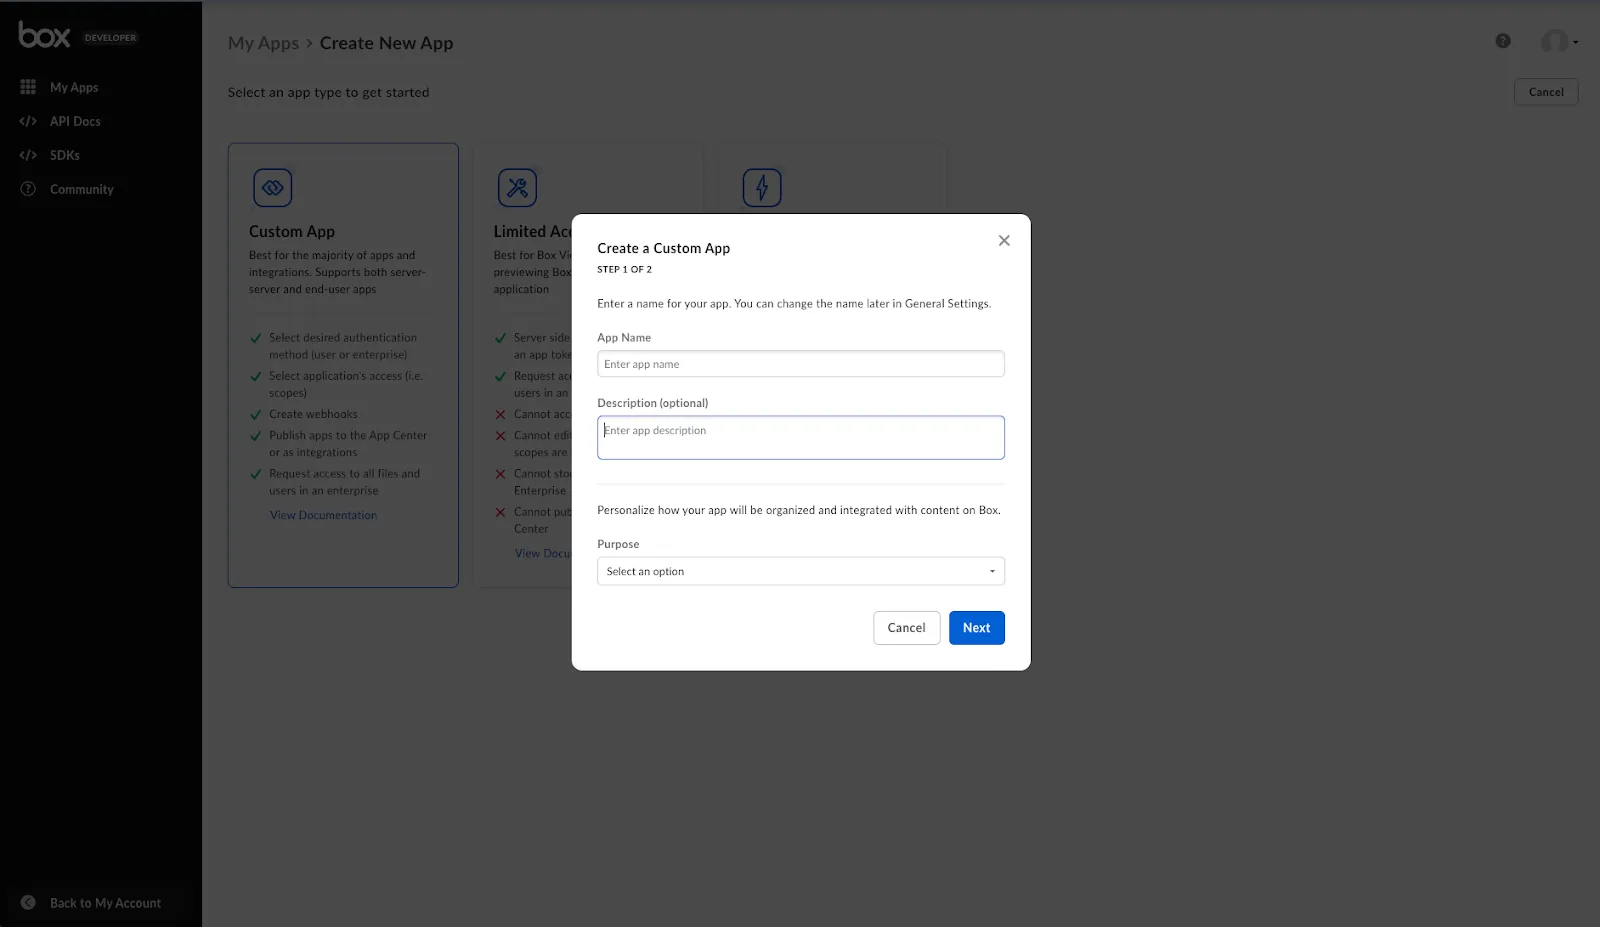
Step 5: Generate your API keys
Once you’ve done the initial steps, go over to the configuration tab to generate your primary and secondary keys.
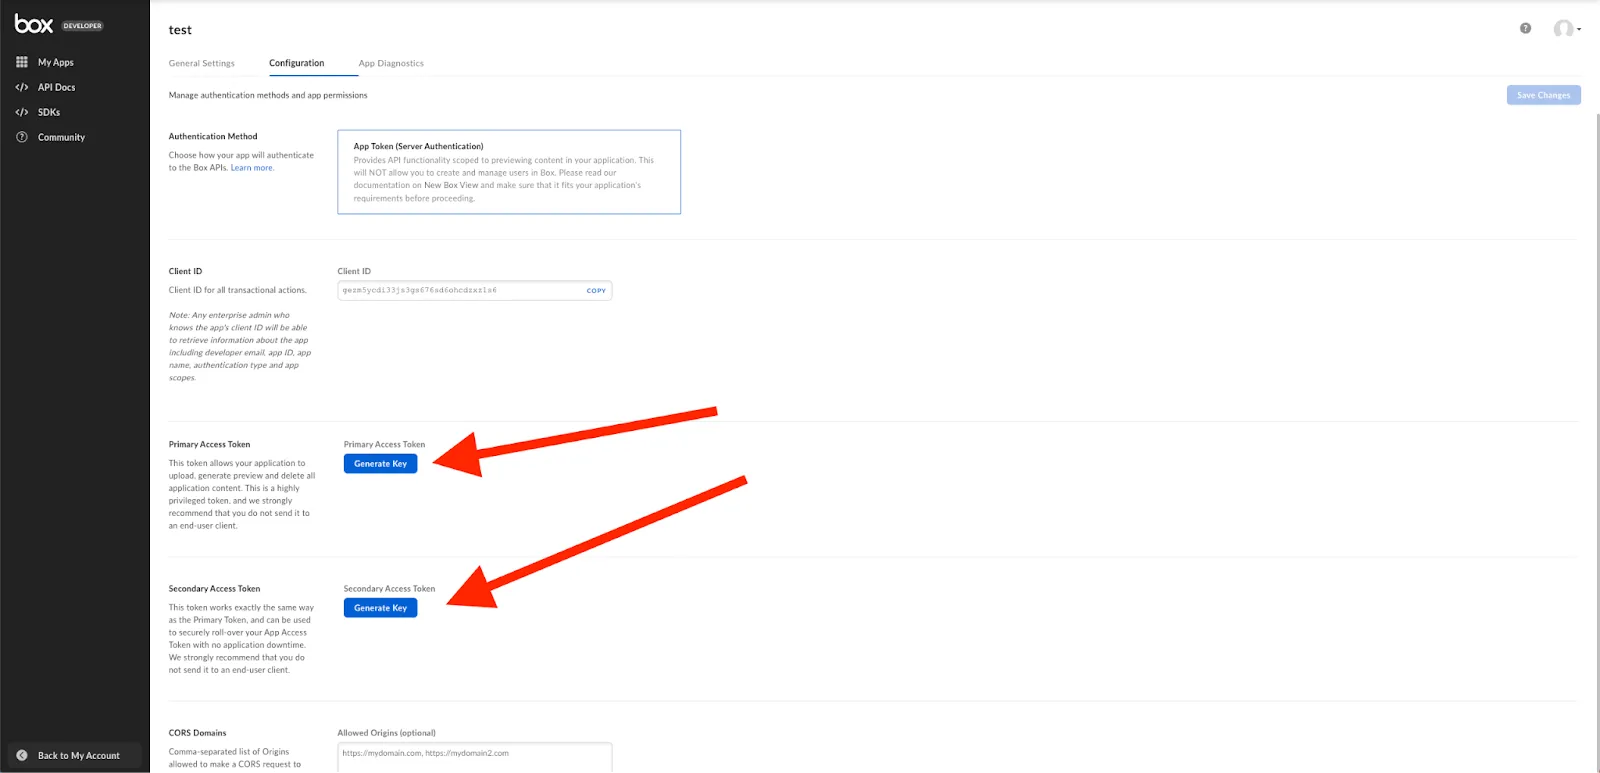
Note: Depending on the type of Box app you want to create, different information will be presented here.
For additional information head over to Box’s API documentation here
Additional considerations for building to Box’s API
There’s obviously more to building to Box’s API than retrieving your API keys. Let’s dive a bit deeper on additional key items.
Pricing
Your call limits to Box's API will depend on the plan you select. As you can tell below, API call volume is capped monthly and fluctuates from 25k to 100k.

Rate limits
Box's API, like many others, imposes rate limits to regulate the flow of requests and prevent abuse. Developers should familiarize themselves with Box's rate limit policies documented in the developer resources and in the screenshot below.

Errors to look out for
When building applications that interact with Box's API, it's important to be vigilant of potential errors that may arise. The common errors documented by Box are 400 Bad Request, 401 Unauthorized, 403 Forbidden, 404 Not Found, 405 Method Not Allowed, 409 Conflict, 410 Gone, 411 Length Required, 412 Precondition Failed, among several others.
You can find the full list of common error codes here.
Final thoughts
Many of your clients use file storage and/or content management platforms that extend beyond Box, such as Dropbox, Google Drive, OneDrive, etc.
You can offer all of the file storage integrations your customers need by simply integrating with Merge’s File Storage Unified API.
To learn more about the API, and Merge’s platform more broadly, you can schedule a demo with one of our integration experts!


.jpg)
