
Table of contents
Just for you
Create Tickets with the Zendesk API in Python


Zendesk is an omnichannel customer service solution that's easy to use and scale. It integrates all channels through which customers reach out to your business, such as email, phone, chat, messenger, and social media, and records client communication as tickets to be resolved.
In addition to customer service management, Zendesk provides sales customer relationship management (CRM) through Zendesk Sell, enhancing productivity and prospect stage visibility for the sales team. It also offers powerful reporting that you can tailor to your business's needs.
In this article, you'll learn how to create tickets with the Zendesk API using Python. This will allow you to integrate and extend your Python projects to use Zendesk. The code used in this article can be found in this GitHub repository.
{{blog-cta-100+}}
Prerequisites
Before getting to the step-by-step process of creating tickets, first take note of the things you'll need:
1. A Zendesk support account with token access enabled
If you don't have an account, you can sign up for a free trial.
You need to authorize your API requests to be able to view and make data changes for tasks such as creating tickets in your country. So, log in to your Zendesk account and go to the Admin Center. Select Apps and Integrations, then select Zendesk API under APIs. Enable token access and save the token. You will only be shown the token once, so save it in a safe place.
The screenshot below shows token access enabled with one active API token:

2. Python installation
You'll be using Python version 3.11 or later. Run the command <code class="blog_inline-code">python --version</code> to see which Python version number you have:
3. A virtual environment using venv
Run the command <code class="blog_inline-code">pip install virtualenv</code> to install the virtual environment tool.
Creating Tickets on the Zendesk Portal
Before you create tickets using Python, it's helpful to create a few tickets on the Zendesk portal to help you understand what constitutes a Zendesk ticket.
Log in to the agent dashboard using the URL <code class="blog_inline-code">https://your_domain.zendesk.com/agent/dashboard</code>, where your_domain is the name of your domain.
The screenshot below shows only one ticket with the subject "Sample ticket: Meet the ticket." This is a default ticket that is created the first time you log in to the dashboard:

To create a new ticket, click Add. This will open a dialog where you can create a new ticket:

Fill in the Subject, Body, Requester, Assignee, Type, and Priority fields. Your Requester and Assignee fields will be different from the ones below, as they will contain the user details in your Zendesk account:
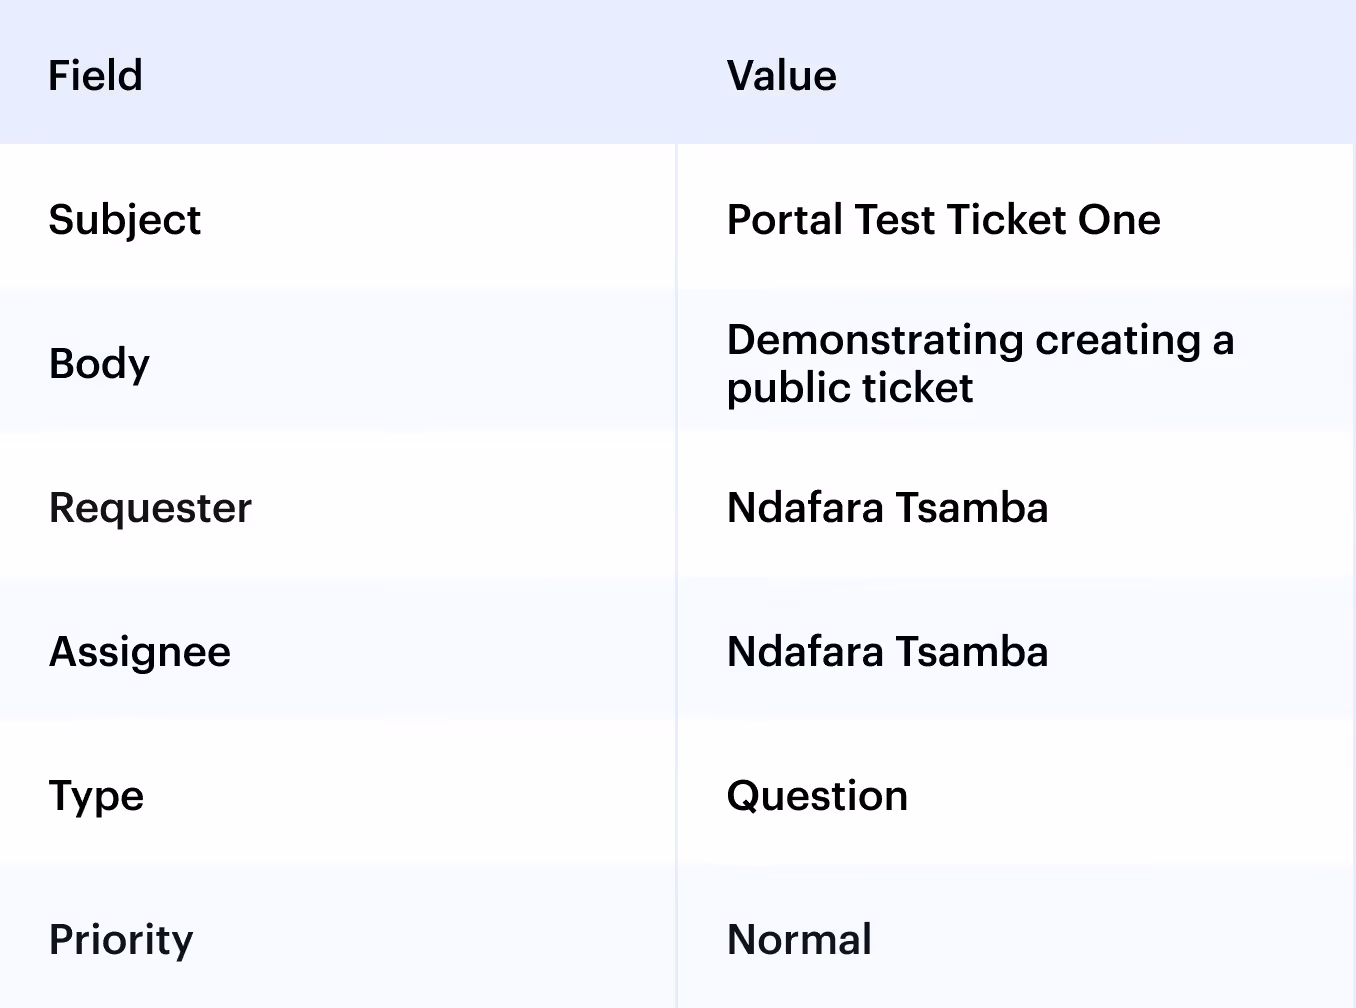
The new ticket dialog should now look similar to the following:
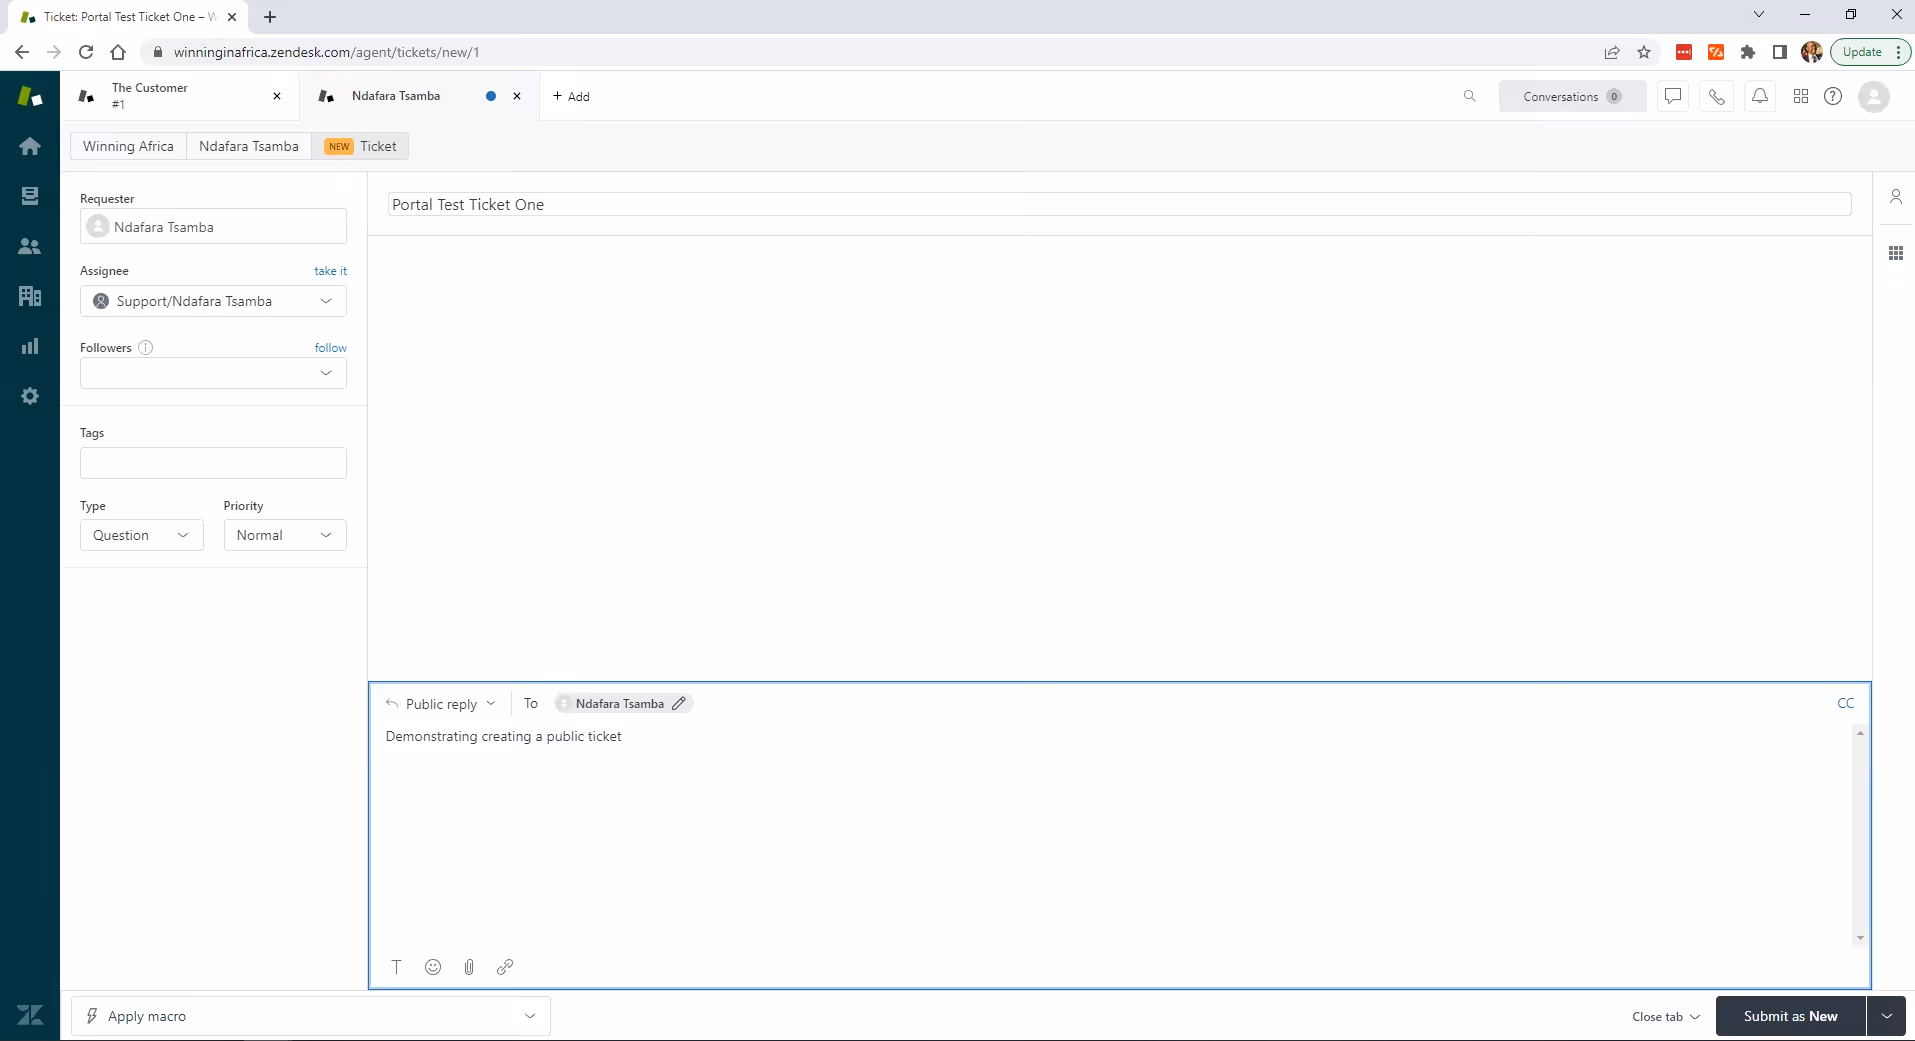
Next, click Submit as New. You can also change this button to Submit as Open, Submit as Pending, or Submit as Solved, as shown below:
After you click Submit as New, the ticket will be added to the dashboard at <code class="blog_inline-code">https://your_domain.zendesk.com/agent/dashboard</code>, as shown below:

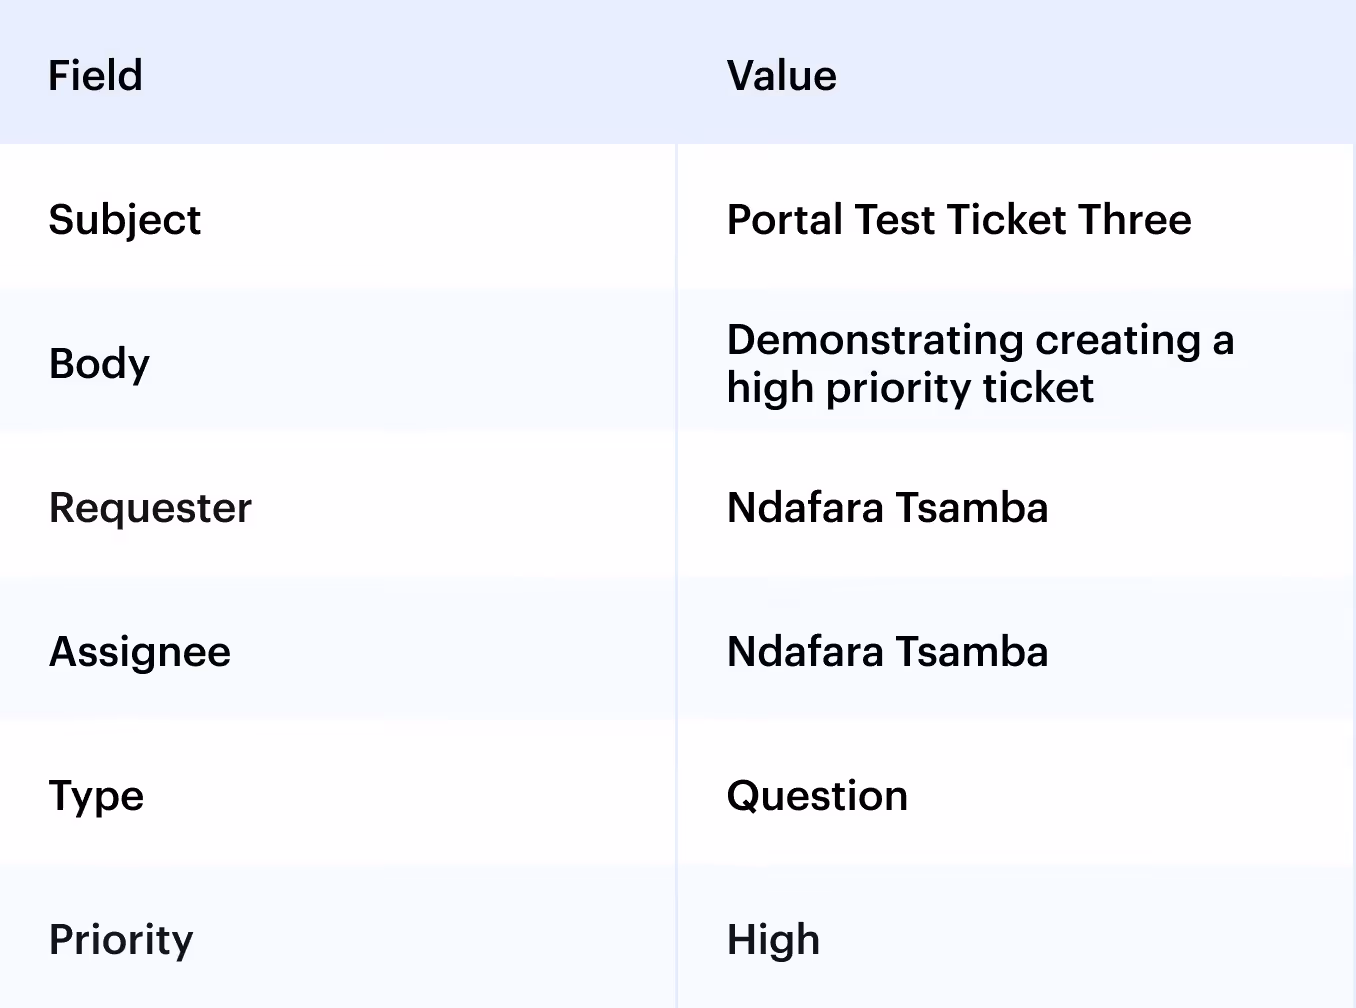
Create two or more tickets, but vary their type, priority, and visibility. The tables below offer some examples of the types of tickets you can create:

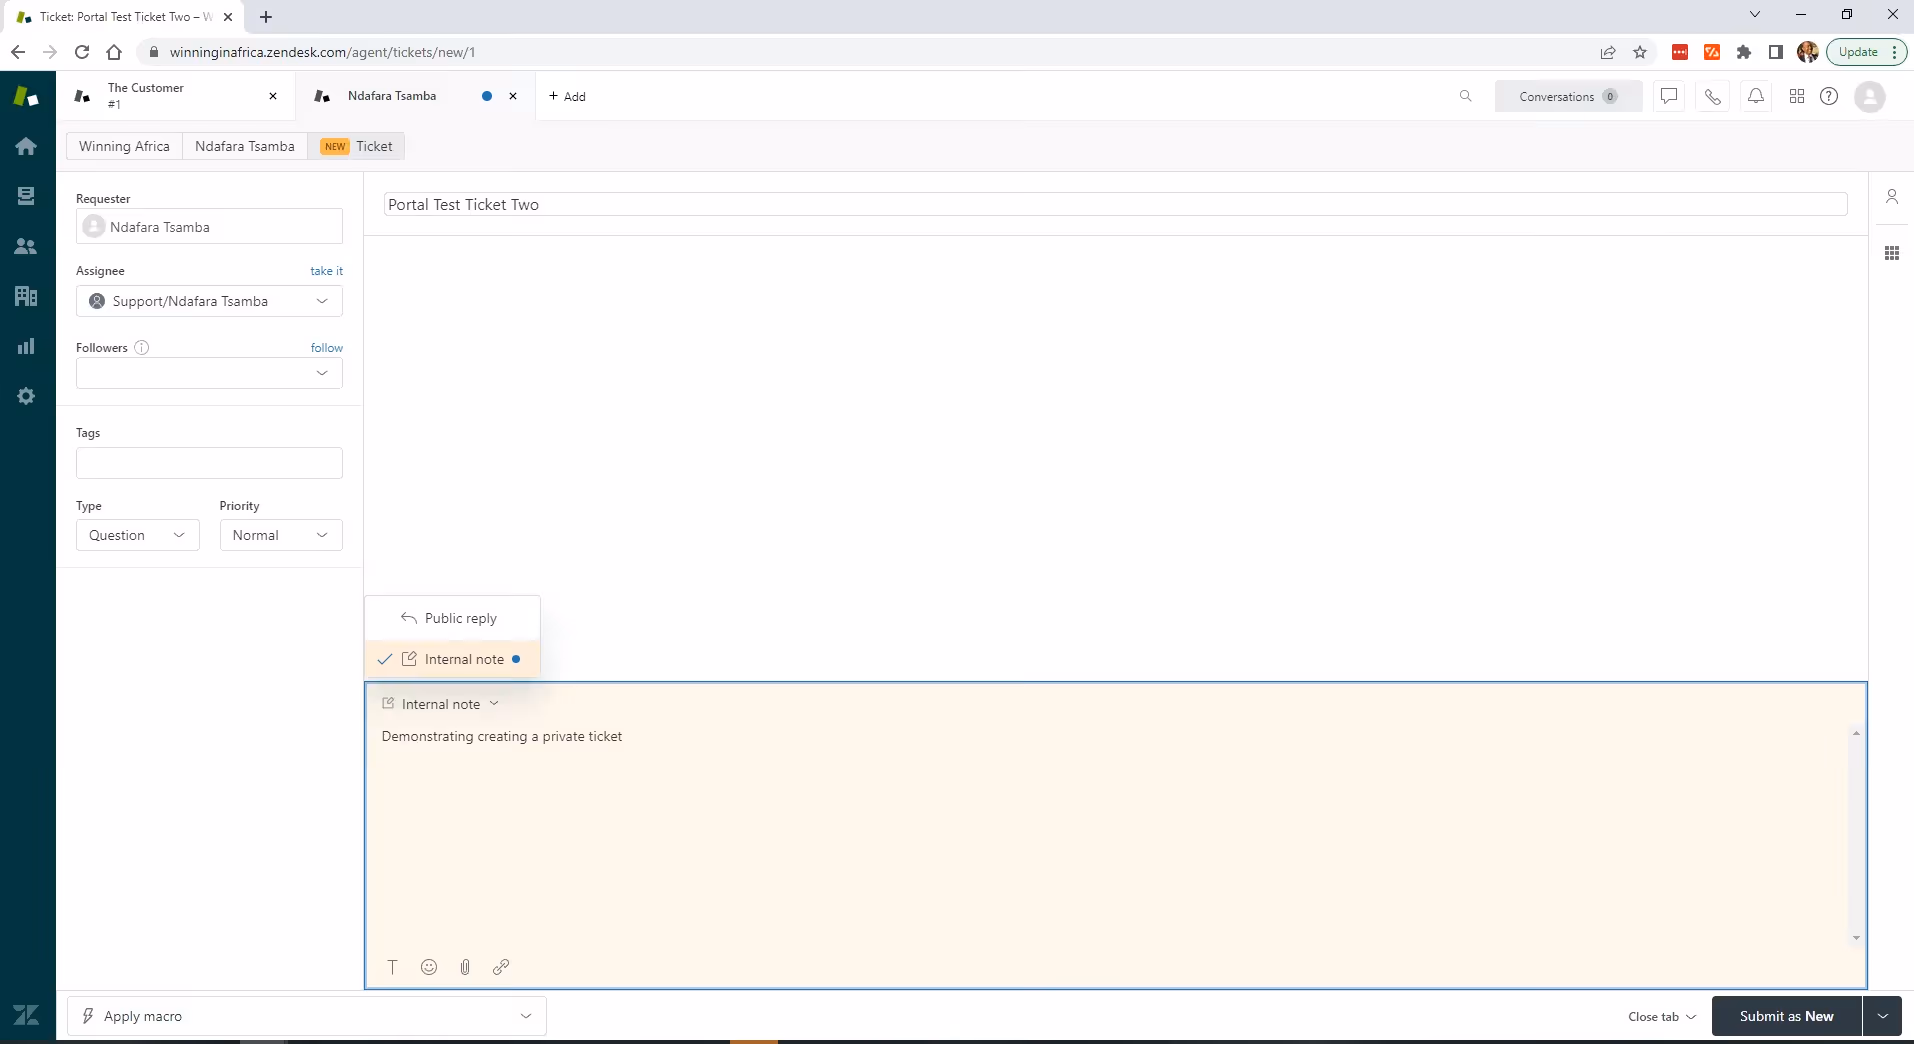
To make a private ticket, select Internal note in the body instead of Public reply, as shown below:
When you select Task as the ticket type, you'll have to provide a due date. In the example below, it's the fifth of December:

The Task ticket will look like this:

Below is a list of all the tickets created for this tutorial, categorized by priority:

Creating a Python Project
Create a new directory and name it <code class="blog_inline-code">Ticketing_with_Zendesk_API</code>.
Navigate to the directory and run the following command to create a virtual environment called <code class="blog_inline-code">ticketing_with_zendesk_api</code>:
After creating the virtual environment, you need to activate it. On Windows, run the following command:
To activate the virtual environment on Linux or Mac, run this command:
Once the virtual environment is activated, install the requests package by running the following command:
Understanding the Anatomy of a Zendesk Ticket Request
Before you write the code, it's important to understand the anatomy of a Zendesk ticket request. Tickets in Zendesk are represented as JSON objects, and the following are some of their properties:

The full list of properties can be found in the Zendesk documentation.
Fetching Tickets
To fetch tickets, you need to send a GET request to a ticket endpoint. At the time of writing, the published ticket endpoints are as follows:
- GET /api/v2/tickets
- GET /api/v2/organizations/{organization_id}/tickets
- GET /api/v2/users/{user_id}/tickets/requested
- GET /api/v2/users/{user_id}/tickets/ccd
- GET /api/v2/users/{user_id}/tickets/followed
- GET /api/v2/users/{user_id}/tickets/assigned
- GET /api/v2/tickets/recent
You'll be using the <code class="blog_inline-code">/api/v2/tickets</code> endpoint, which gives you all of the existing tickets.
Create a file in the <code class="blog_inline-code">Ticketing_with_Zendesk_API</code> directory with the name <code class="blog_inline-code">fetch_tickets.py</code>. You'll use this file to fetch the tickets in your Zendesk account.
Put the following code in the <code class="blog_inline-code">fetch_tickets.py</code> file that you created:
The code starts by importing the requests package, which is a module that allows you to send HTTP requests. Next, it sets the credentials. For the <code class="blog_inline-code">base_url</code>, replace <code class="blog_inline-code">your_domain</code> with the actual domain name with which you signed up on Zendesk.
It then sets the request_endpoint with the endpoint that you want to hit on Zendesk. In this instance, it is <code class="blog_inline-code">/api/v2/tickets</code>. Next, it sets up the user and the password. These are the authentication details that will be used to communicate with the Zendesk API. Replace <code class="blog_inline-code">your_email</code> with the email you used to sign up, and replace <code class="blog_inline-code">your_token</code> with the token that you saved earlier.
The code then sends a request to the endpoint using the <code class="blog_inline-code">requests.get()</code> method, and you pass in the URL and the authentication details. The full line of code becomes:
Next, it checks the status_code of the response. If it is not 200, it means that there was a problem, so it prints the response code that it got and then exits the application.
If it is 200, everything went well, and it proceeds to decode the response to JSON. It then loops through all the tickets, printing each ticket's ID, subject, description, priority, and due date.
To execute the program, run the following command in the terminal from the root directory:
The output of the code should be as follows:
The output should be consistent with the tickets you have in Zendesk. In this example, it's five tickets.
Creating Tickets Using Python
You've seen how to create tickets on the portal and then fetch them using Python. You'll now see how to create tickets with Python instead of the portal. Instead of sending a GET request, like you did for fetching, you'll send a POST request, and the published endpoint to send is <code class="blog_inline-code">/api/v2/tickets</code>.
In essence, you'll construct your message using the ticket properties mentioned earlier, encode the data into a JSON payload, and then send it.
Create a file named <code class="blog_inline-code">create_ticket.py</code> in the <code class="blog_inline-code">Ticketing_with_Zendesk_API</code> directory and put in the following code:
The code starts by importing the requests and json modules. The requests module is used to send your ticket to Zendesk, and the json module is used to encode your data into a payload that the Zendesk API accepts.
It then sets up the credentials as before. Remember to replace <code class="blog_inline-code">your_domain</code>, <code class="blog_inline-code">your_email</code>, and <code class="blog_inline-code">your_token</code> with your actual values. It then sets up the headers. The Zendesk API expects a content type of <code class="blog_inline-code">application/json</code>, so that is included here.
Next, it creates the ticket information by using some of the parameters that you have already encountered in this tutorial. This example uses subject, body, type, and priority. It then creates a dictionary that represents what the Zendesk API expects and encodes it into JSON format.
With everything it needs to create the ticket, it sends a POST request using the requests module.
If you get a 201 status code, it means that the ticket was created successfully, and a "Successfully created the ticket" message is printed. If the status code is not 201, there was a problem, so the status code that you got is printed, and it exits the application.
To execute the code, run the following command:
If everything went well, you'll get a confirmation message that the ticket was successfully created:
To verify that the ticket was created, log in to the agent dashboard at <code class="blog_inline-code">https://your_domain.zendesk.com/agent/dashboard</code>, where you should see a ticket with the subject "Python API Test Ticket One."
Showing a Single Ticket
Instead of listing all the tickets in one output, you can show a specific ticket, but this is only possible if you know the ticket ID of the ticket you want to show. This method works by using a GET request to the published endpoint at <code class="blog_inline-code">/api/v2/tickets/{ticket_id}</code> and then replacing <code class="blog_inline-code">ticket_id</code> with your ticket ID.
Create a file called <code class="blog_inline-code">show_ticket.py</code> and put in the following code:
To execute the code, run the following command:
The output of the execution should be as follows:
The subject is "Python API Test Ticket One," which matches the one you created using the API in Python.
Authentication Errors
Things don't always work as intended, and you could encounter some authentication errors. Below are some of the authentication errors with their response codes that you might encounter:

These errors can be fixed by checking if you are authorized to perform API calls. If you're authorized, check whether you're using the correct user and token details.
You can find the full list of errors you can encounter in the Zendesk developer documentation.
Conclusion
In this article, you learned how to create and show tickets with the Zendesk API in Python.
Doing this manually for each integration you use can be tedious, though. If you have to integrate several tools, consider Merge, a Unified API for hundreds of integrations that include Zendesk, Freshdesk, Salesforce Service Cloud, and other helpdesk and ticketing apps.
Instead of learning each API, you only have to know how Merge works to interact with the different APIs that it supports. And if you don't see the integration you need, let Merge know, and they'll add it fast—at no extra charge to you.
You can learn more about Merge by scheduling a demo with one of our integration experts.

.png)
.png)
.png)

