
Table of contents
Just for you
How to Retrieve Incidents Using the ServiceNow API in Python


ServiceNow is a popular, easy-to-use, ticketing platform that provides automated workflows to replace manual tasks. It has good search capabilities and defined roles, and it allows you to control access to features and capabilities based on those roles. Because it's cloud-based, it's also easily scalable.
Developers often need to integrate with ServiceNow because it provides such excellent tools to connect business-to-business systems. For example, it allows easy integration with third-party applications and data sources, which allows you to analyze incidents in more detail. Here is a list of out-of-the-box integrations it offers.
In this article, you'll learn how to get incidents from the ServiceNow API using the Python programming language and by using webhooks.
The code shown in this tutorial can be found in this GitHub repository.
{{this-blog-only-cta}}
Prerequisites
You'll need the following to follow along with this tutorial:
- A ServiceNow account: You need to contact sales to get a real account, but for this tutorial, you could simply use a developer account, which you can sign up for on their website.
- A personal developer instance: Once you have a developer account, you need to request a Personal Developer Instance (PDI) to access the ServiceNow application. Follow these instructions and make sure you select the Admin role for the PDI.
- Python version 3.9 or later
- A Pipedream account for testing the ServiceNow webhook
Anatomy of an Incident
Before retrieving incidents from ServiceNow, you need to understand their makeup. The best way to understand what constitutes an incident is to create a few using the user interface. Later in this tutorial, you'll then use the ServiceNow API with Python to retrieve them.
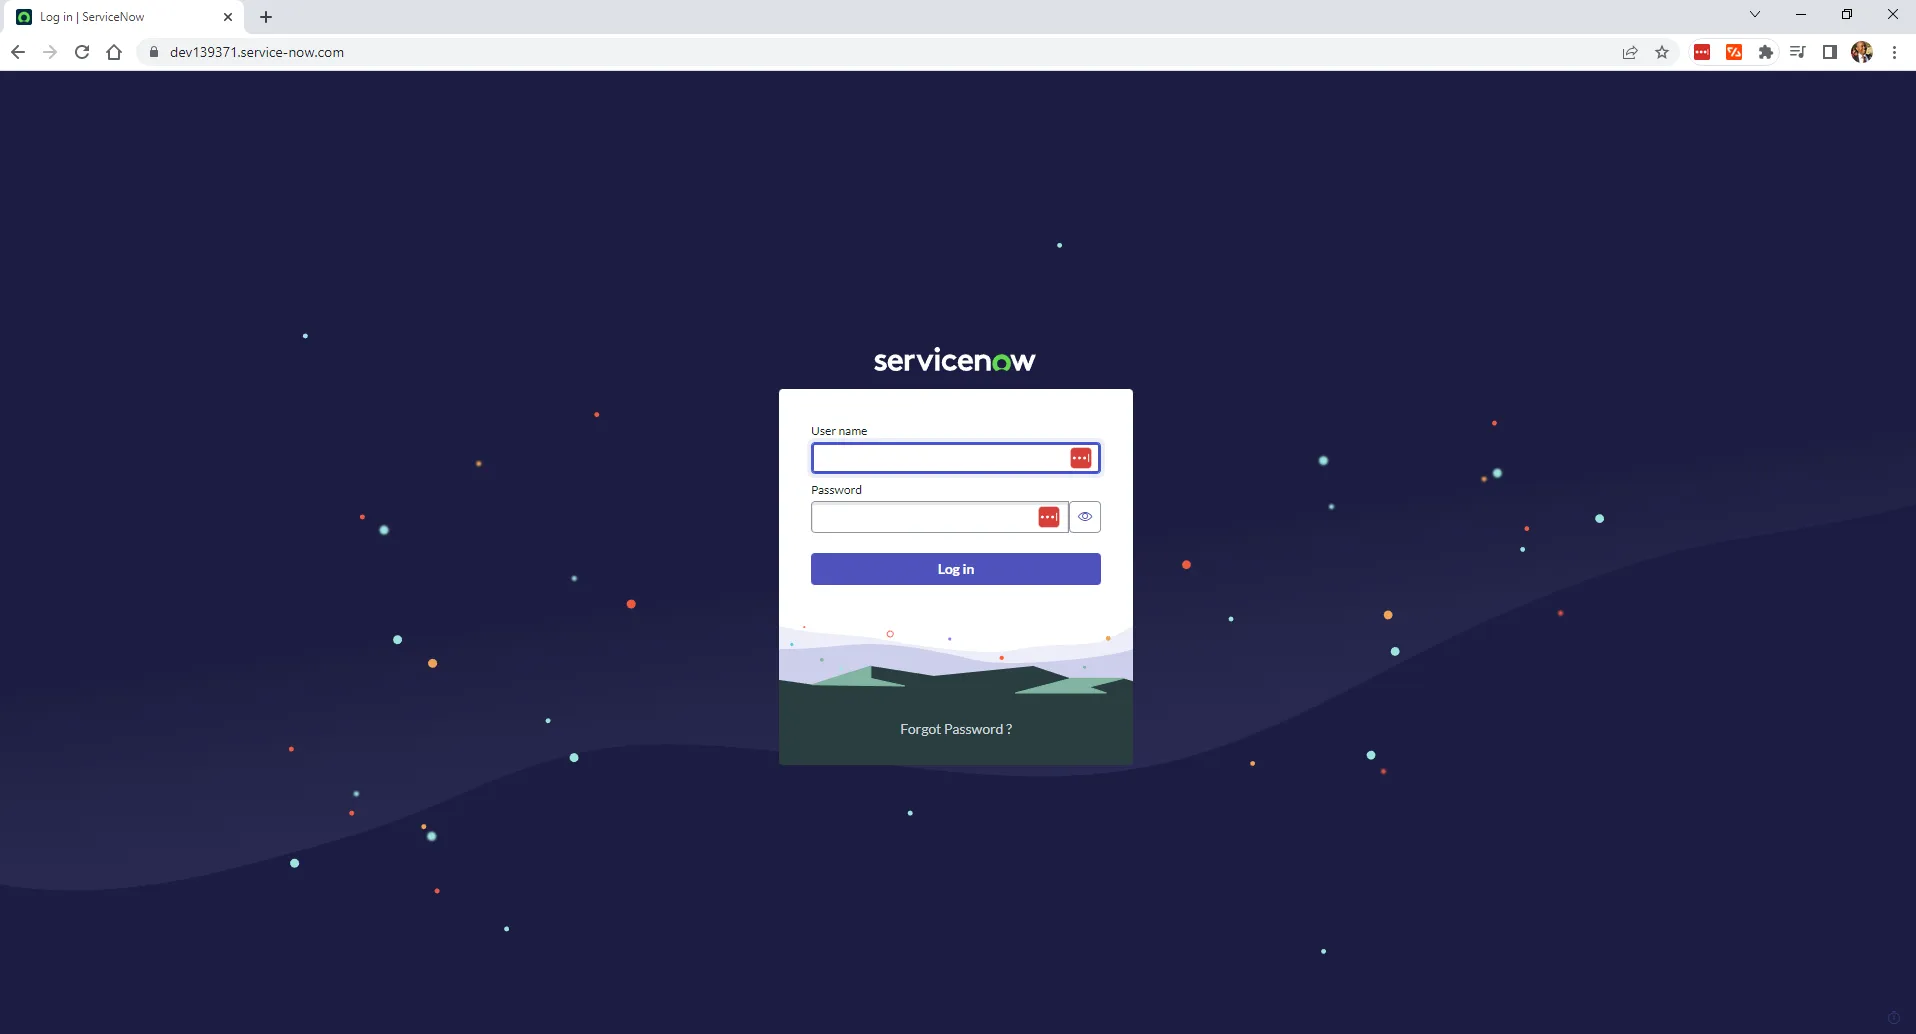
Log in to Your PDI
Log in to your PDI using the URL you got after creating it. The URL used for this tutorial, for example, is <code class="blog_inline-code">https://dev139371.service-now.com</code>. It will take you to the login page, where you need to supply your username and password:
View and Create Incidents
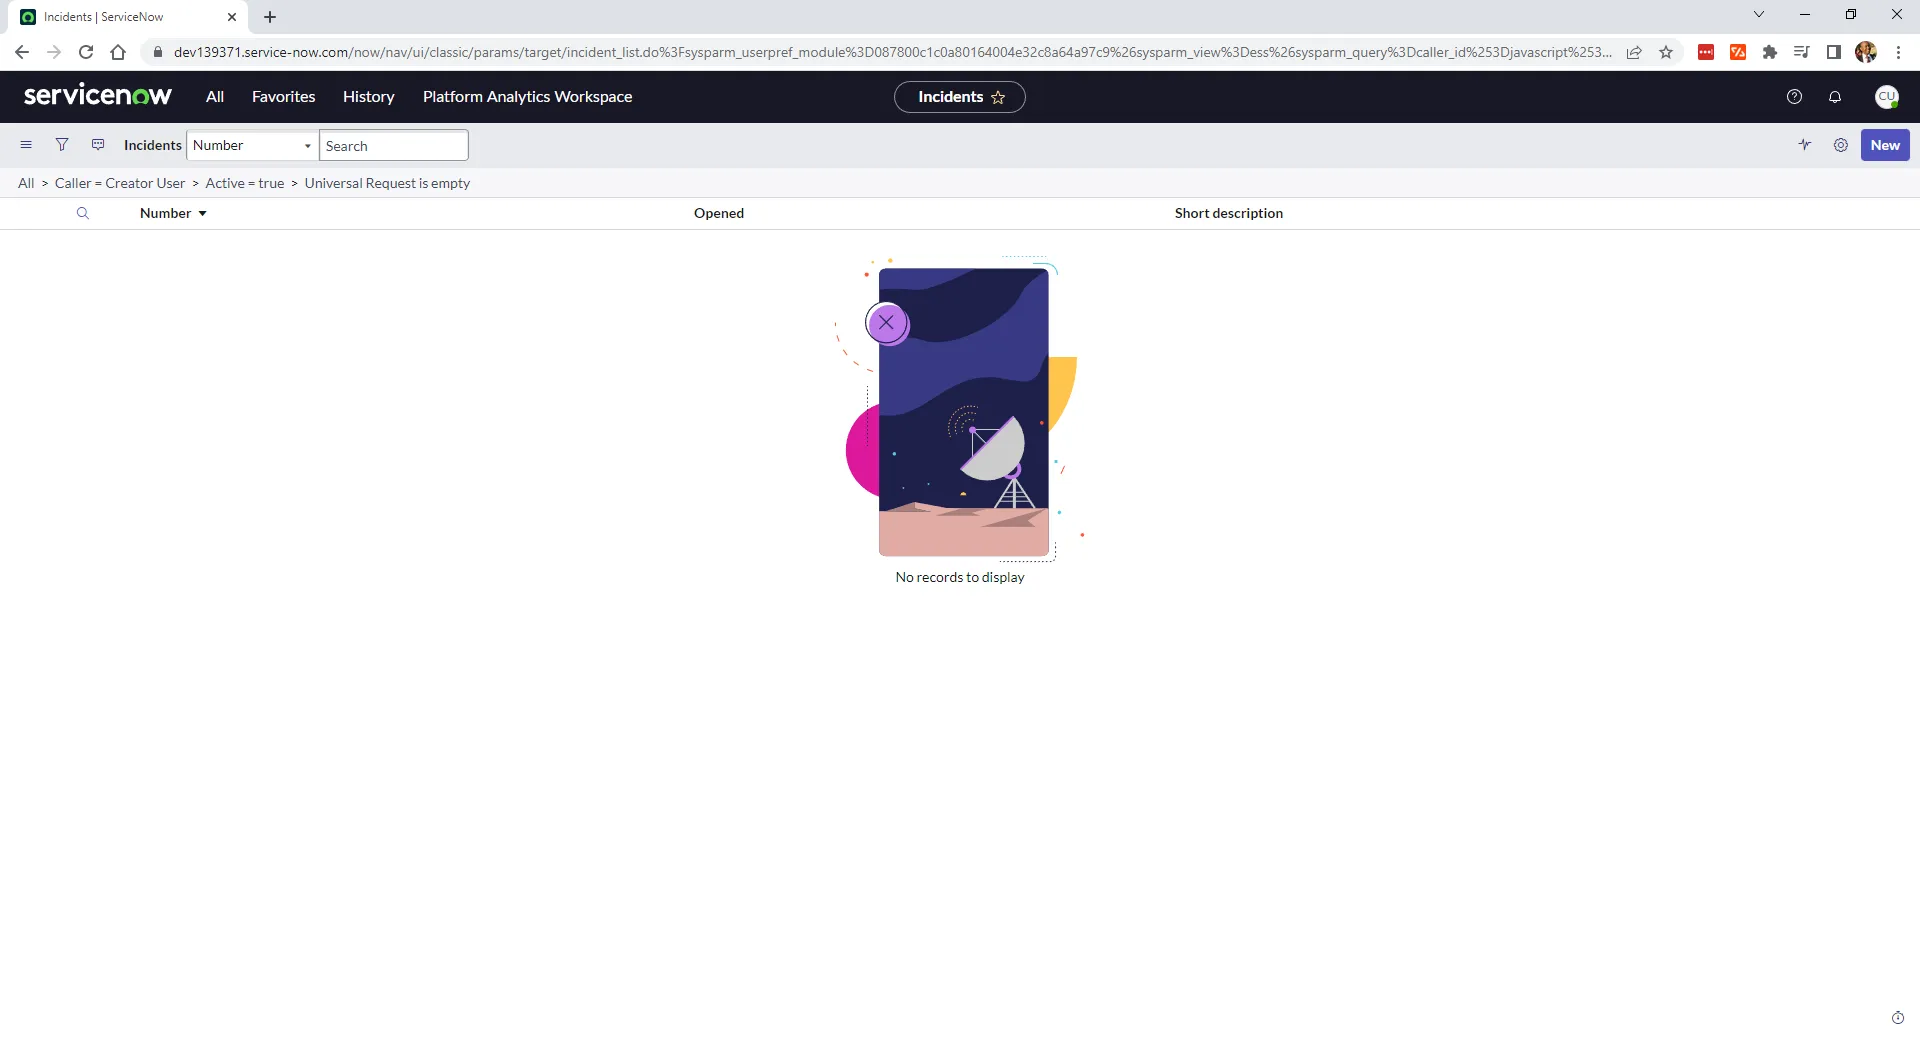
Once you're logged in, select All, expand Self-Service, then click on Incidents.
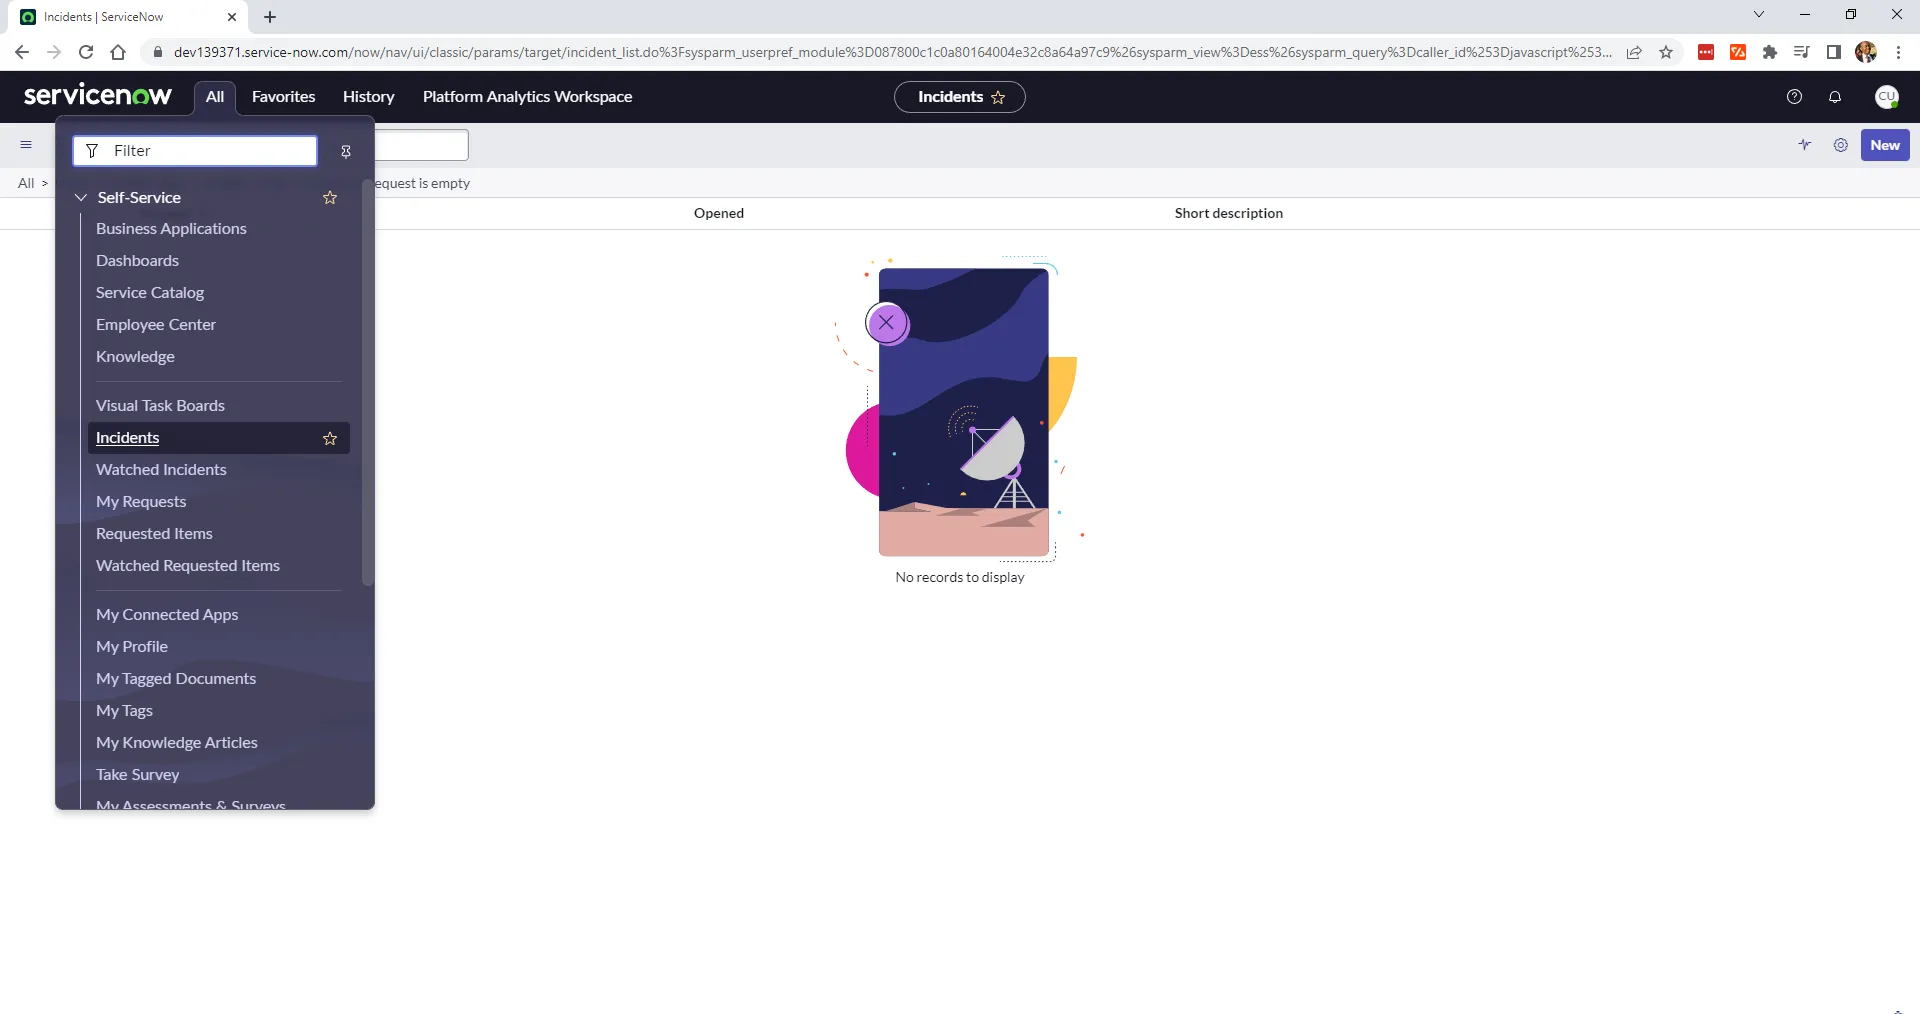
This will open the Incidents page, which shows all the current incidents. If you had any, they would be listed here. As you can see below, there are no current incidents:
To create an incident, click on the New button in the top left corner. This will open up the page for creating incidents.
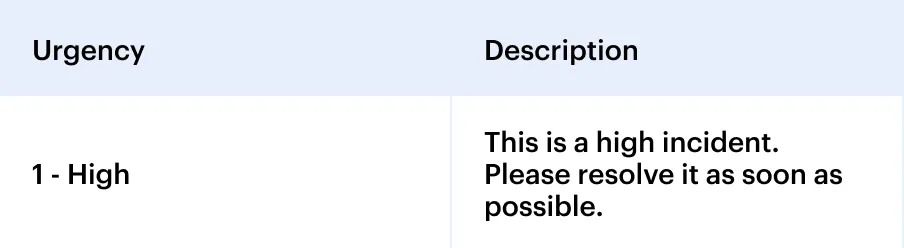
You have to provide the Urgency, which is a measure of the business criticality based on the impact and business needs of the customer. It's also a way of assigning priority for dealing with incidents. The options here are High, Medium, and Low.
You also have to describe your issue. The more information you can provide in this field, the better it is for the support organization to quickly resolve your issue.
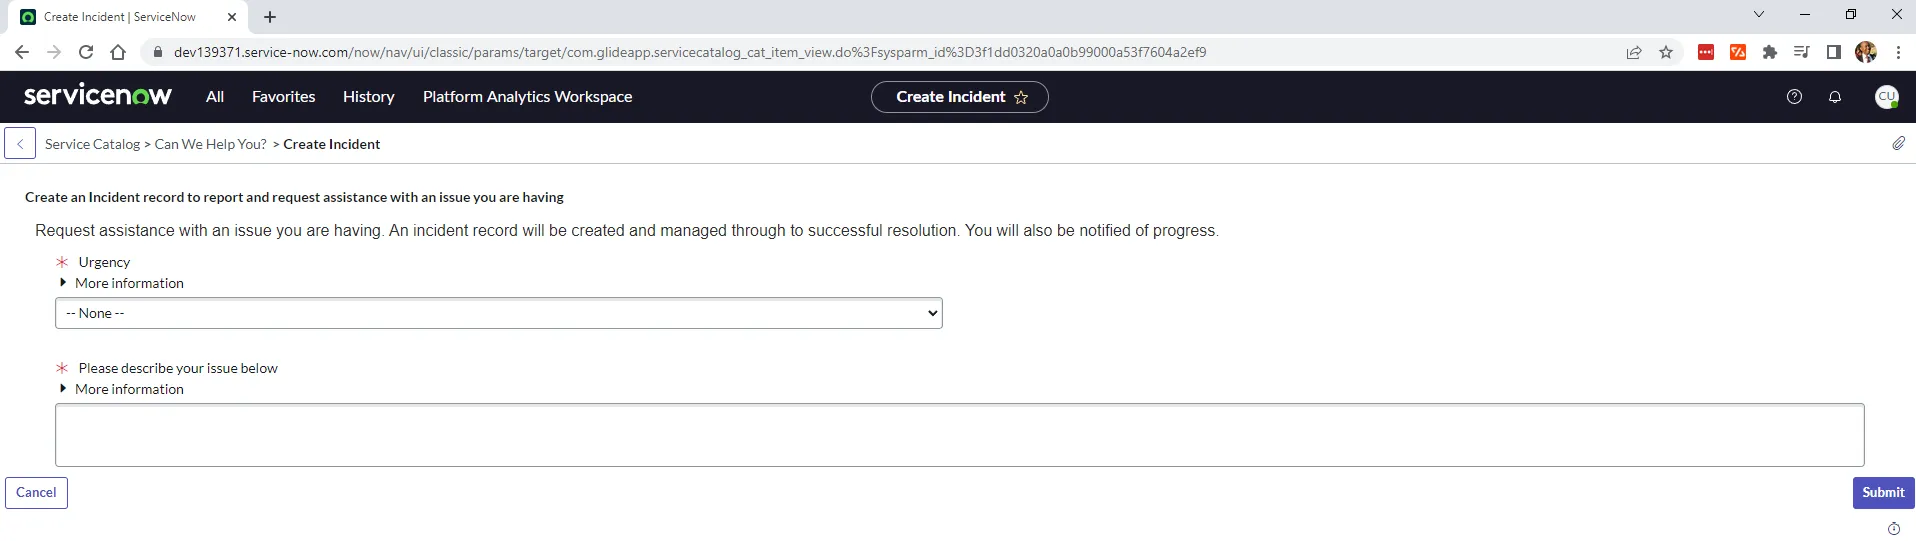
Since this is only an example, you can use something simple like this:
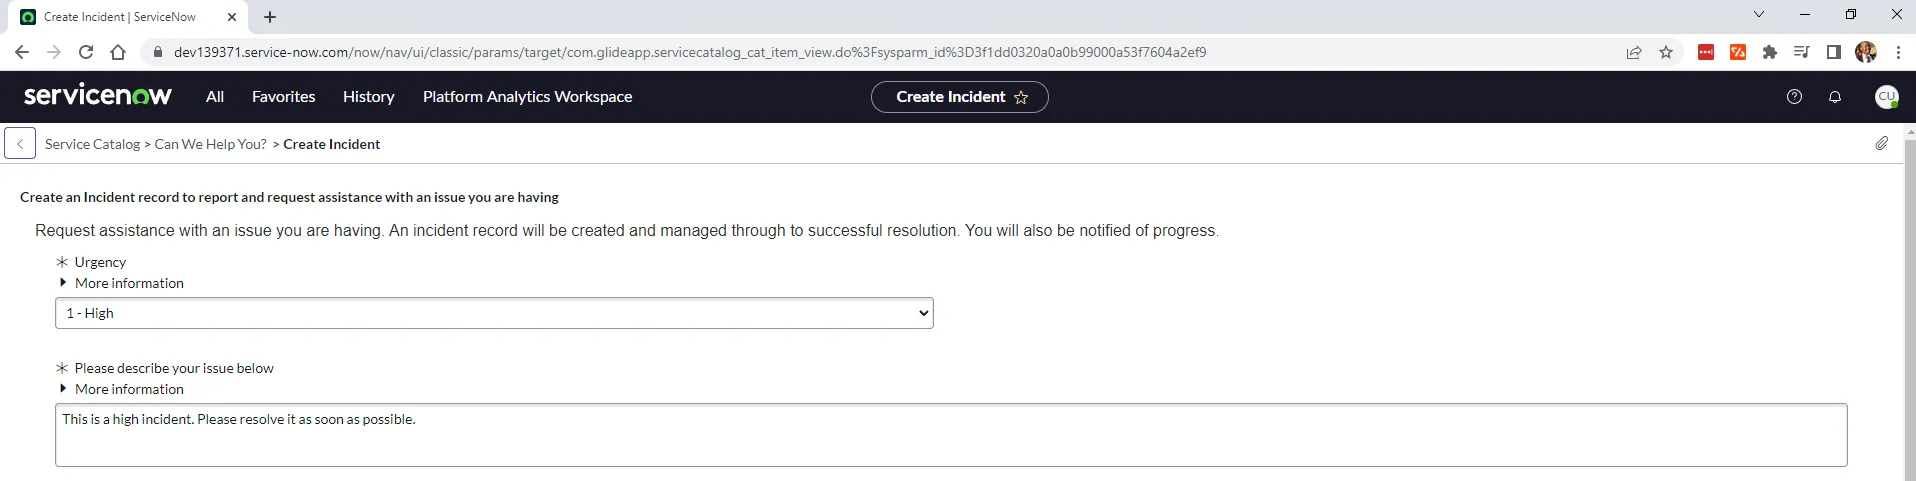
Once you have populated the Urgency and Description, click on Submit to create the incident.
As soon as the incident is created, the Incident Details page opens up, which shows other fields such as the Incident Number, Date Opened, and State. This page shows you the details of the incident that you just captured.

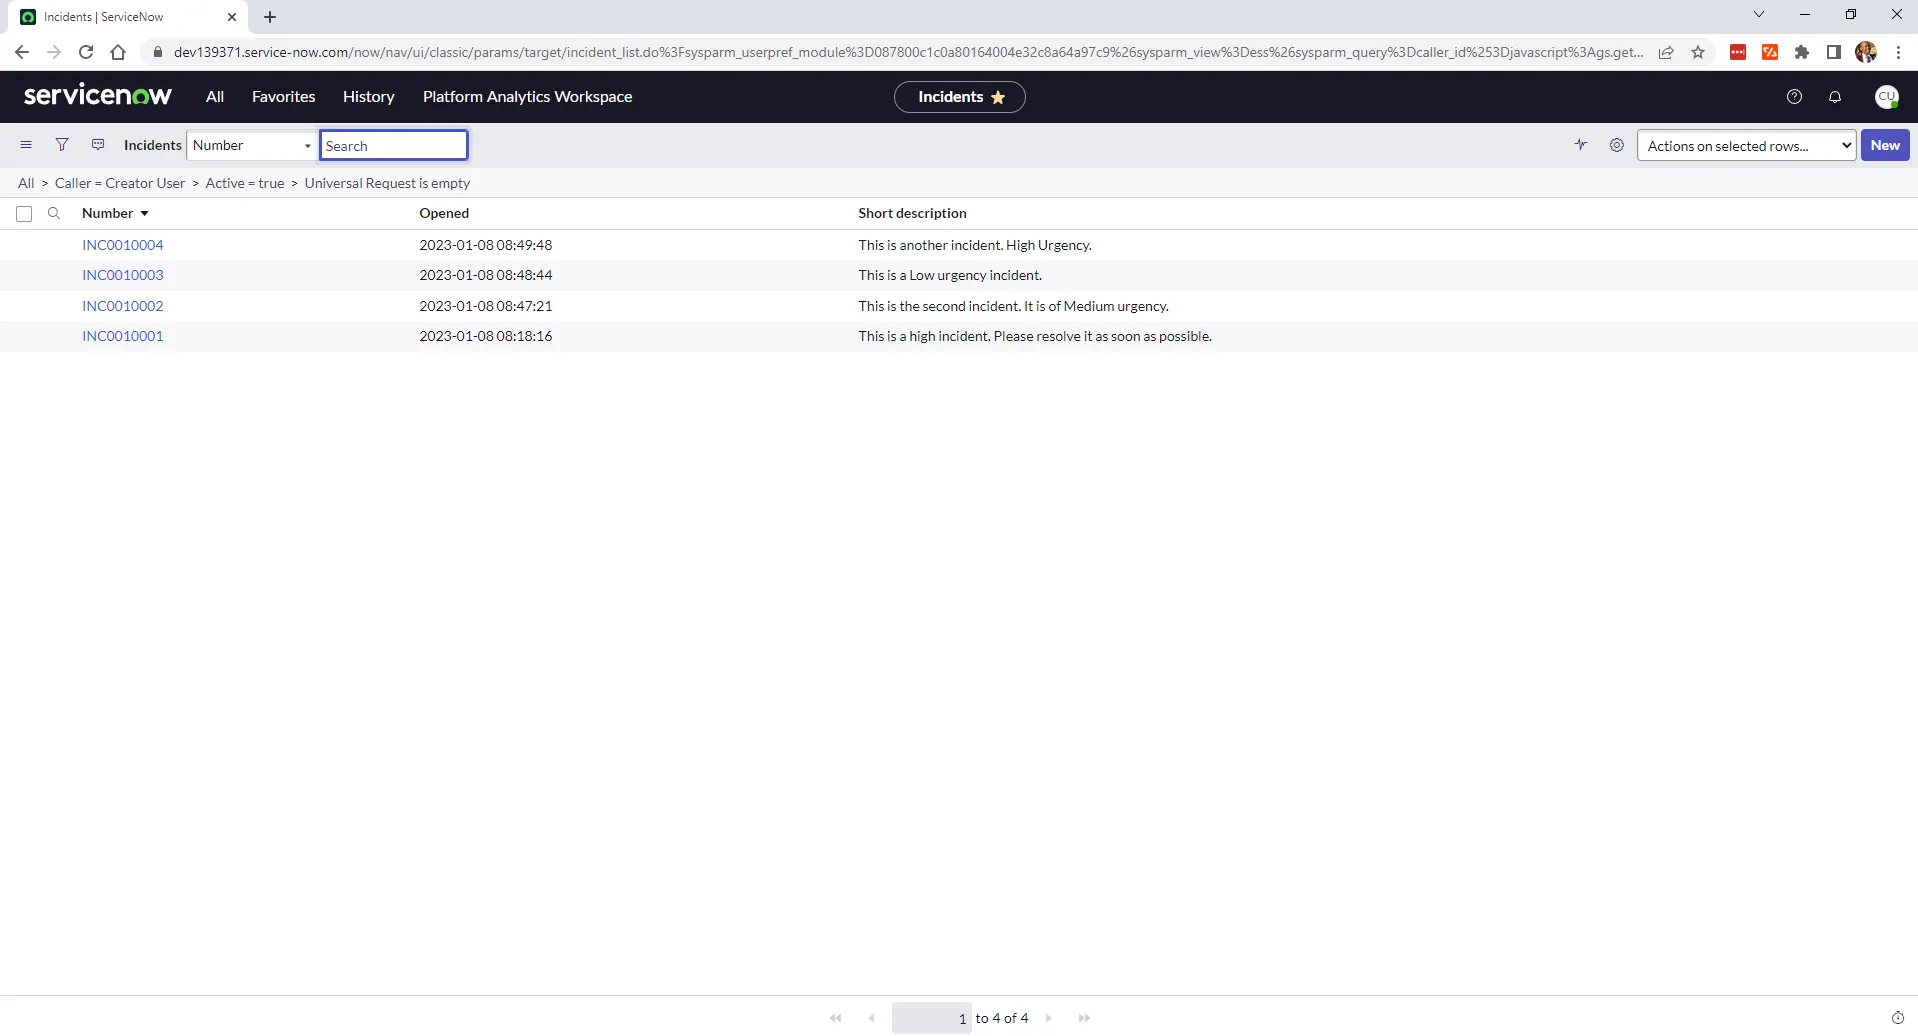
Create a few more incidents with varying urgencies to use later in this tutorial. See a few examples below:

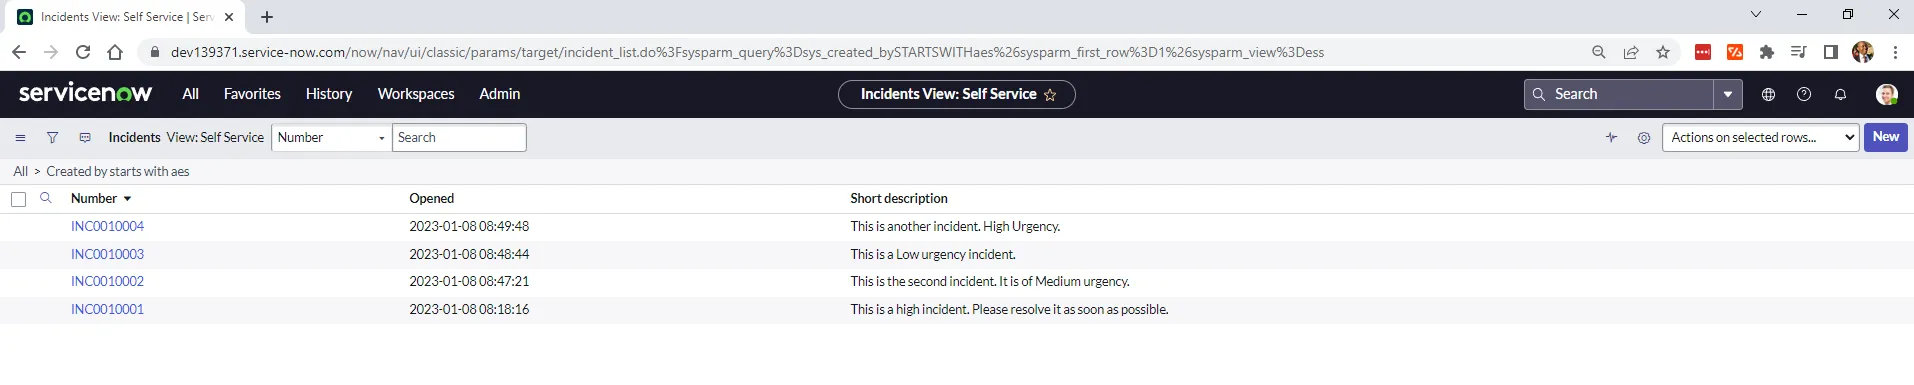
If you go to the Incidents page, you should now see a list of the incidents you just created.
How to Retrieve ServiceNow Incidents Using Python
Now you have a few incidents created from the portal, you'll be fetching them using Python.
Create a Python Project and Activate a Virtual Environment
Create a new directory and name it <code class="blog_inline-code">Get_Incidents_with_ServiceNow_API</code>.
Navigate to the directory and run the following command to create a virtual environment called <code class="blog_inline-code">get_incidents_with_servicenow_api</code>:
After creating the virtual environment, you need to activate it. On Windows, run the following command:
To activate the virtual environment on Linux or Mac, run this command:
Once the virtual environment is activated, install the requests package by running the following command:
You will use the requests package to make HTTP calls to the ServiceNow API.
Get Incidents with Python Using Basic Authentication
You'll first get the incidents using basic authentication—in other words, by using a username and password as credentials.
Create a new file in the <code class="blog_inline-code">Get_Incidents_with_ServiceNow_API</code> directory and name it get_incidents_basic_authentication.py.
Paste the following code into it:
Replace <code class="blog_inline-code">your_username</code>, <code class="blog_inline-code">your_password</code>, and <code class="blog_inline-code">your_instance_url</code> with the values you got when you set up your PDI.
To execute the script, run the following command:
python get_incidents_basic_authentication.py
If the code executes well, you should get an array with a list of your incidents as the output similar to this (your response will be significantly larger, we’ve just truncated ours for ease of use in this tutorial):
As you can see from this output, ServiceNow recorded much more information than what you entered when you created your incidents. You can filter out what you don't need.
If you get the following <code class="blog_inline-code">401</code> status code, it means you're not authenticated:
If you get this error, you then need to check your username and password credentials to ensure that they are correct and authorized.
Get Incidents with Python Using OAuth Authentication
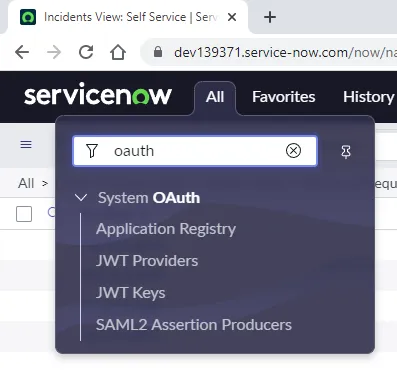
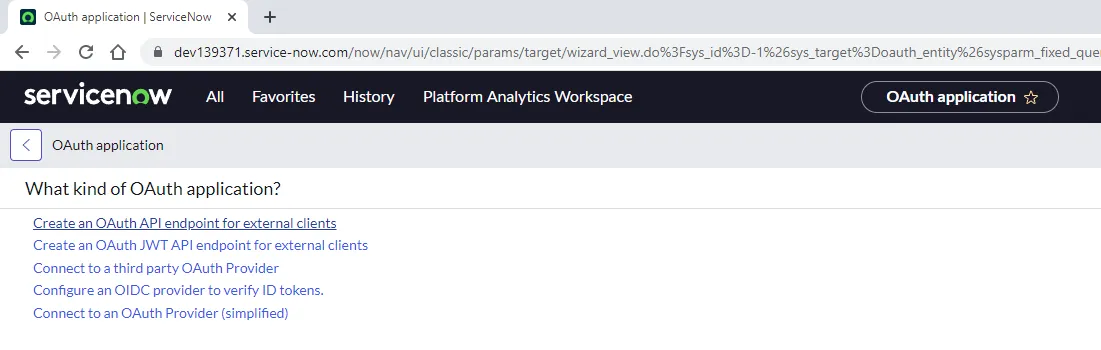
The first thing you need to do is register a new OAuth application. In your ServiceNow PDI, search for oauth. Under System OAuth, click on Application Registry.
This will open up the application registry, where you have to click on New and then click the option Create an OAuth API endpoint for external clients.
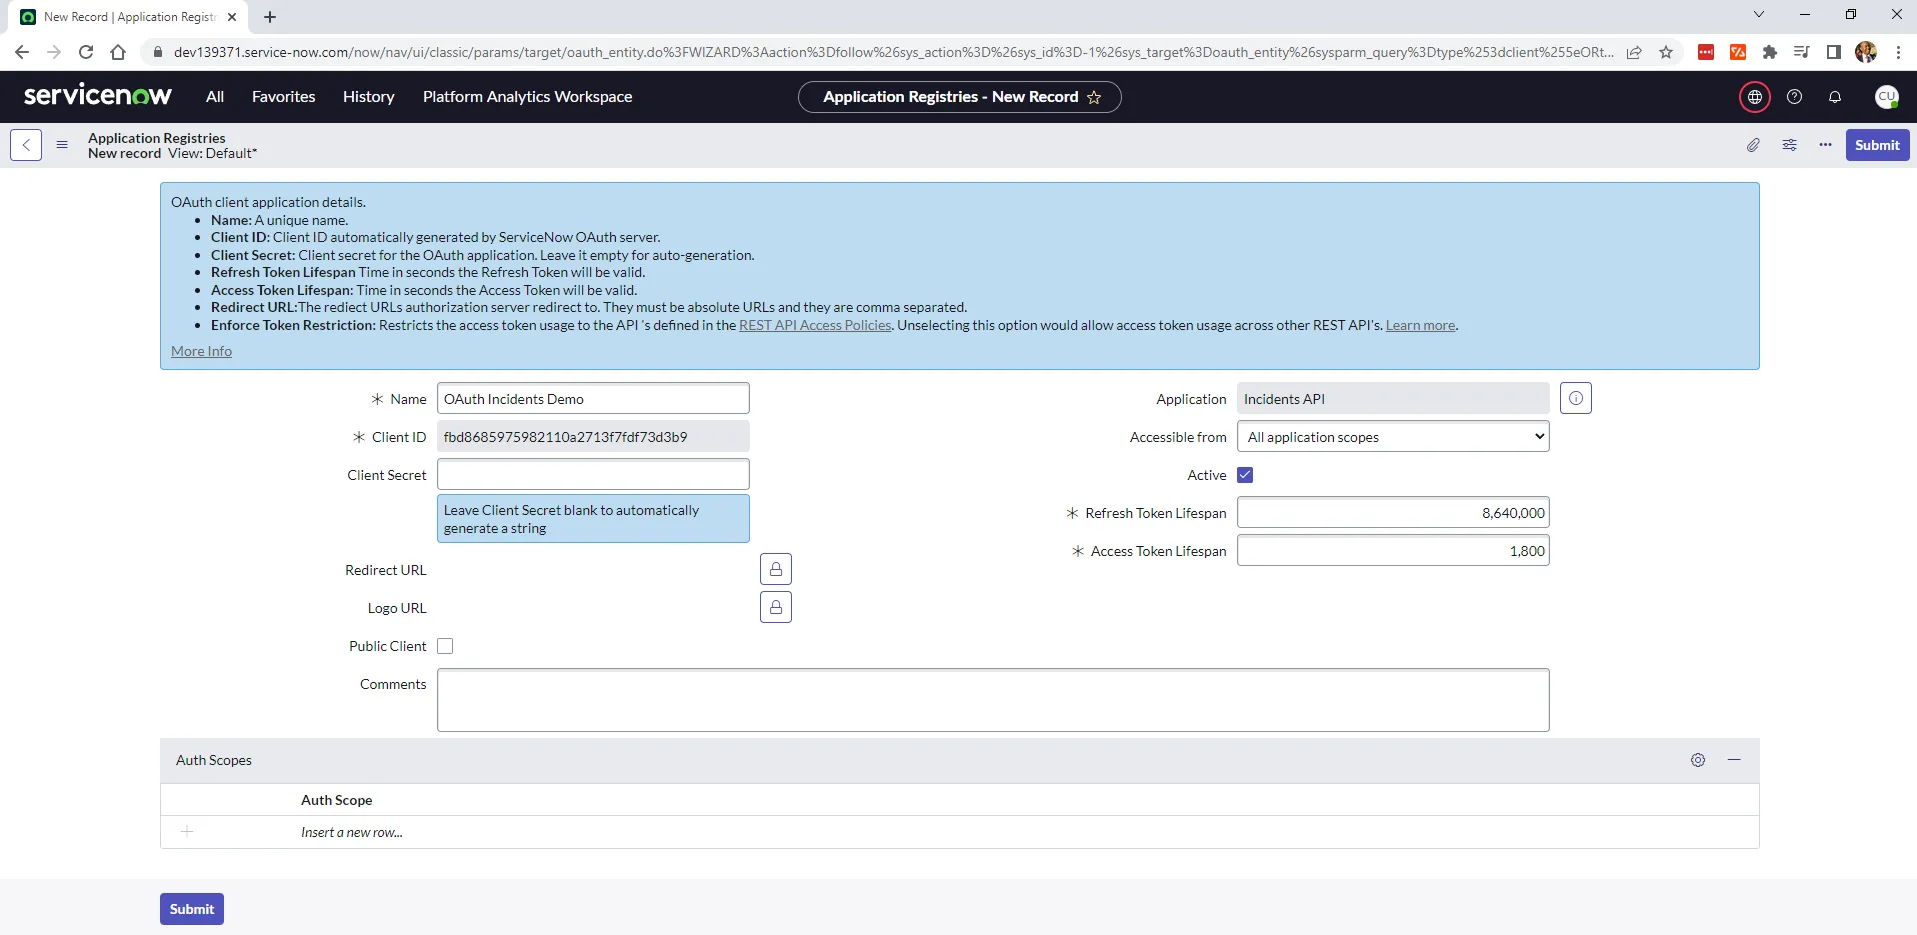
Fill in the name of the application. In this tutorial, name it OAuth Incidents Demo and then click Submit.
Your application will now show in the list of OAuth applications:

Click on OAuth Incidents Demo to see the details. Copy the client ID and the client secret as you're going to need to use them later in your code.
Create a file named get_oauth_token.py and put in the following code:
Replace <code class="blog_inline-code">your_instance_url</code>, <code class="blog_inline-code">your_username</code>, <code class="blog_inline-code">your_password</code>, <code class="blog_inline-code">your_client_id</code>, and <code class="blog_inline-code">your_client_secret</code> with your actual values.
To execute the file, run the following command:
If it executes successfully, you will get an access token to use in a subsequent request.
Remember to save your <code class="blog_inline-code">access_token</code> in a safe place.
To get your incidents using the access token, create a file called get_incidents_oauth.py and put the following code into it:p
Remember to replace <code class="blog_inline-code">your_instance_url</code> with yours, and use the access token you got from the previous step instead of <code class="blog_inline-code">YOUR_ACCESS_TOKEN</code>.
Run the code with the following command:
python get_incidents_oauth.py
You should get the same output as before.
How to Retrieve ServiceNow Incidents Using Webhooks
You can also retrieve incidents from ServiceNow using webhooks.
You create webhooks in ServiceNow by specifying business rules. Business rules are essentially server-side logic that gets executed when database records are updated, queried, inserted, or deleted. For the use case of this tutorial, when you create a new incident, the incident will be automatically pushed to an endpoint you specify.
Let's see how it works.
Navigate to the Incidents homepage.
Right-click anywhere on the Incidents headings (Number, Opened, and Short description):
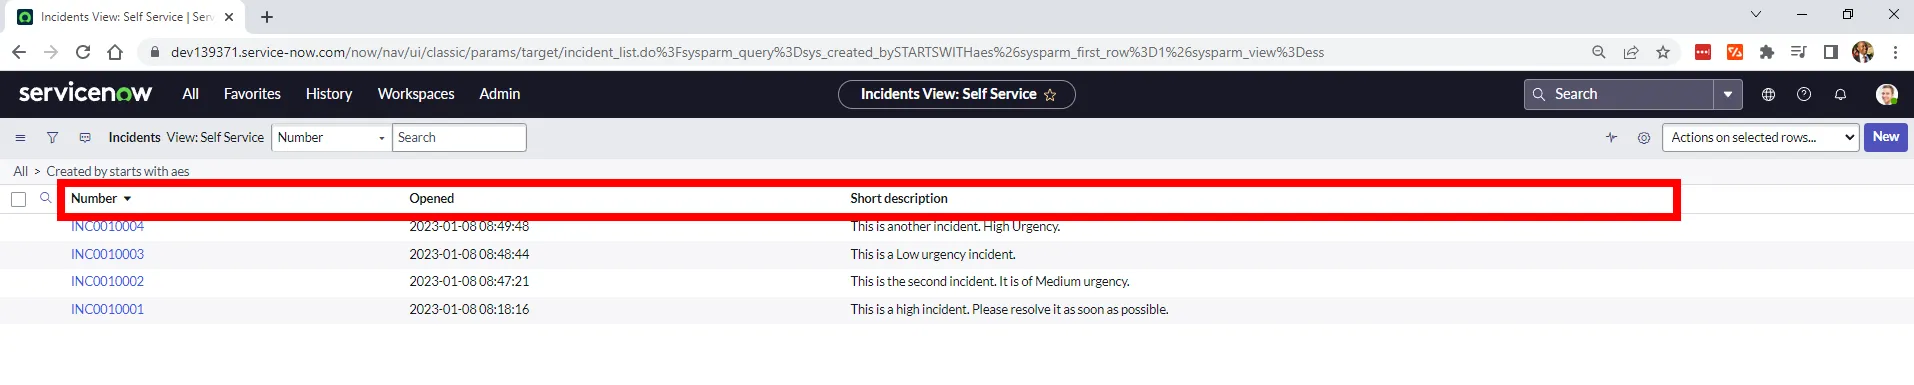
It will open a context menu from where you should select Configure and then Business Rules.

Once the Business Rules page is open, click on New at the top right corner to create a new business rule.

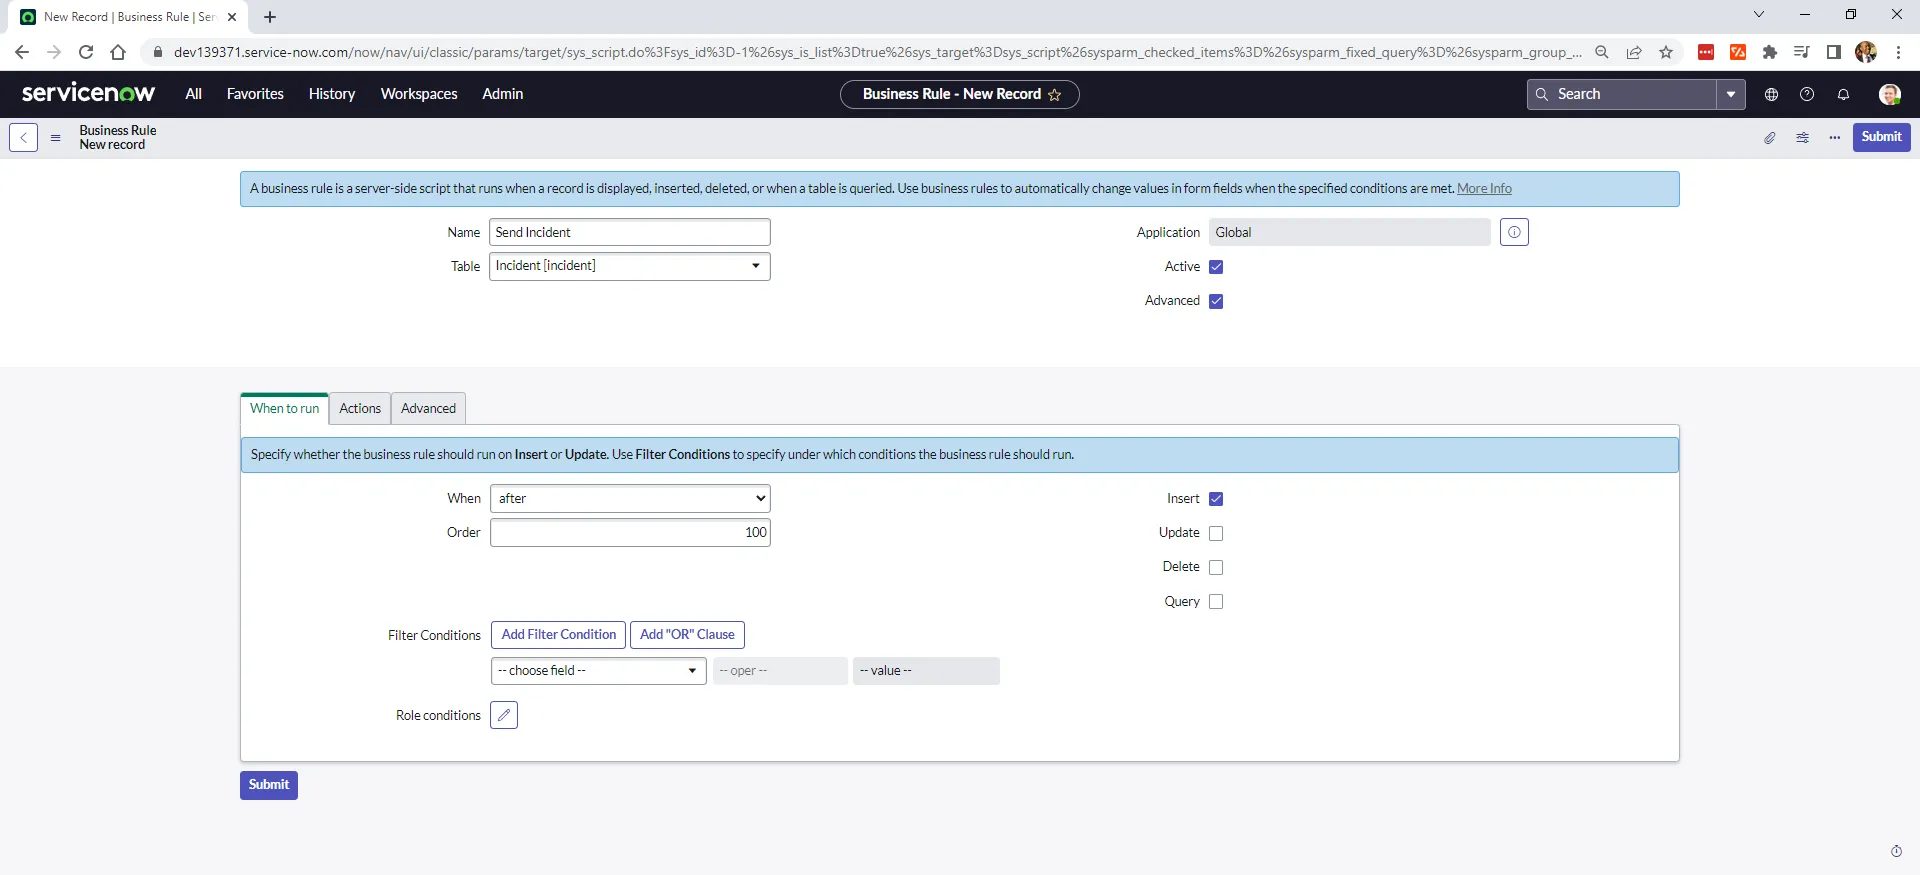
You need to name the business rule. For this tutorial, use Send Incident. The incident table is preselected, which works for this tutorial as this is where incidents are written to when they are created. You could also select another table.
Take note that the Active option is selected. This means that as soon as you create the rule, it will start listening for inserts into the Incident table.
Also select the Advanced checkbox to show the Advanced Tab, where you will put the script for this example.
Select the When to run tab. For When, choose the dropdown option after and select the Insert checkbox. This means that you want your business rule to be executed after an insert into the incident table.
Your business rule should look as follows:
Open the Advanced tab, leave the condition field blank, and paste in the following script:
It should look like this:
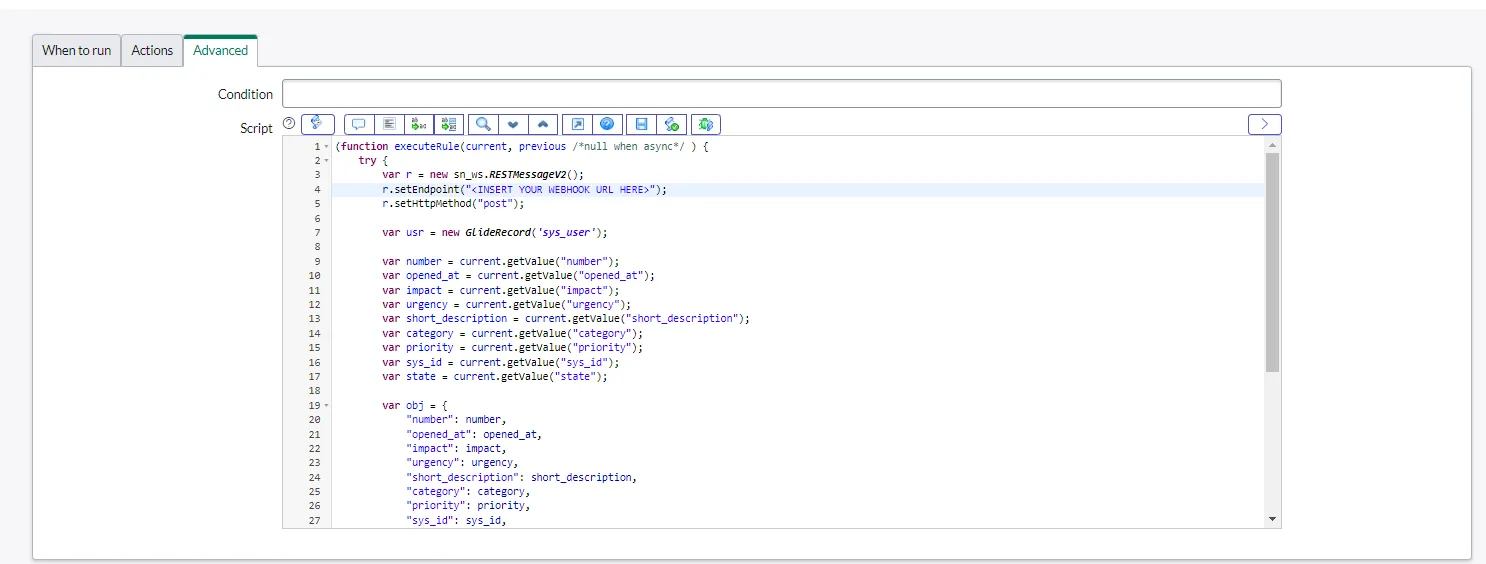
This script gets the current incident details using the <code class="blog_inline-code">current keyword</code>. In this example, it gets the incident number, opened_at, impact, urgency, short_description, category, priority, sys_id, and state. You will have seen these fields on the output when you ran get_incidents_basic_authentication.py or get_incidents_oauth.py.
Make sure to replace <code class="blog_inline-code">YOUR WEBHOOK URL HERE</code> with your actual endpoint URL. This is the URL of the application that will be listening for new incidents—in other words, where you want to get the incident updates. For example, this can be your Flask or FastAPI application endpoint that is listening for requests.
Once you have the script inserted, click Submit to create it.
To verify that your business rule was created, search for it in the list of business rules.
And congrats! When a new incident is created, the business rule will send the details of the incident to the endpoint you specified.
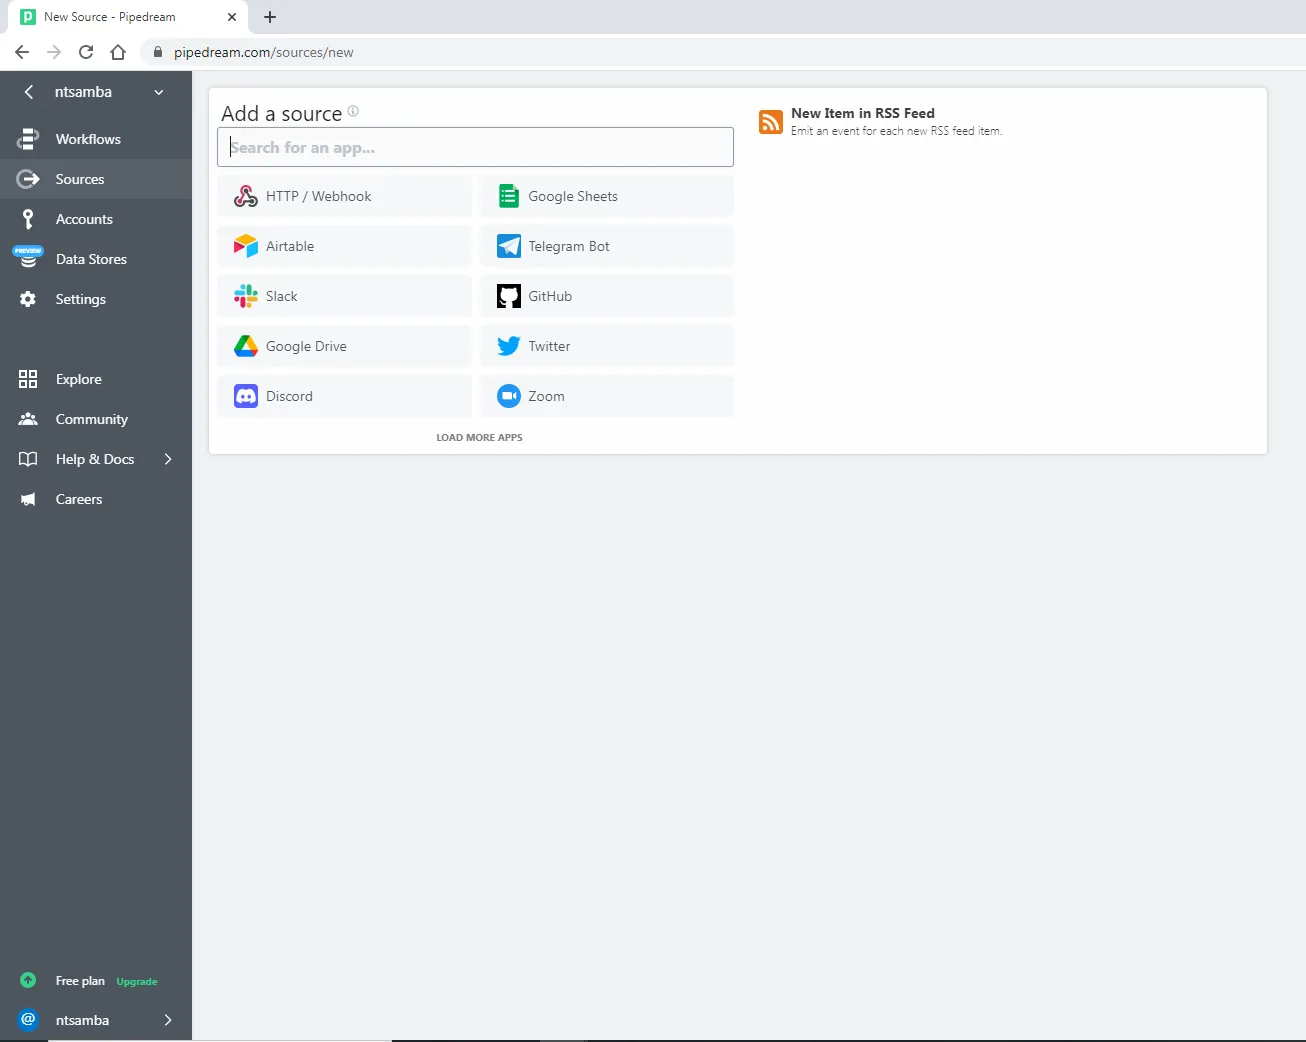
To test this webhook, log into your Pipedream account and select Sources:

Click on New to create a new source.
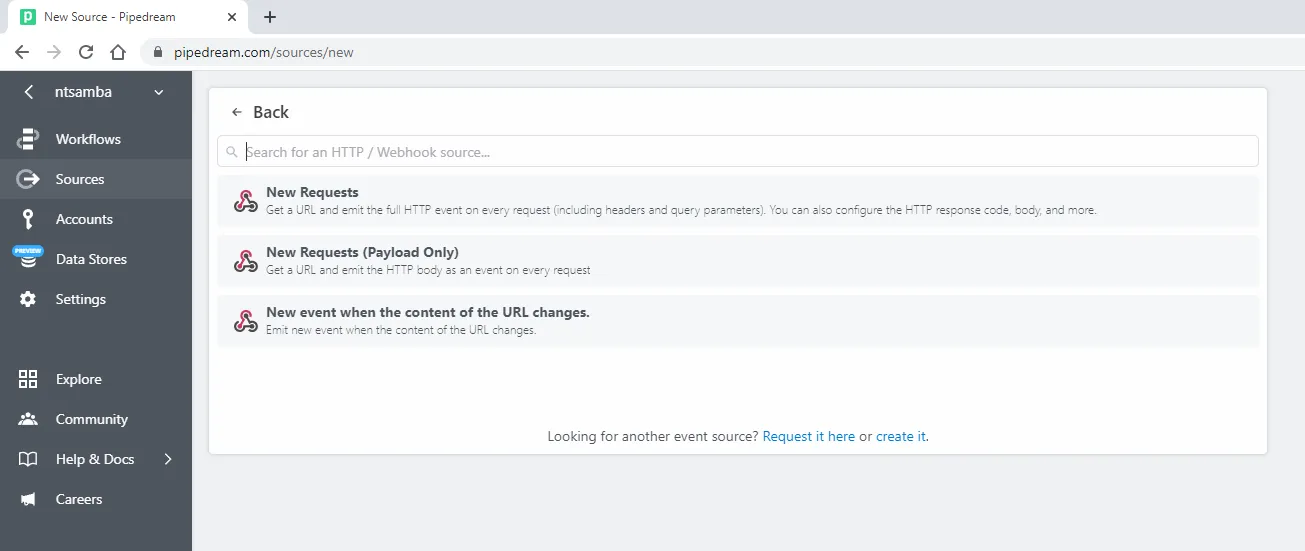
Click on New Requests.
Name the source ServiceNow.
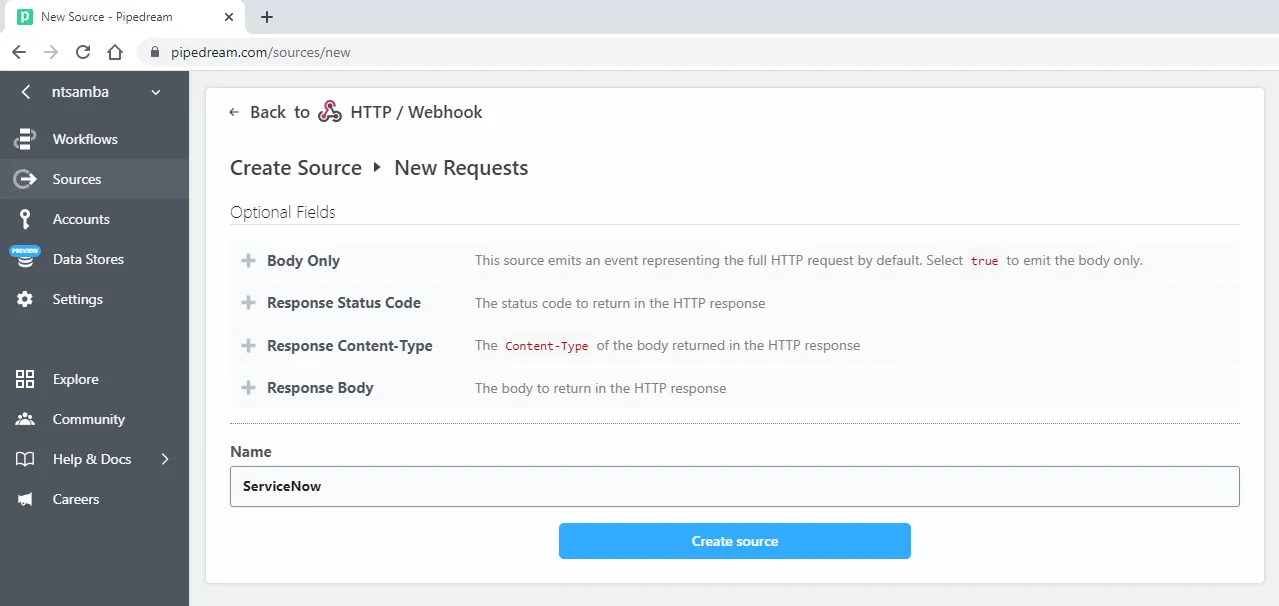
Click on Create source.
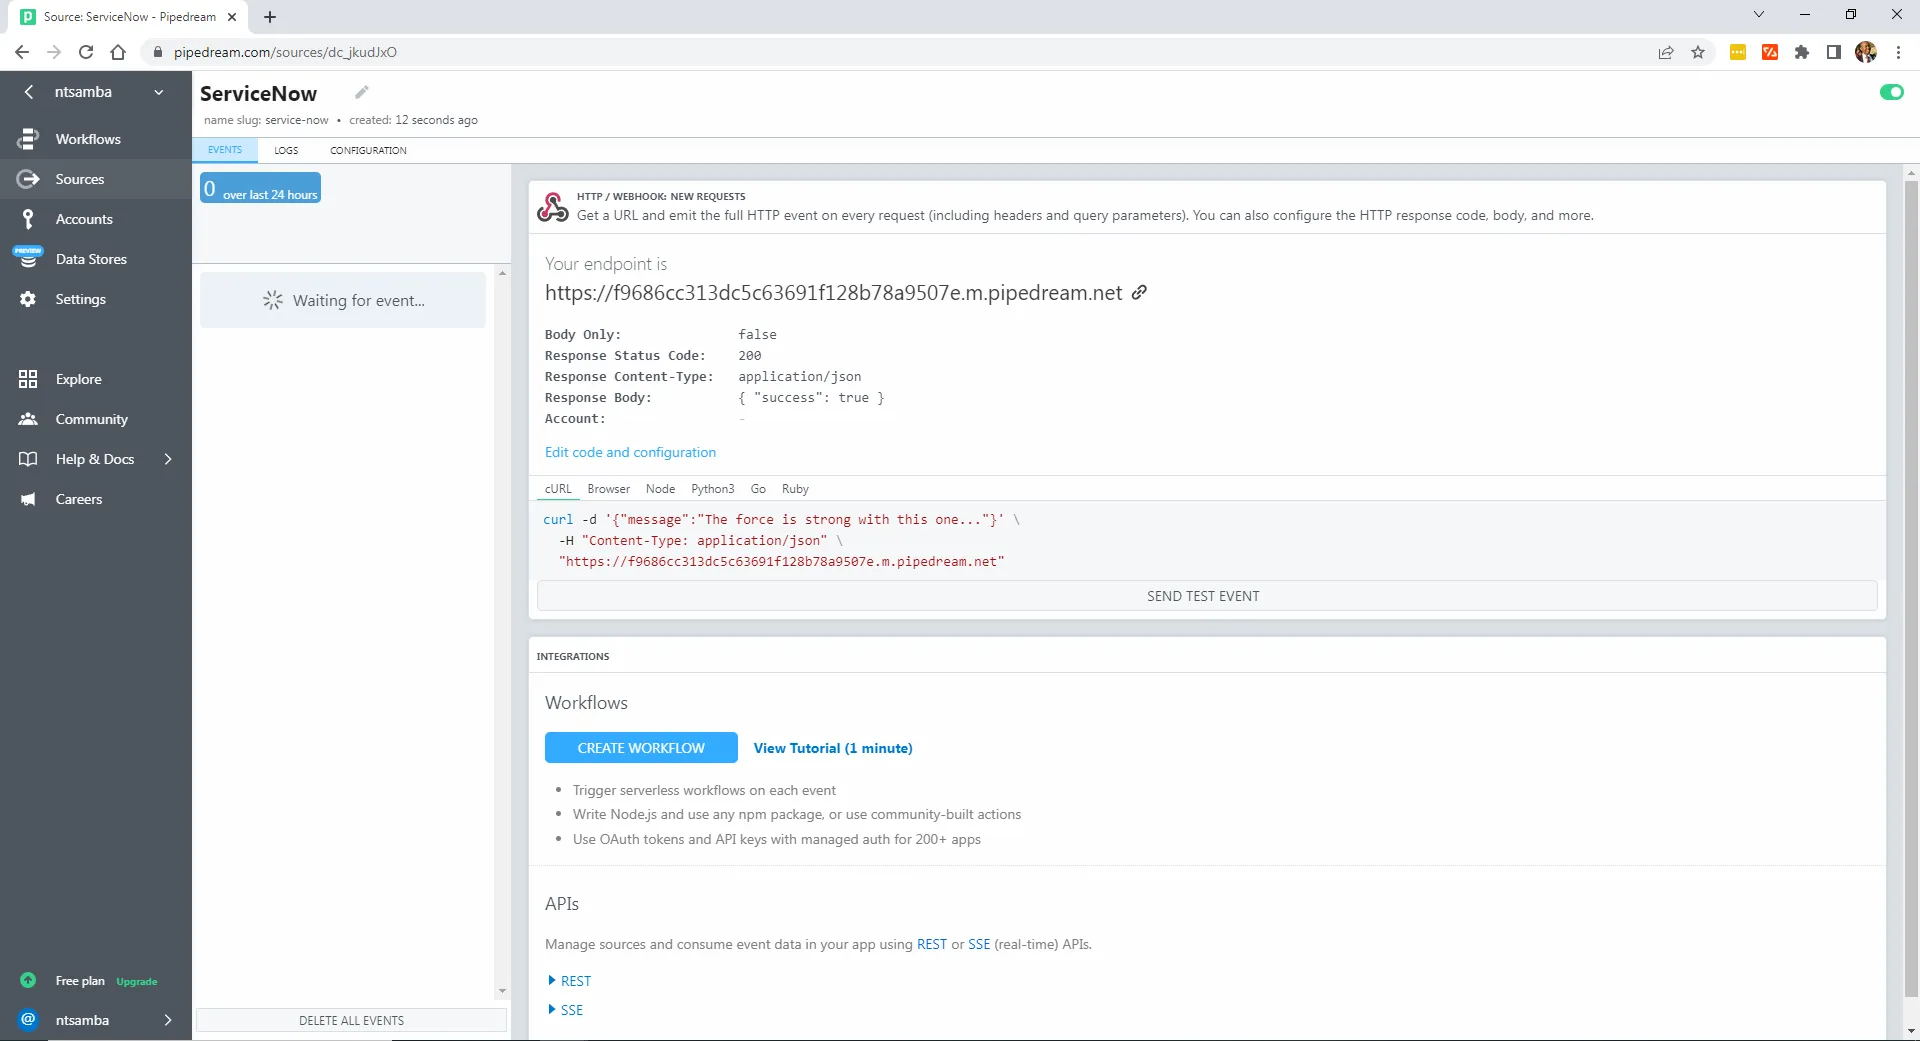
If the source is created successfully, you will get an endpoint URL, and Pipedream will let you know that it is waiting for an event.
Copy the endpoint URL.
Navigate to the script in your business rule from earlier and replace <code class="blog_inline-code">YOUR WEBHOOK URL HERE</code> with the endpoint URL you got from Pipedream:
Now, back in your ServiceNow instance, create an incident using the following details:
- Number: INC0010013
- Short description: Demonstrating Webhook
- Urgency: 1 - High

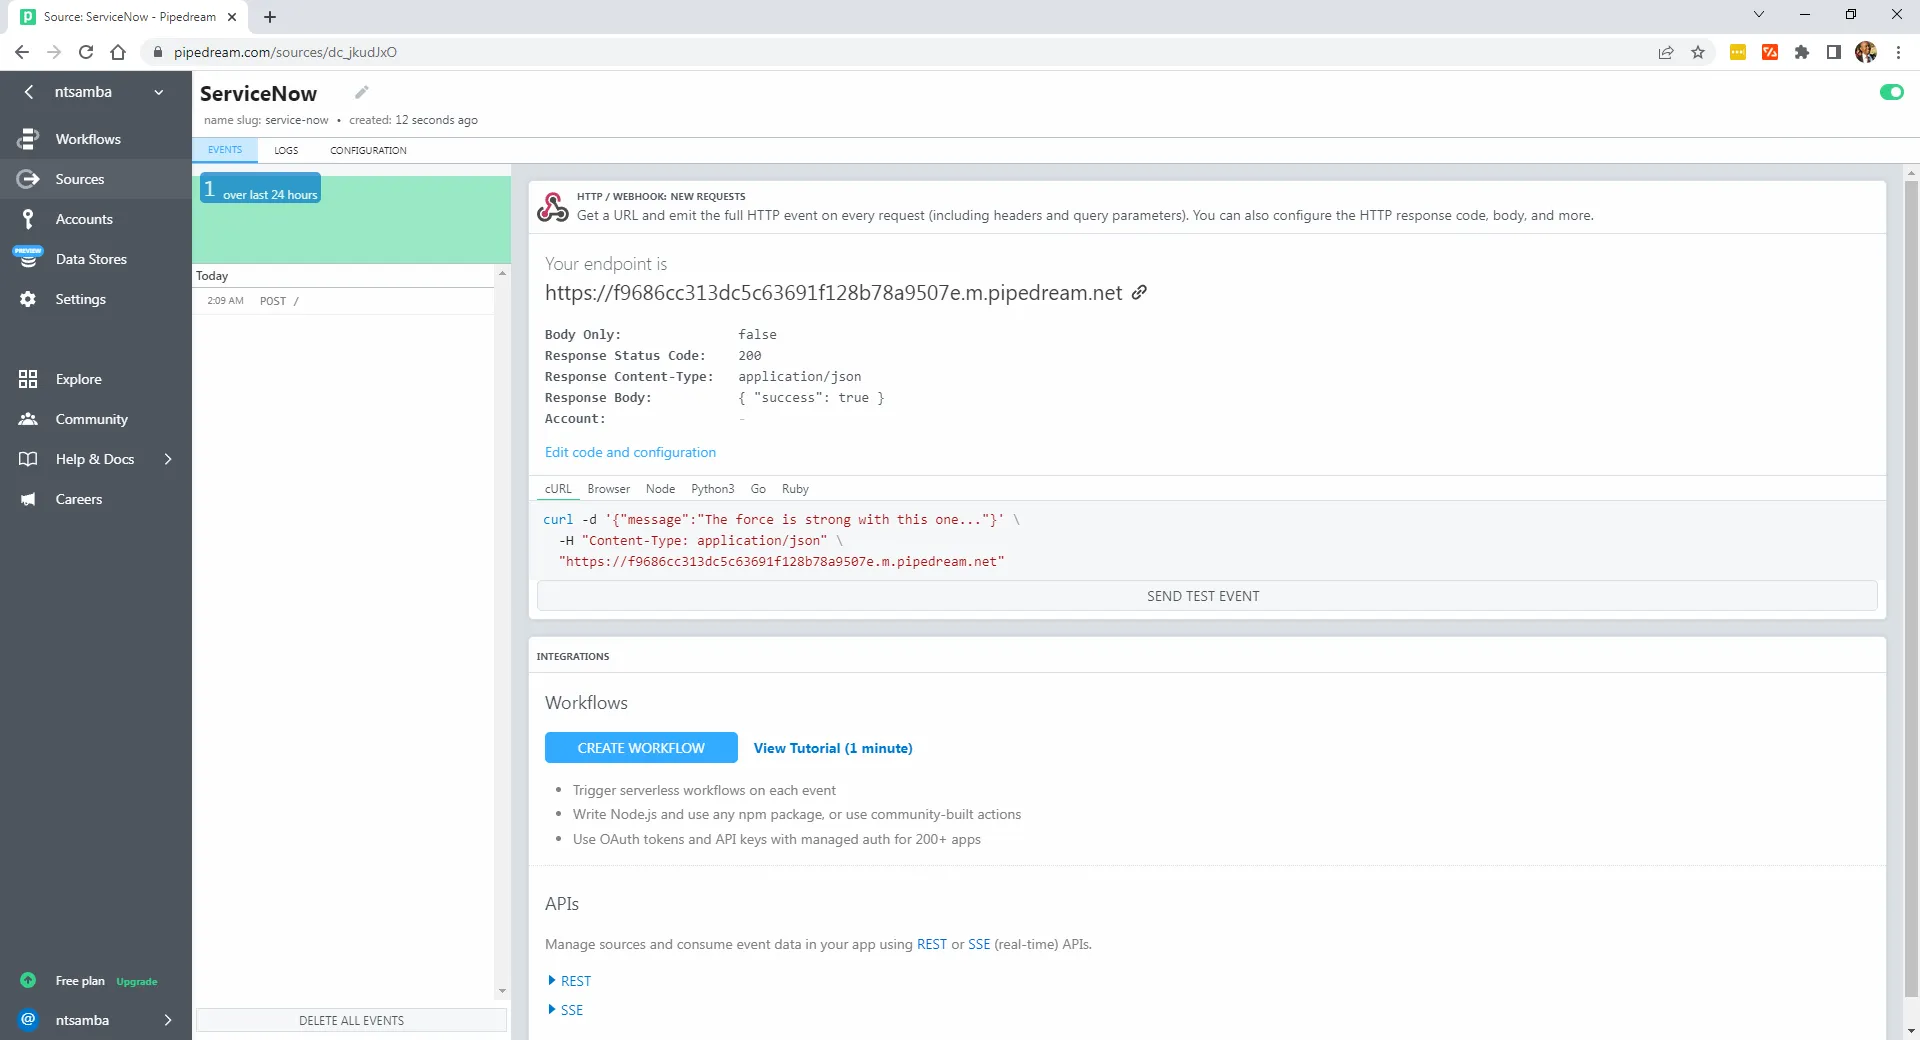
When you click Submit, the business rule will execute and send the incident details to your endpoint. You should be able to see the details of this incident as the body in your Pipedream ServiceNow source.
You should now have one event in the ServiceNow source in Pipedream.
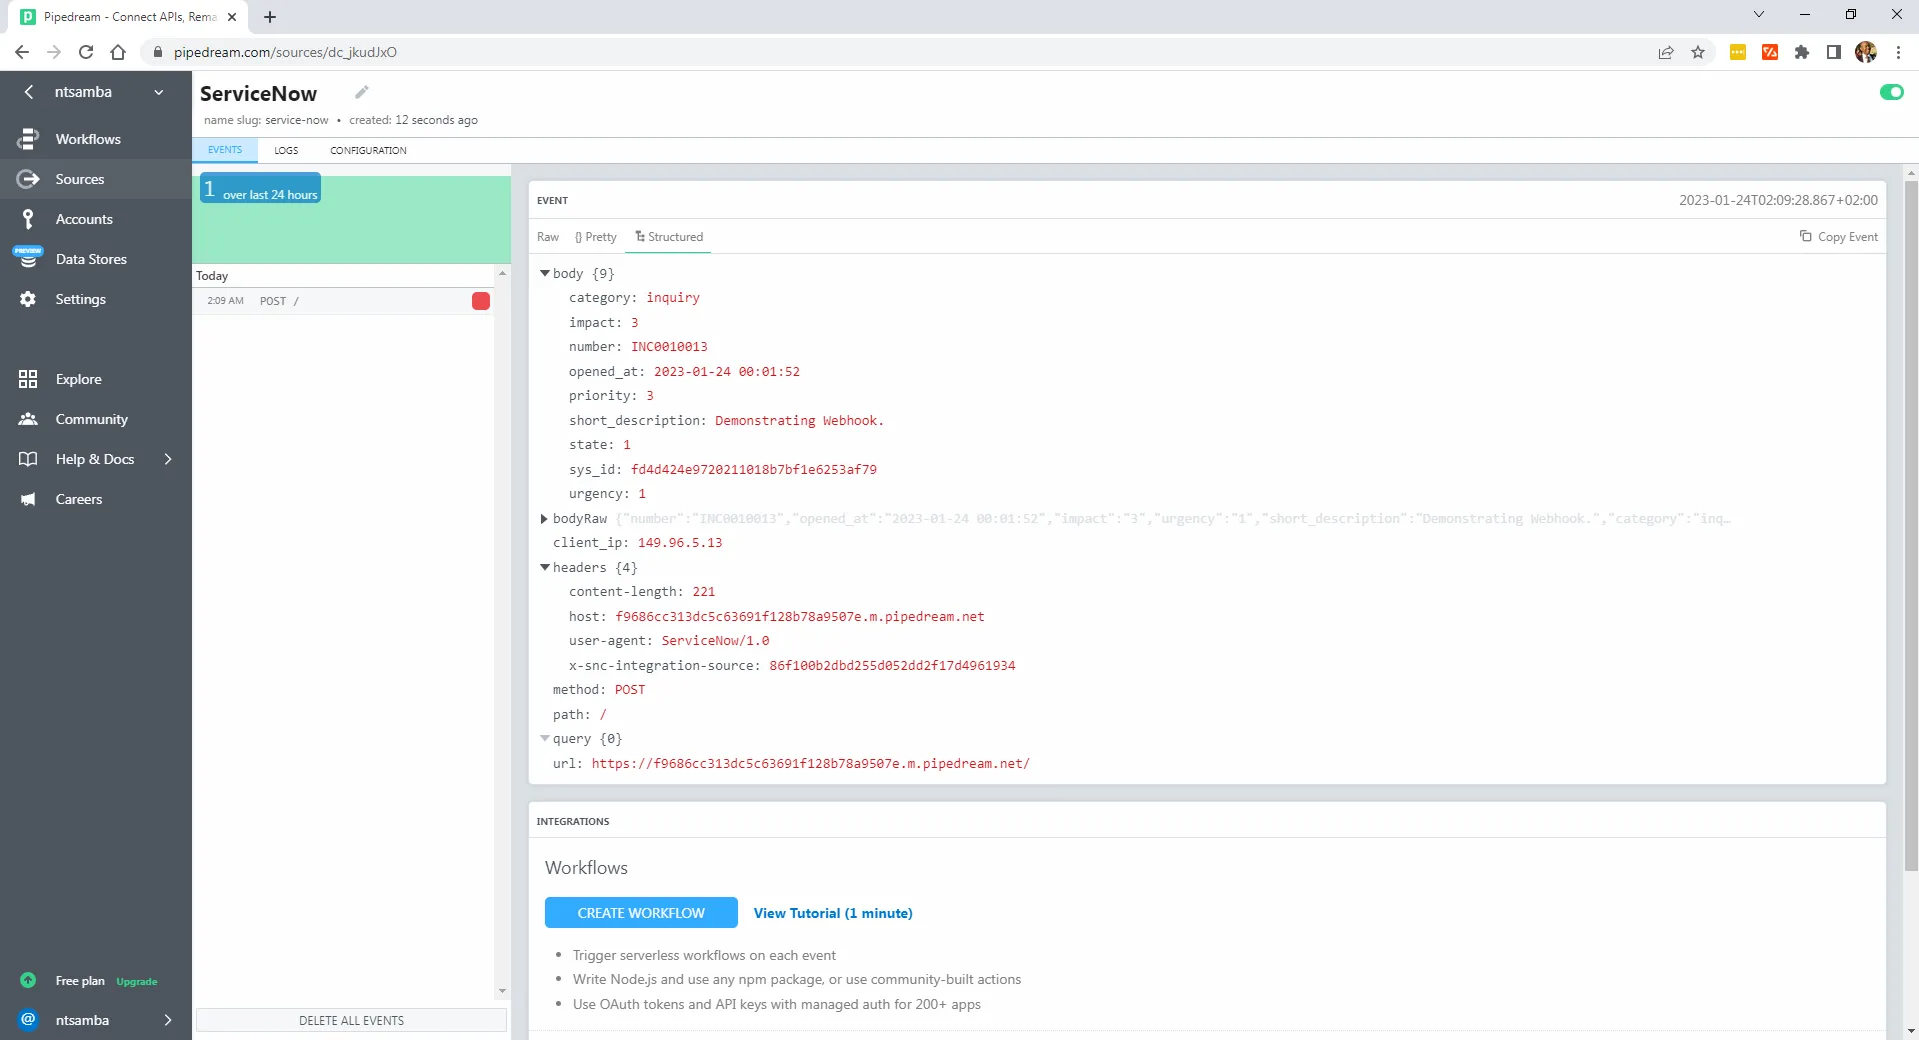
If you click on the event, you can see the details of the incident that you just created in ServiceNow in the body tag. This shows that the webhook is working.
Conclusion
In this article, you learned how to get incidents from the ServiceNow API with Python. You created a few incidents using the user interface and read those incidents using the API. You also learned how to retrieve incident details using webhooks.
Getting this wealth of information is important, but doing it manually for each ServiceNow product you use can be tedious. So consider Merge, a unified API with more than 15 integrations that include ticketing in a single API. Instead of managing several integrations, you only need to build and maintain your integration with Merge and let it handle all the new updates on partner integrations.
Learn more about Merge by scheduling a demo with one of our integration experts.


.png)
.png)

