
Table of contents
Just for you
How to Build a Zenefits API Integration: Developer Guide

Zenefits is a popular HRIS with features that range from onboarding and exiting, payroll, benefits, and time tracking. As you’re building out your own app’s integration support, providing users an easy way to sync their Zenefits data with your own app can drive more sales.
One of the easiest ways to provide a Zenefits integration for your app or platform is to build an integration through Merge. Merge is a Unified API for B2B integrations, and provides a seamless way for all your app to connect to Zenefits and 40+ other HR, Payroll, and Directory platforms.
In this guide, you’ll learn about the easiest way to set up a Zenefits integration, retrieve the access key from the dashboard to authenticate appropriately with the Merge API, and integrate it with your users’ Zenefits account. You’ll then use the Merge API to collect information from companies and employees that are using your Zenefits account. Lastly, you’ll set up webhooks to stay up-to-date with data updates and secure your webhook endpoint with signature hashing.
Let’s get started.
Integration with the Zenefits API Through Merge
Before starting, you’ll want to make sure you have the following setup. This will allow you to test your integration to make sure it works for your users.
- Have access to an existing Zenefits account.
- Sign up for a free account on Merge and access to their API keys.
Related: A guide to choosing between polling and webhooks
Authenticate with the Merge API
The Merge Unified API is accessed via two forms of authentication.
The first, a Production Access Key authorizes you as a user of Merge.
The second, a Linked Account Token, authorizes that your API requests are being made on behalf of a specific user.
You collect your Production Access Key from the Merge dashboard to authenticate using the Merge API.
Follow the steps below to get the access key:
1. Open the Merge dashboard.
2. Click on Configuration on the left sidebar.
3. Click on the API Keys tab of the configuration page.
4. Copy the Production Access Key from the Organization Secrets section of the page and save it for later.
We’ll walk through how to create a Linked Account Token, next.
Create a Linked Account Token via Zenefits
Next, we’ll want to set up your link_token in Zenefits.
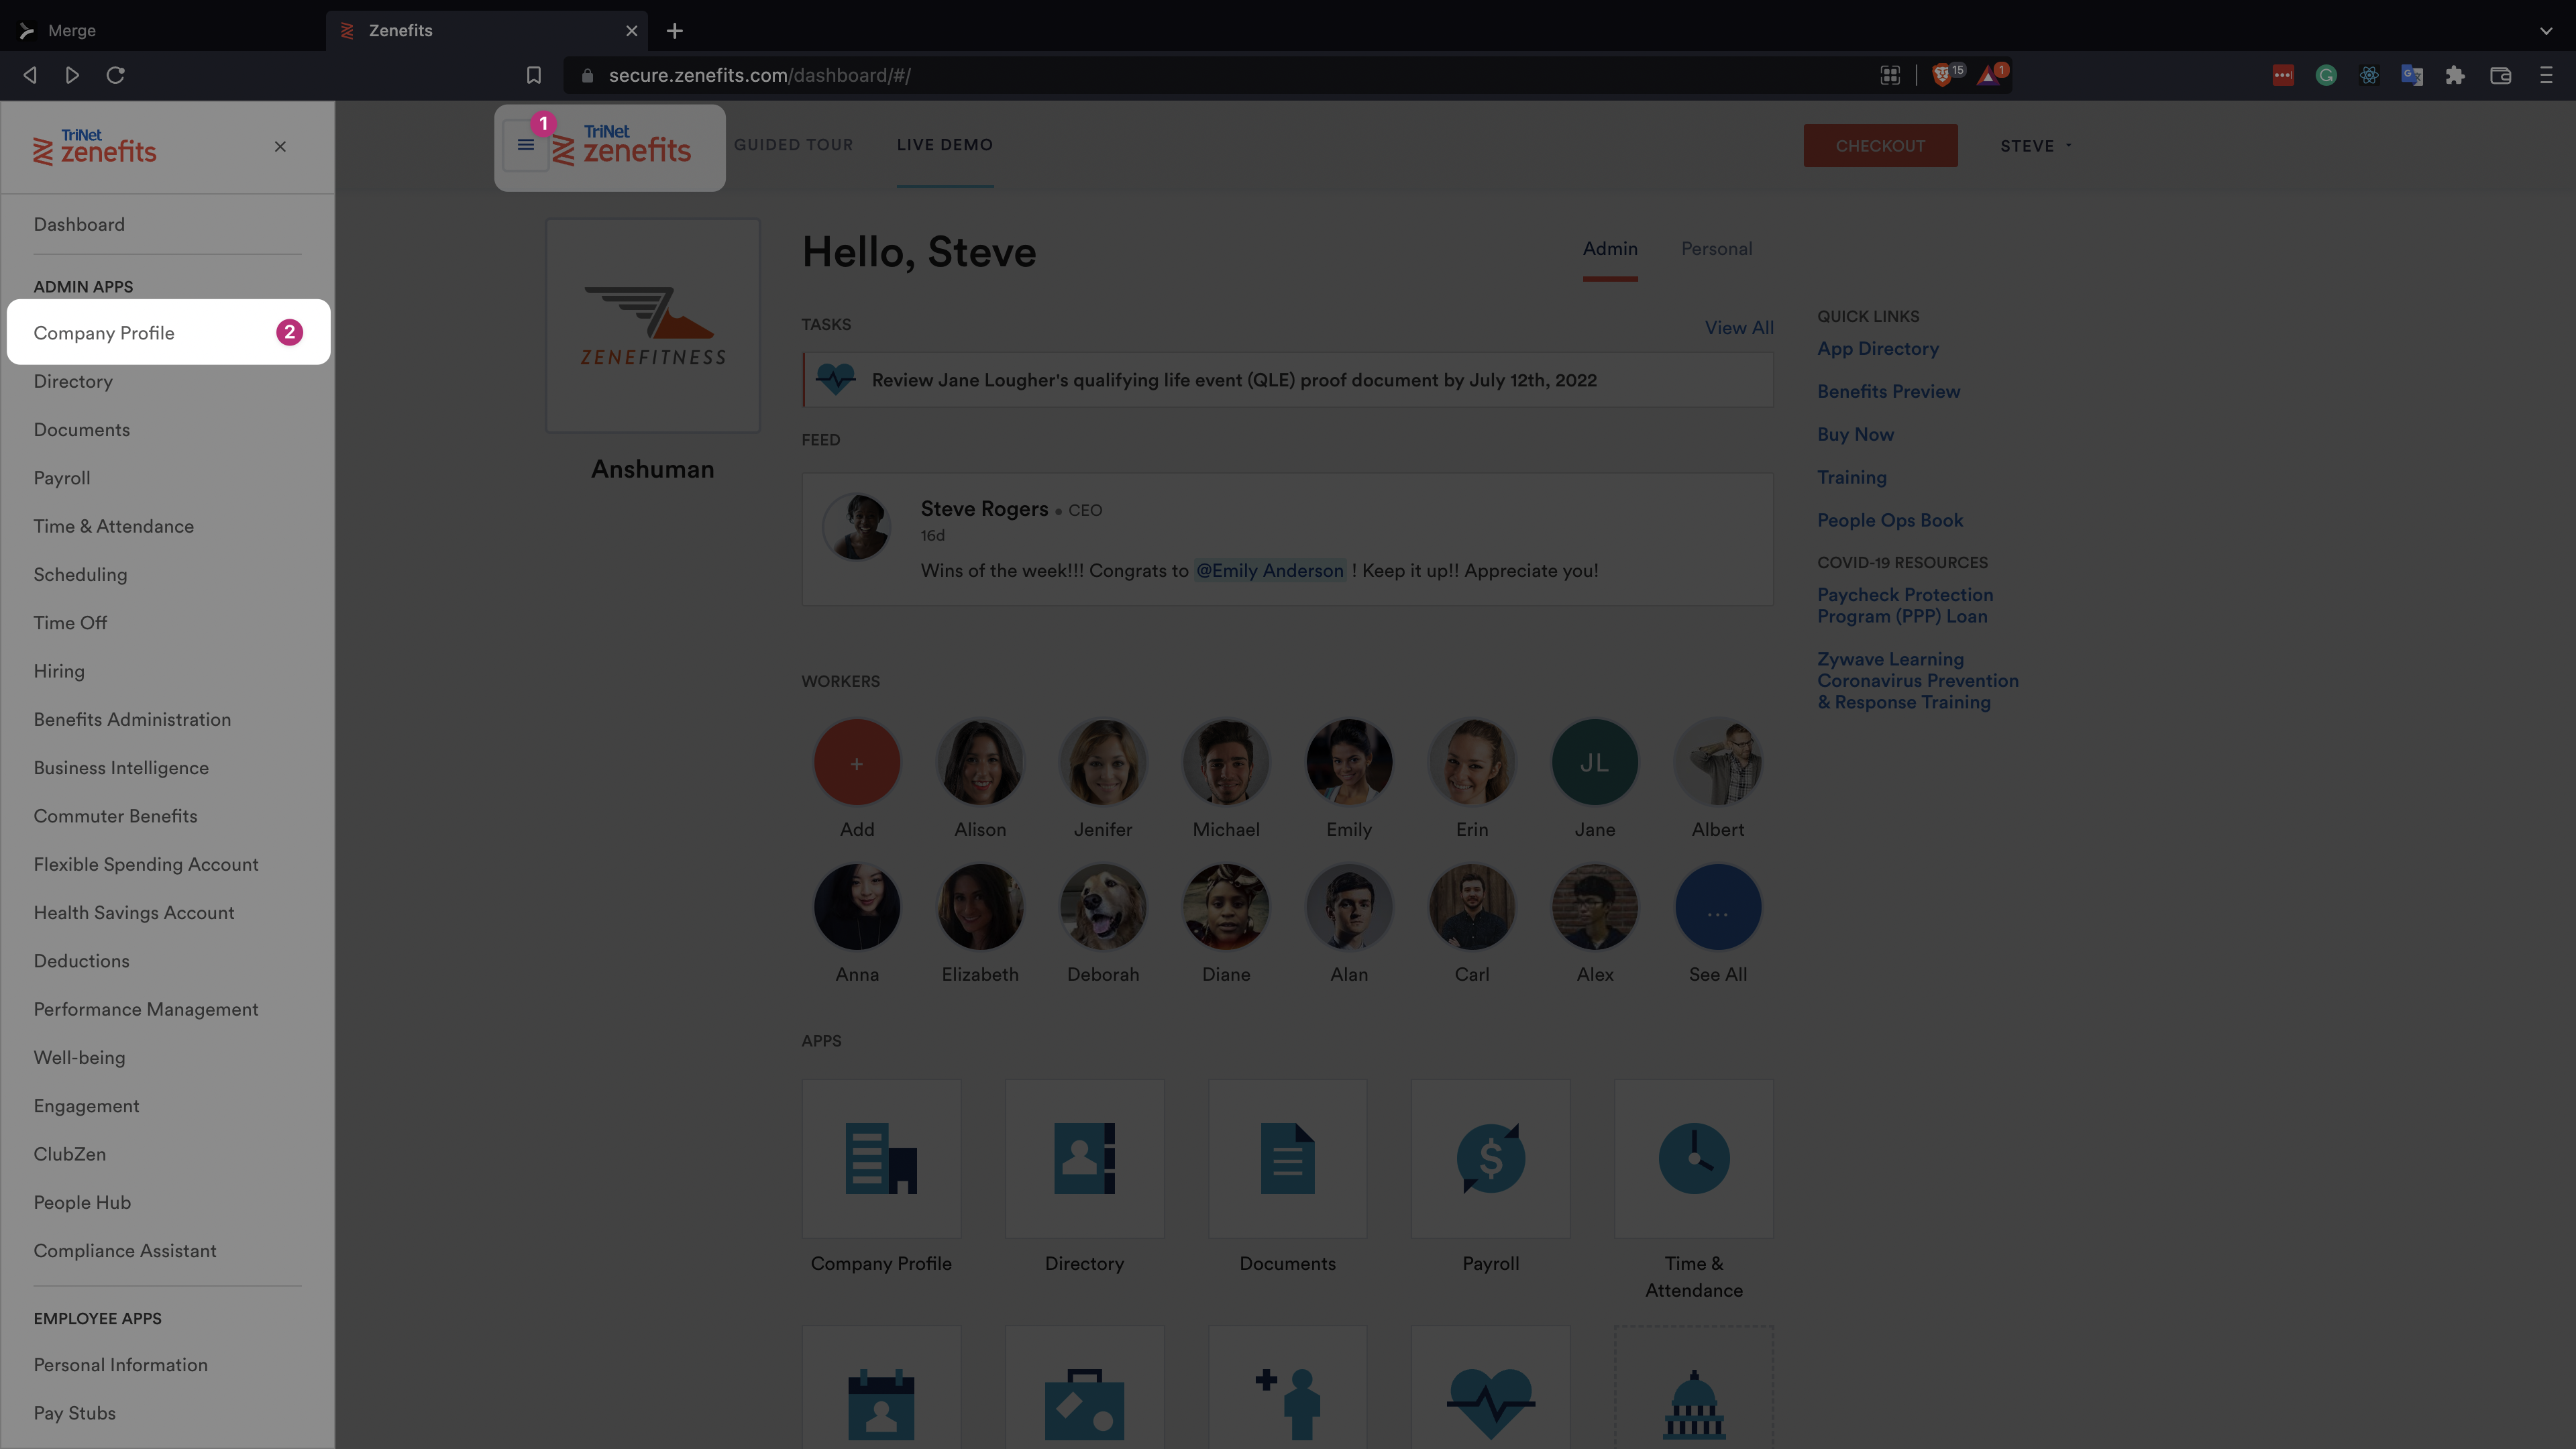
1. Open the Zenefits dashboard in your web browser.
2. Click on the hamburger icon on the top navigation bar to open the sidebar.
3. Click on Company Profile.
4. On the Company Profile page, click on Custom Integrations.
5. Click on the Add Token button to create a new REST API token. Make sure to tick all the checkboxes in the form.
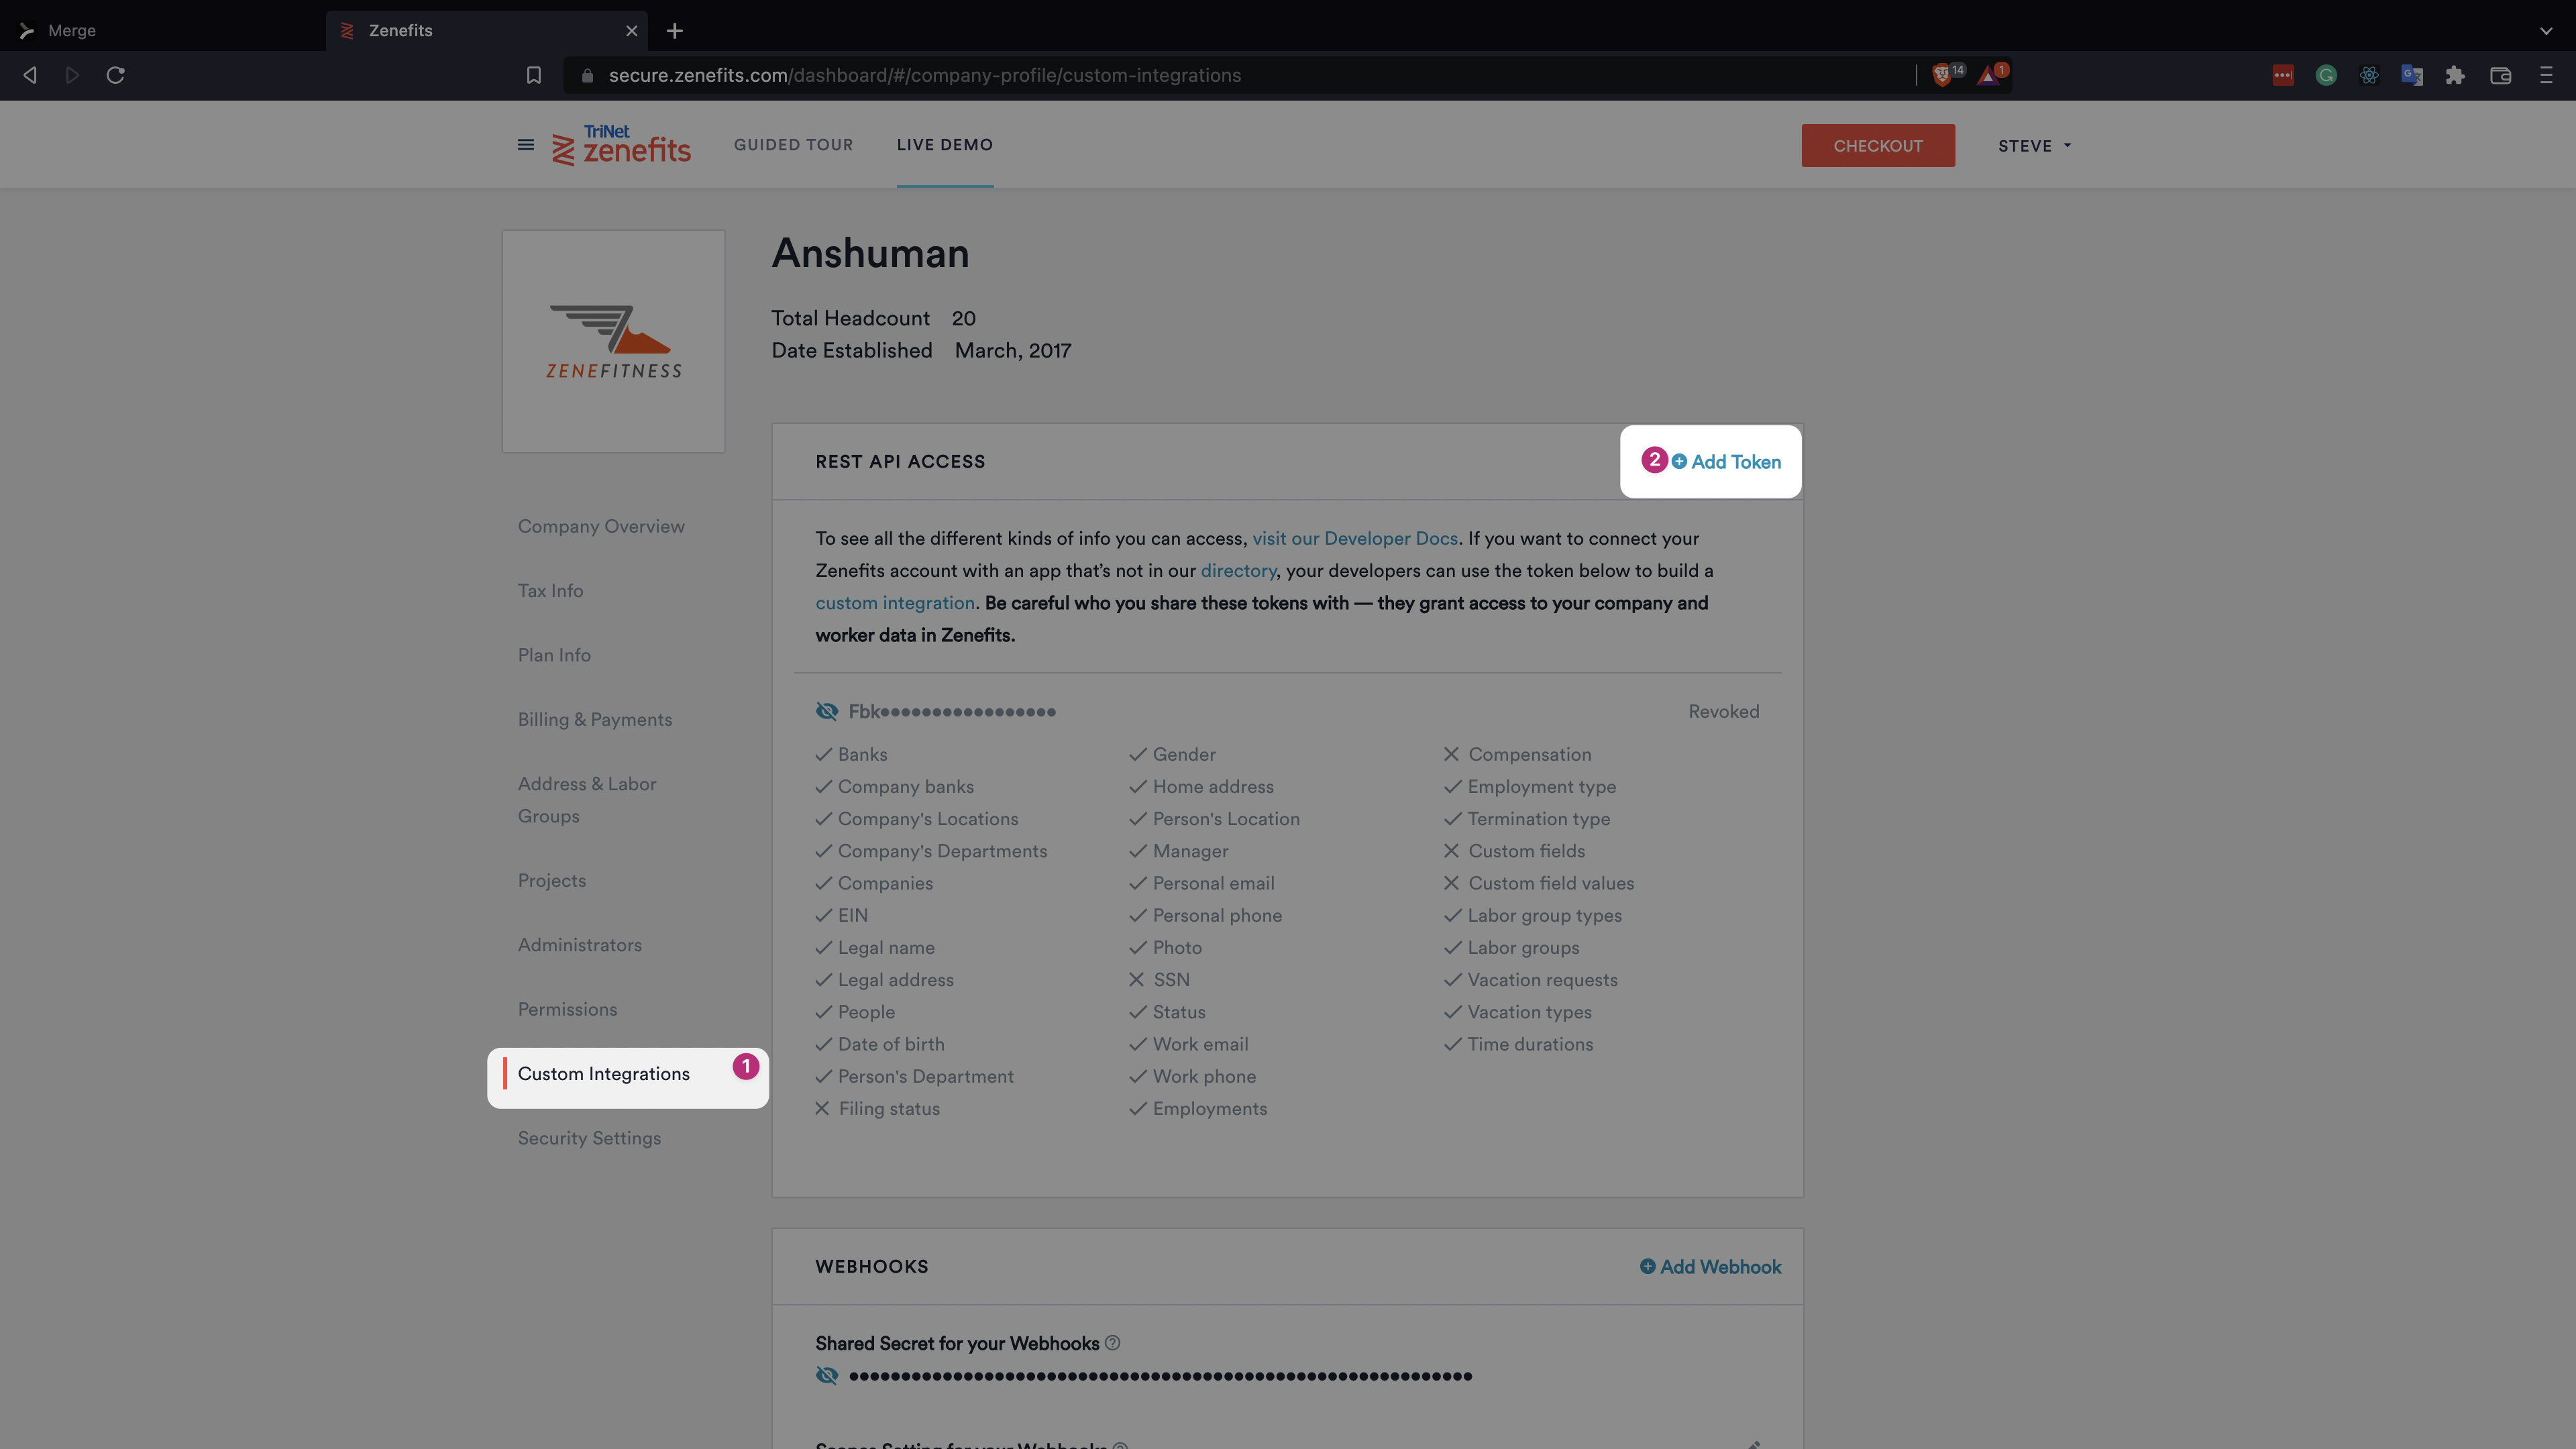
Once ready, the new token will show in the list as a secret. Click on the eye icon to see the token, and save it somewhere safe for use later.
Link Your Zenefits Account with Merge
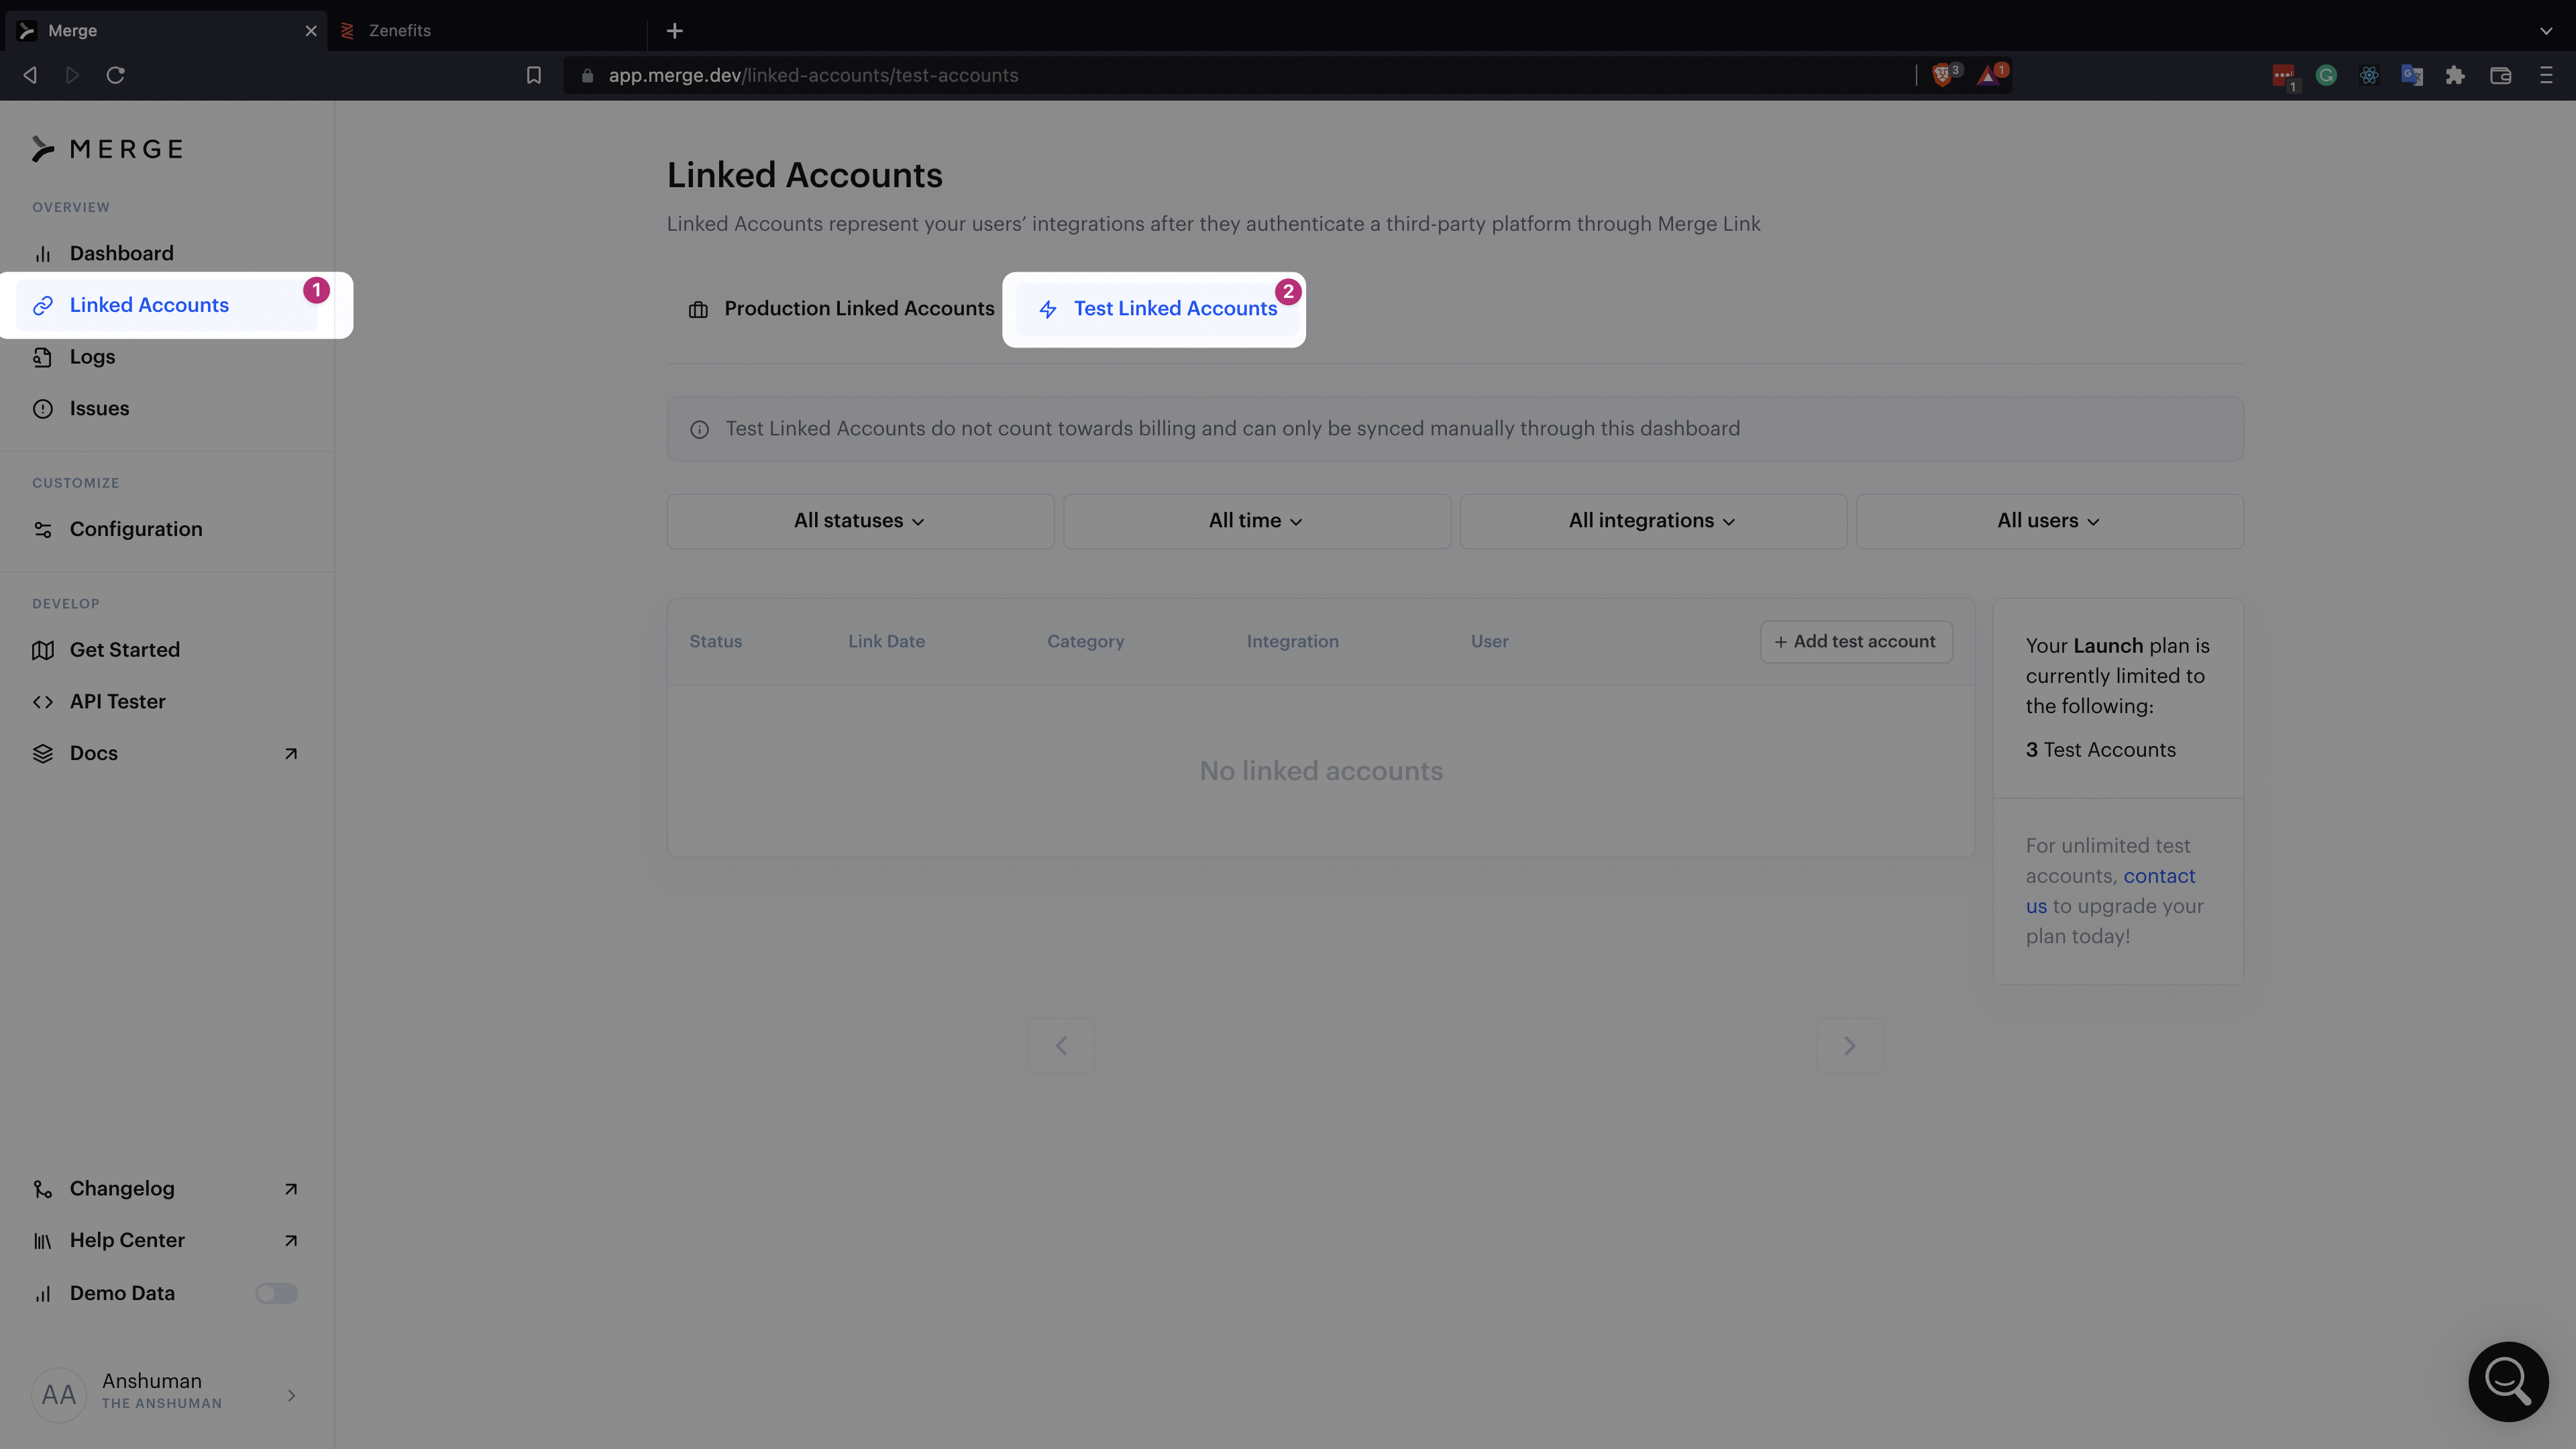
1. Open your Merge dashboard.
2. Click on Linked Accounts in the left sidebar.
3. Select the Test Linked Accounts tab on the Linked Accounts page.
4. Follow the steps shown in the video below to link your Zenefits account with Merge:
5. Click on the newly linked Zenefits account in the table.
6. Copy the Account Token from the Overview section. Later in this tutorial, the account token will be sent as a header called X-Account-Token to authorize your Merge API requests to collect end users’ data from your Zenefits account.

Convert to Production Account
To use the Merge API in production applications, convert the linked account to production by clicking on the Settings tab and clicking on Convert to Production Linked Account.

Now that you have the access-key and account-token, you can use the Merge API to access the data from your Zenefits account.
Make Requests to Zenefits Using the Merge API
The following examples use the node-fetch npm package to make HTTP calls to the Merge HRIS API.
Run npm install --save node-fetch@2 to install the package.
Get Companies’ Details
All information about how common models work with the Merge HRIS Unified API is stored in our documentation. You can view it here.
Use the /companies endpoint of the Merge API to get the list of companies available in your Zenefits account:
Get a List of Employees
Use the /employees endpoint of the Merge API to get a list of all employees available in your Zenefits account:
Get Employee Details by ID
Use the /employees/:employeeId endpoint of the Merge API to get the information of a given employee using their employee ID from your Zenefits account:
Make Requests to Zenefits Using Merge SDKs
You can also use the Merge SDKs to get data from Zenefits. The following examples use Merge’s Node/TS SDK, and you can choose to view a full list of the SDKs that Merge provides here.
Install the SDK
Run npm install --save @mergeapi/merge-hris-node to install the Merge SDK in your project.
Get Companies’ Details
Use the companiesList method to get a list of companies available in your Zenefits account:
Get a List of Employees
Use the employeesList method to get a list of all employees available in your Zenefits account:
Get Employee Details by ID
Use the employeesRetrieve method to get the information of a given employee using their employee ID from your Zenefits account. Provide the employeeId as the second parameter when invoking the employeesRetrieve method:
Set Up Webhooks
Keeping yourself up-to-date with the latest data from Merge has synced from your users’ Zenefits account might be difficult over time. That’s why Merge allows you to subscribe to their webhooks to receive updates rather than continuously checking on them. Merge’s webhooks will make POST requests to the API endpoint you registered and provide data in the request body.
Follow the steps below to set up a webhook in Merge:
1. Open the Webhooks configuration page on your Merge dashboard, and click on Add webhook button.
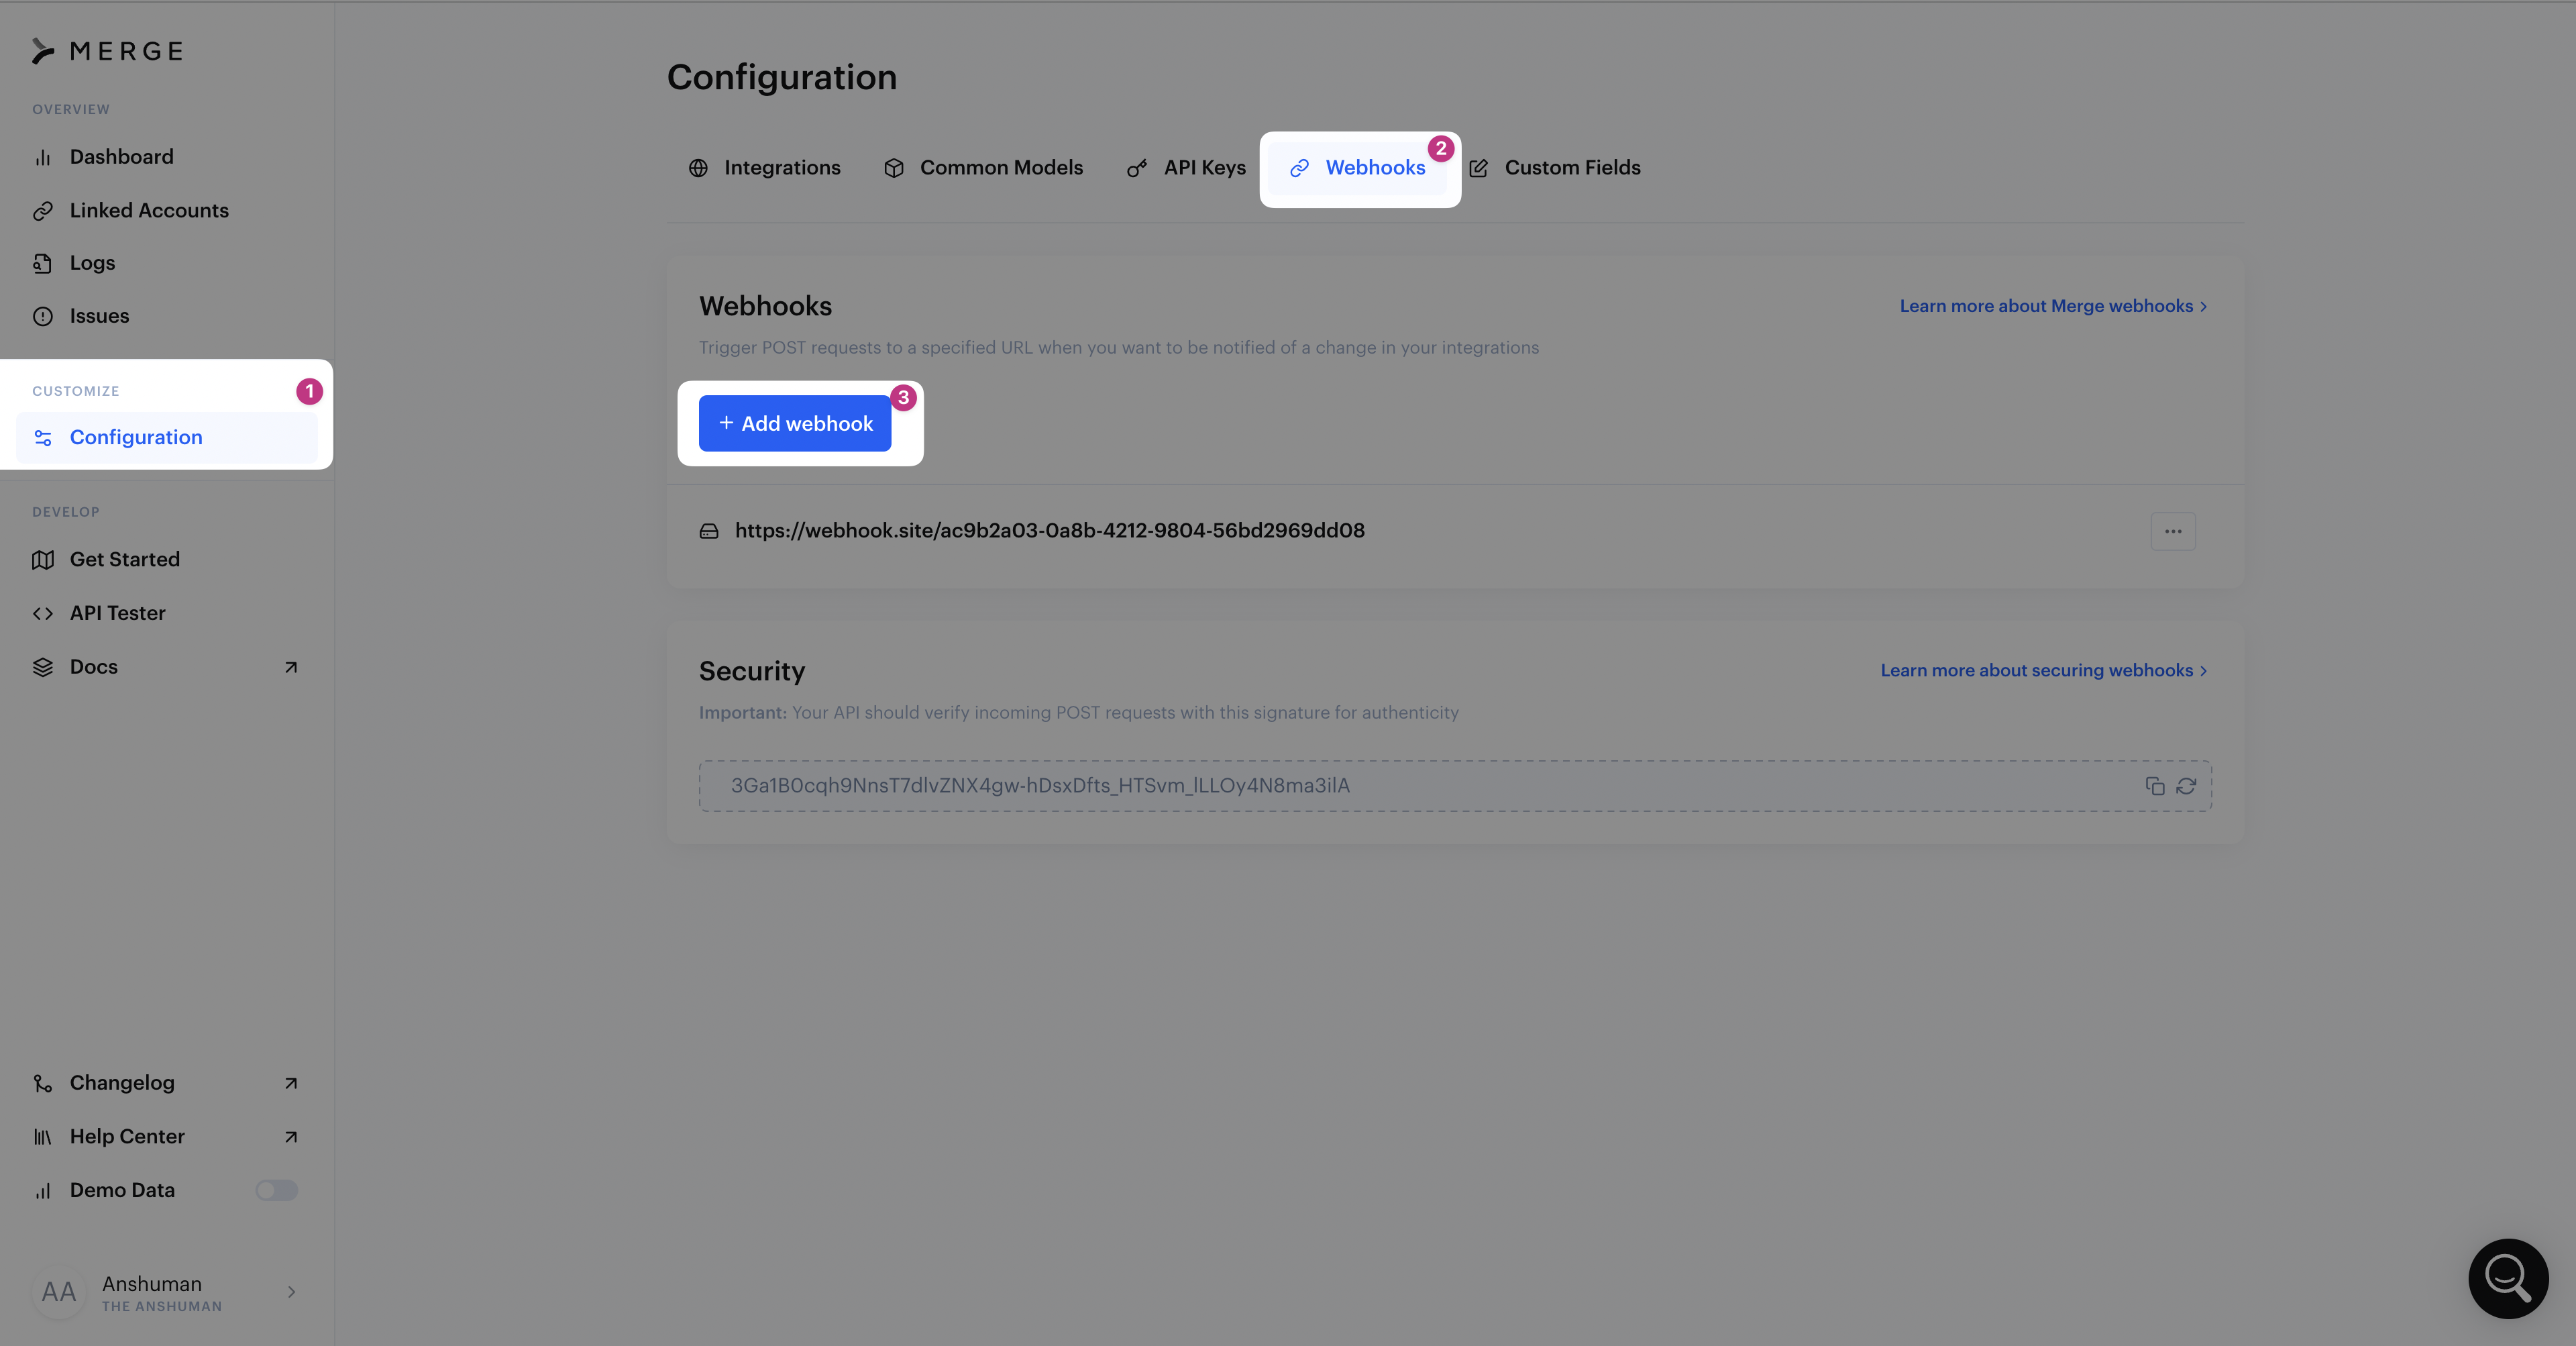
2. Input the Webhook URL that will be called by a POST request by Merge, select the subscription type, either sync notifications or data changes, and click the Add webhook button.
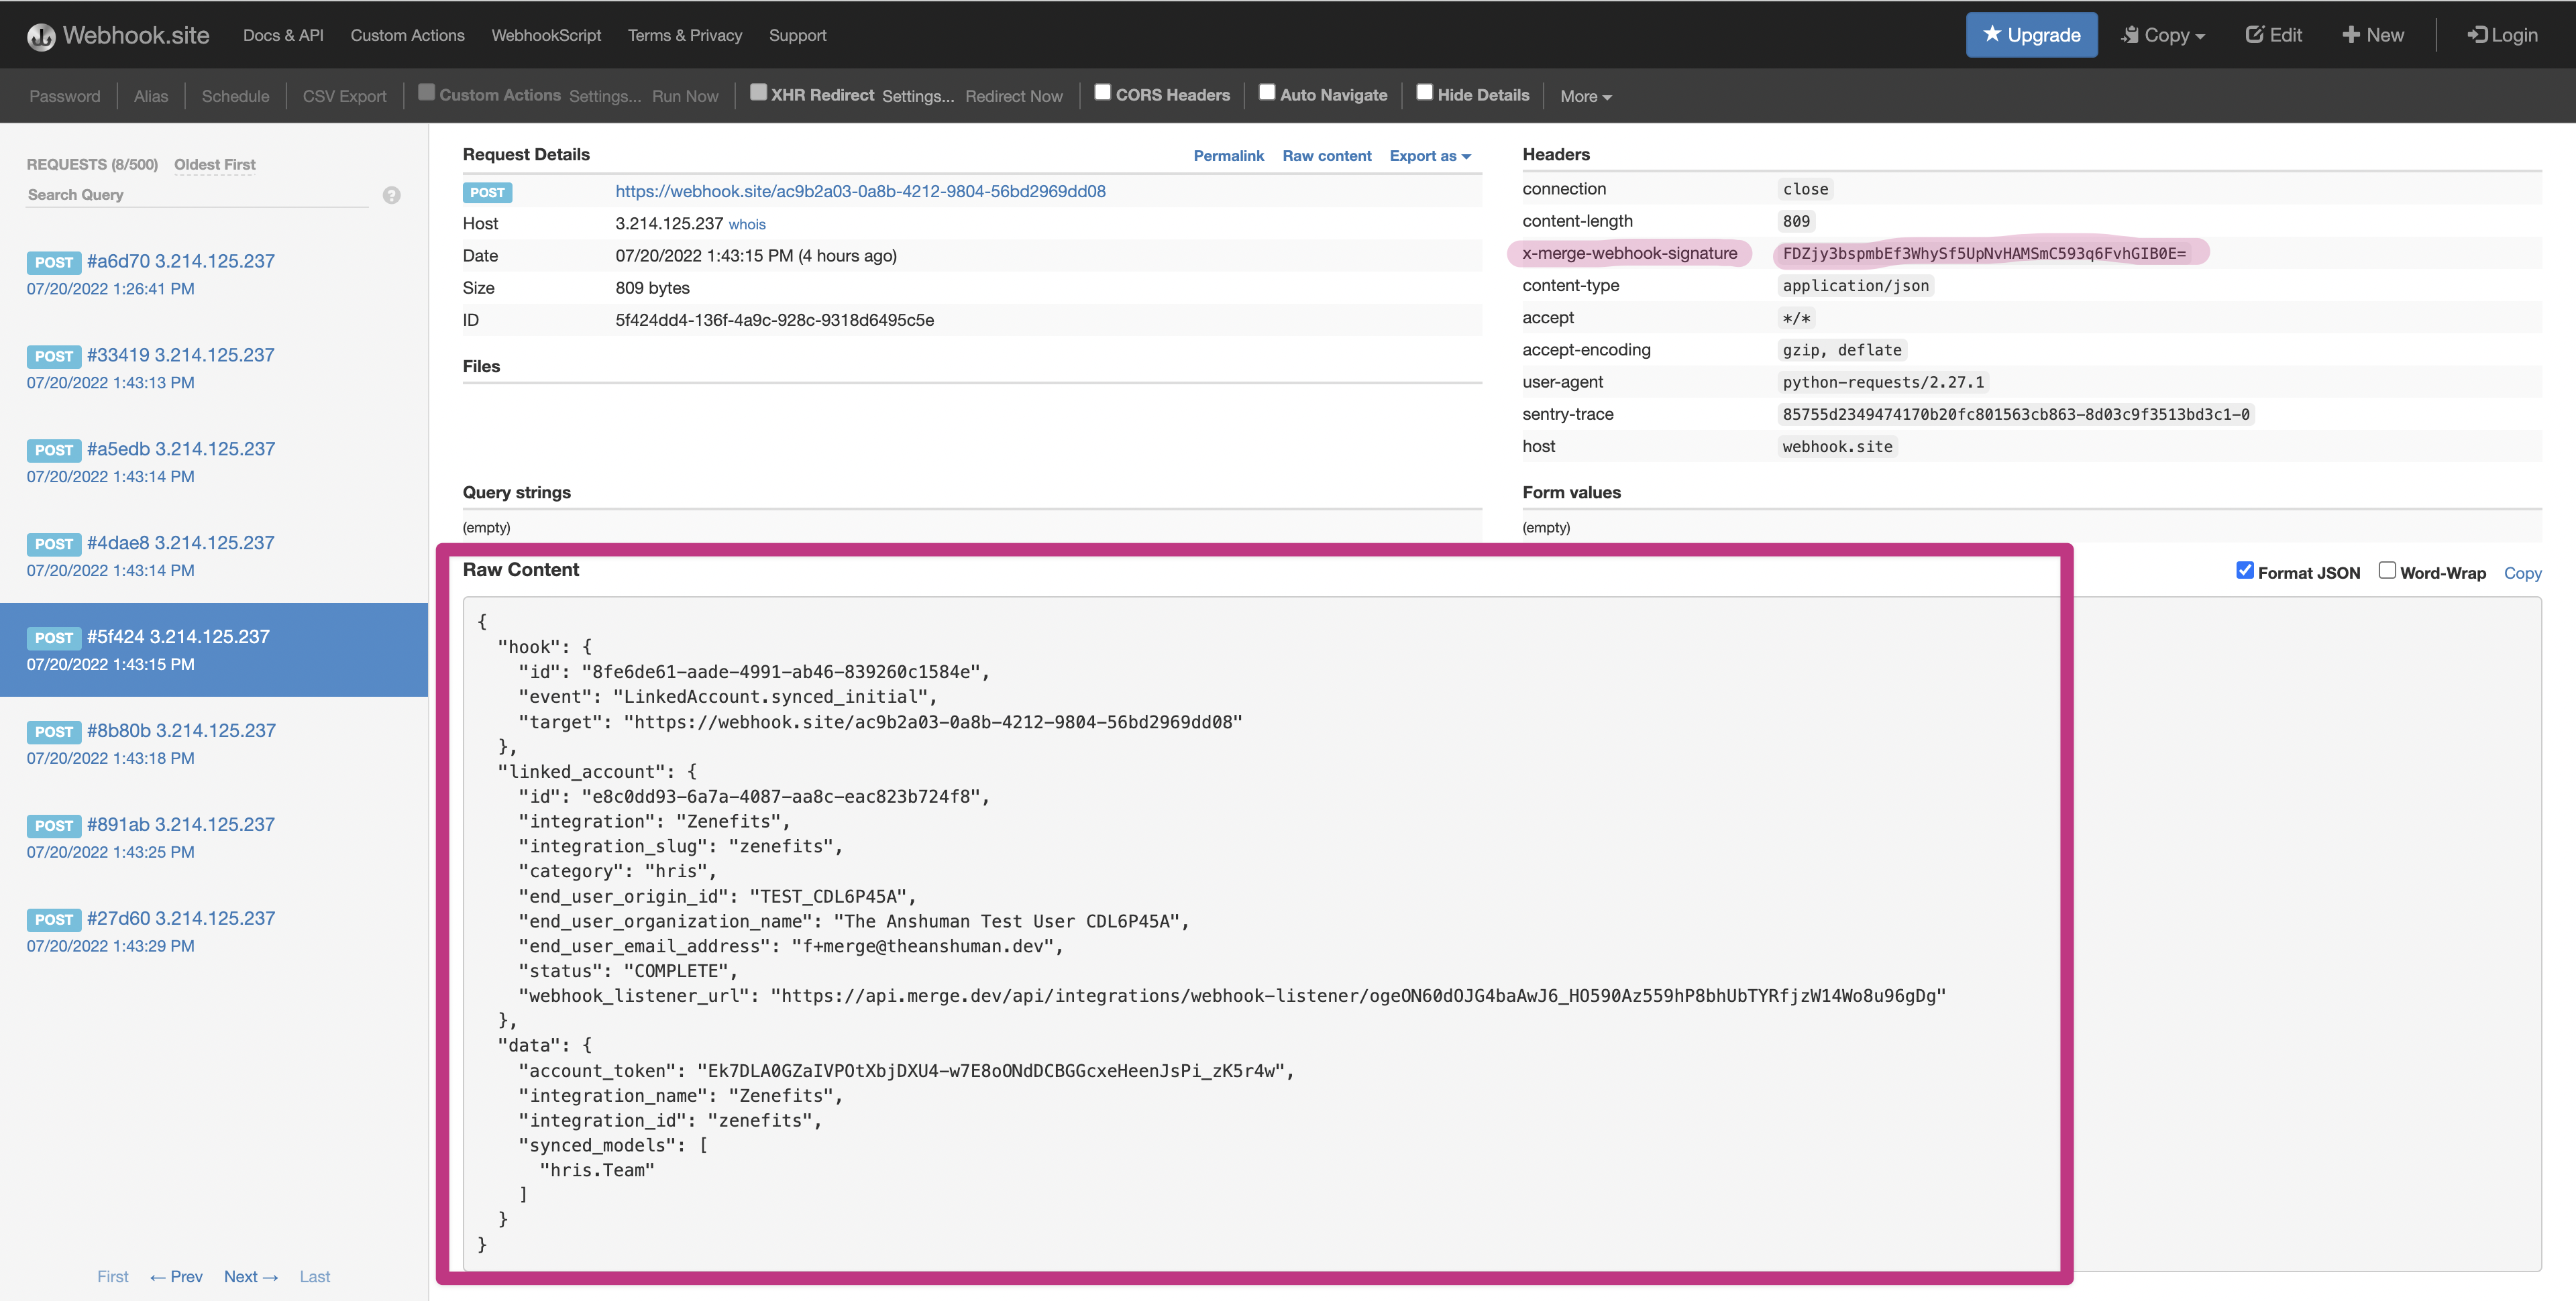
That’s it. The webhook will automatically report the latest data to your API endpoint, as shown below.
Secure Your Webhook
Securing your webhook endpoint is critical to prevent malicious requests from coming through. You can hash the request body content with the signature copied from the Merge dashboard. To verify the request’s authenticity, compare the hashed request body with the value of the X-Merge-Webhook-Signature header Merge sends with each request.
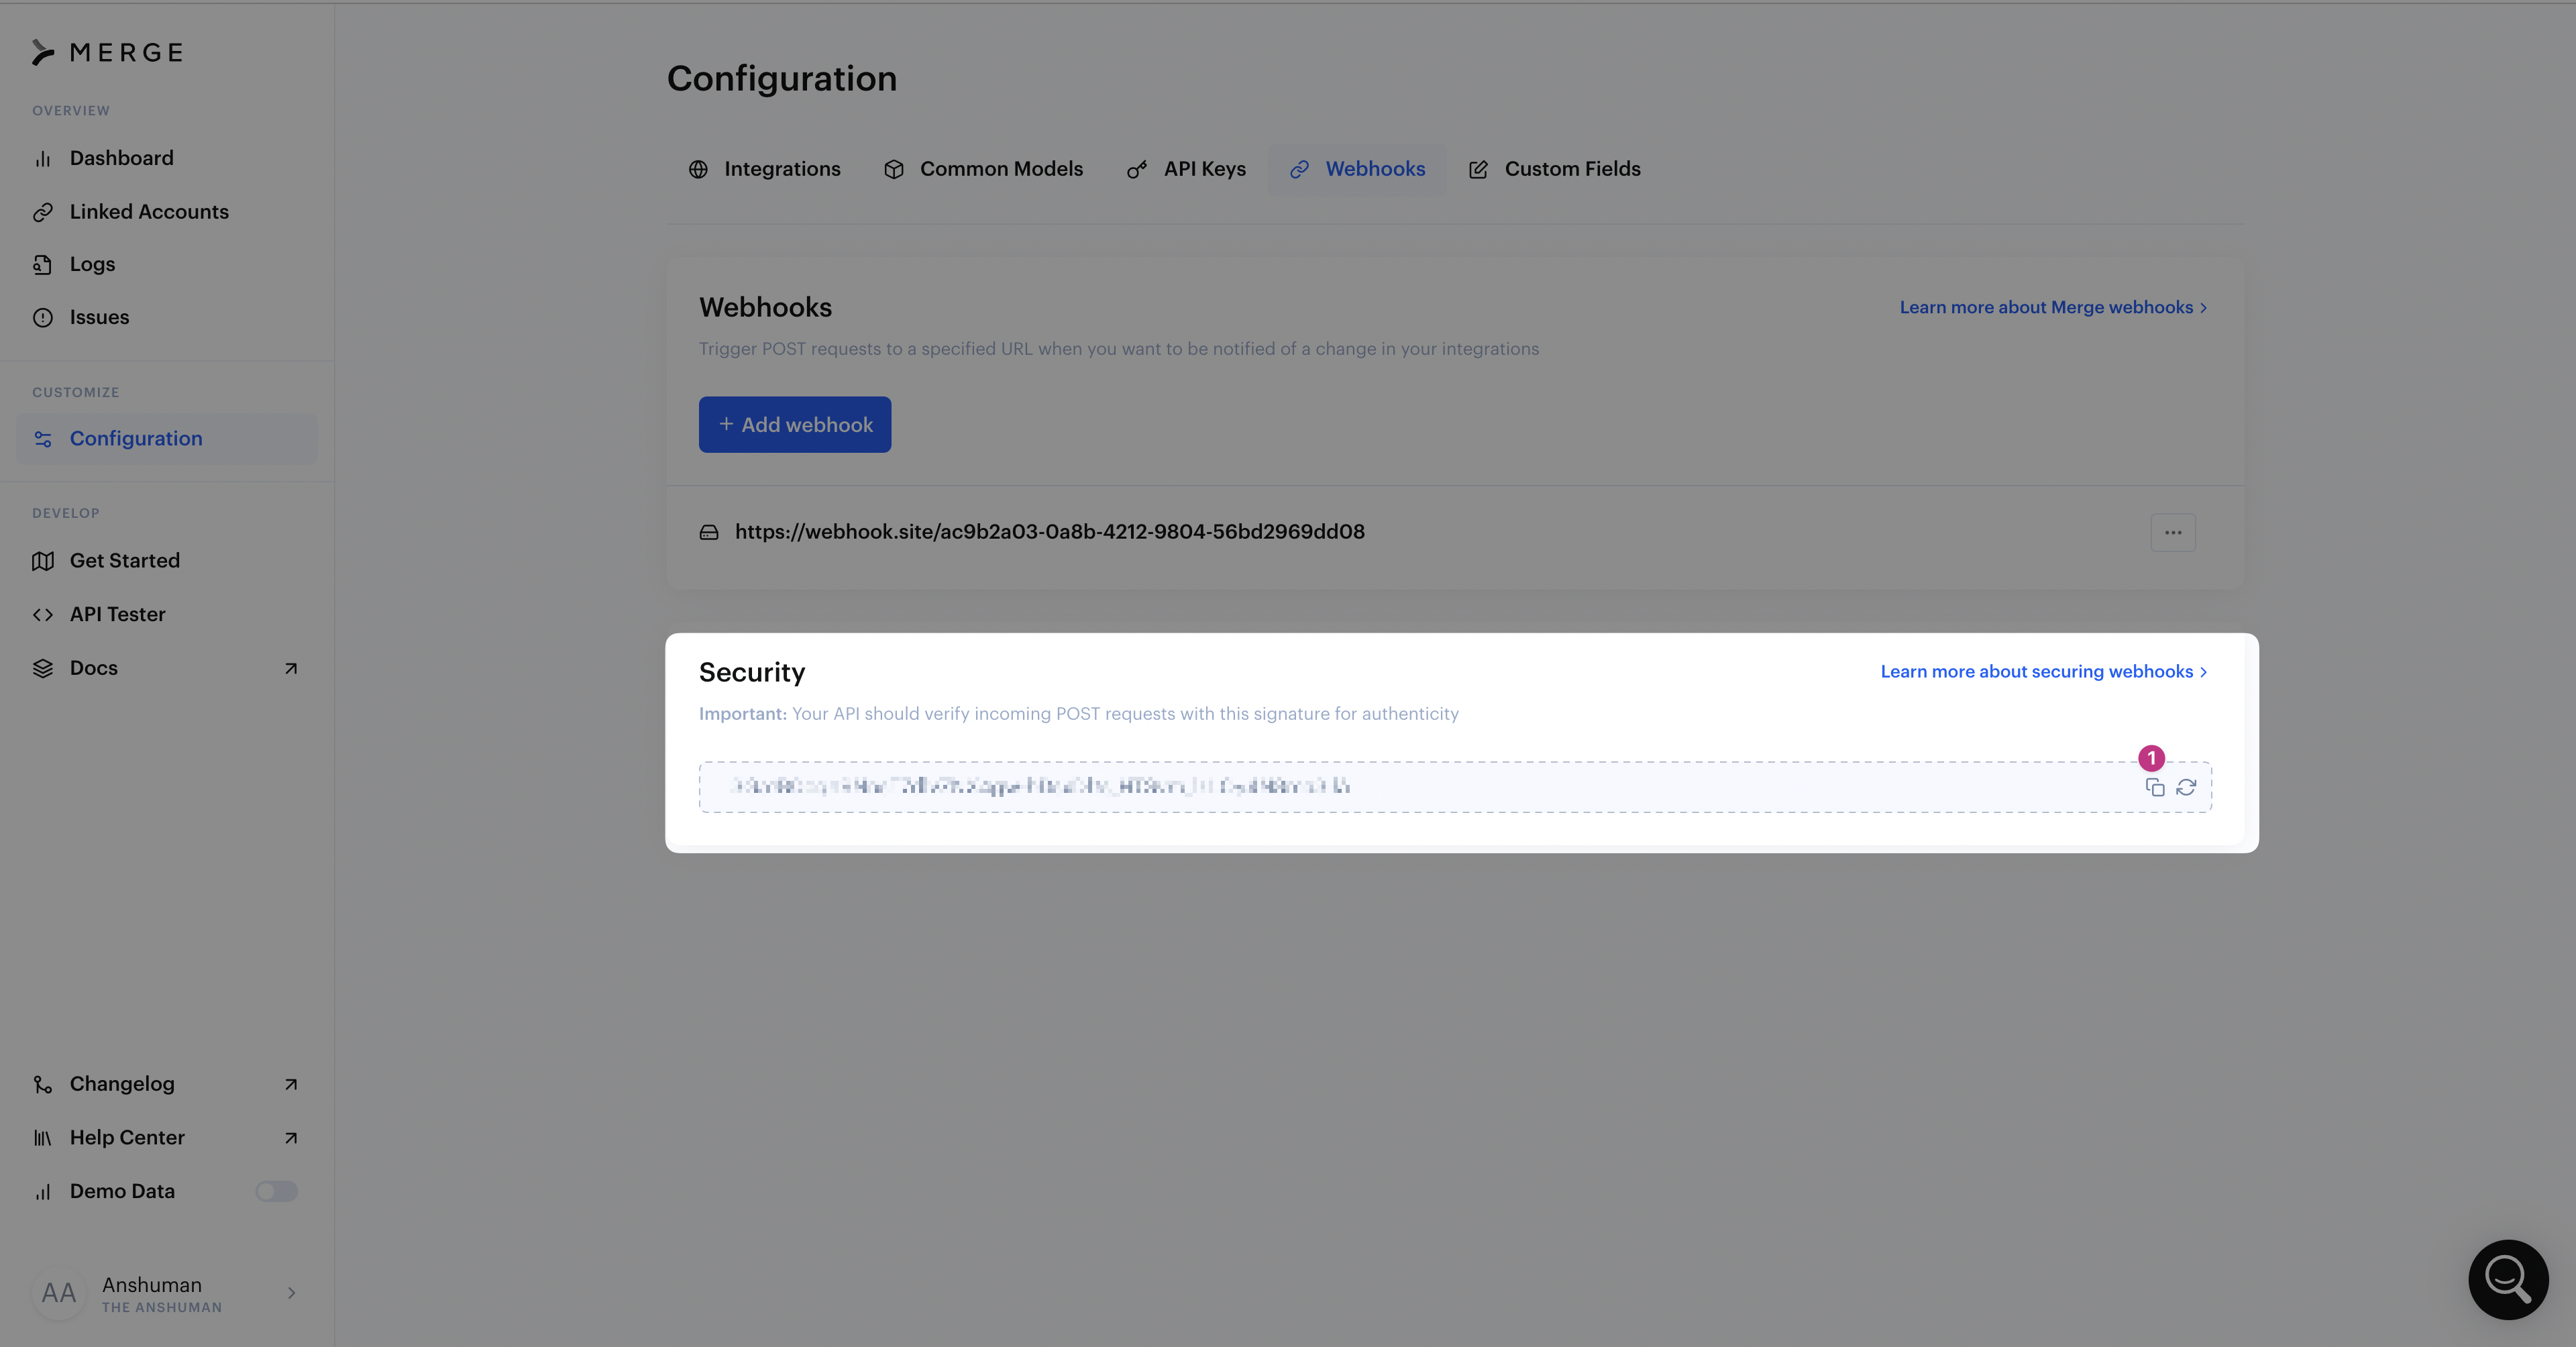
To copy your webhook signature, open the Webhooks configuration page on your Merge dashboard and copy the token from the Security section to use later.
The example below shows how to secure your webhook in Node.js and Express.
Run npm i --save express to install Express.
Conclusion
In this guide, you learned to set up a Merge account, retrieve the access key from your Merge dashboard, and integrate it with your Zenefits account. Using Merge’s Unified API, you also worked through different ways to access company and employee information from your Zenefits account. Lastly, you set up webhooks to stay up-to-date with data updates, including securing your webhook endpoint.
You can read more about the Merge HRIS API on our documentation page, which explains all domains and endpoints.
Merge’s unified API for payroll, HR, recruiting, accounting, and ticketing solutions helps you build HR integrations with Zenefits and more than thirty-two other integrations through a single API. You can link as many integrations—even from different providers—to your Merge account and access all the data with one API.

.png)

.png)

