Table of contents
How to get your Jira API key (5 steps)
Jira, a widely-used issue and project tracking software, helps a wide range of teams manage bugs, critical tasks, and more through an intuitive interface.
While the platform’s out-of-the-box features and capabilities are already powerful, they can provide even more value when you integrate Jira to your other internal applications or when you connect your product to customers' instances of the application.
Regardless of your integration use case(s) with Jira, you’ll need to get your API key in the platform. We’ll help you do just that below!
{{this-blog-only-cta}}
1. Create your account or sign in
You should be able to create your account or log in within Jira’s homepage.

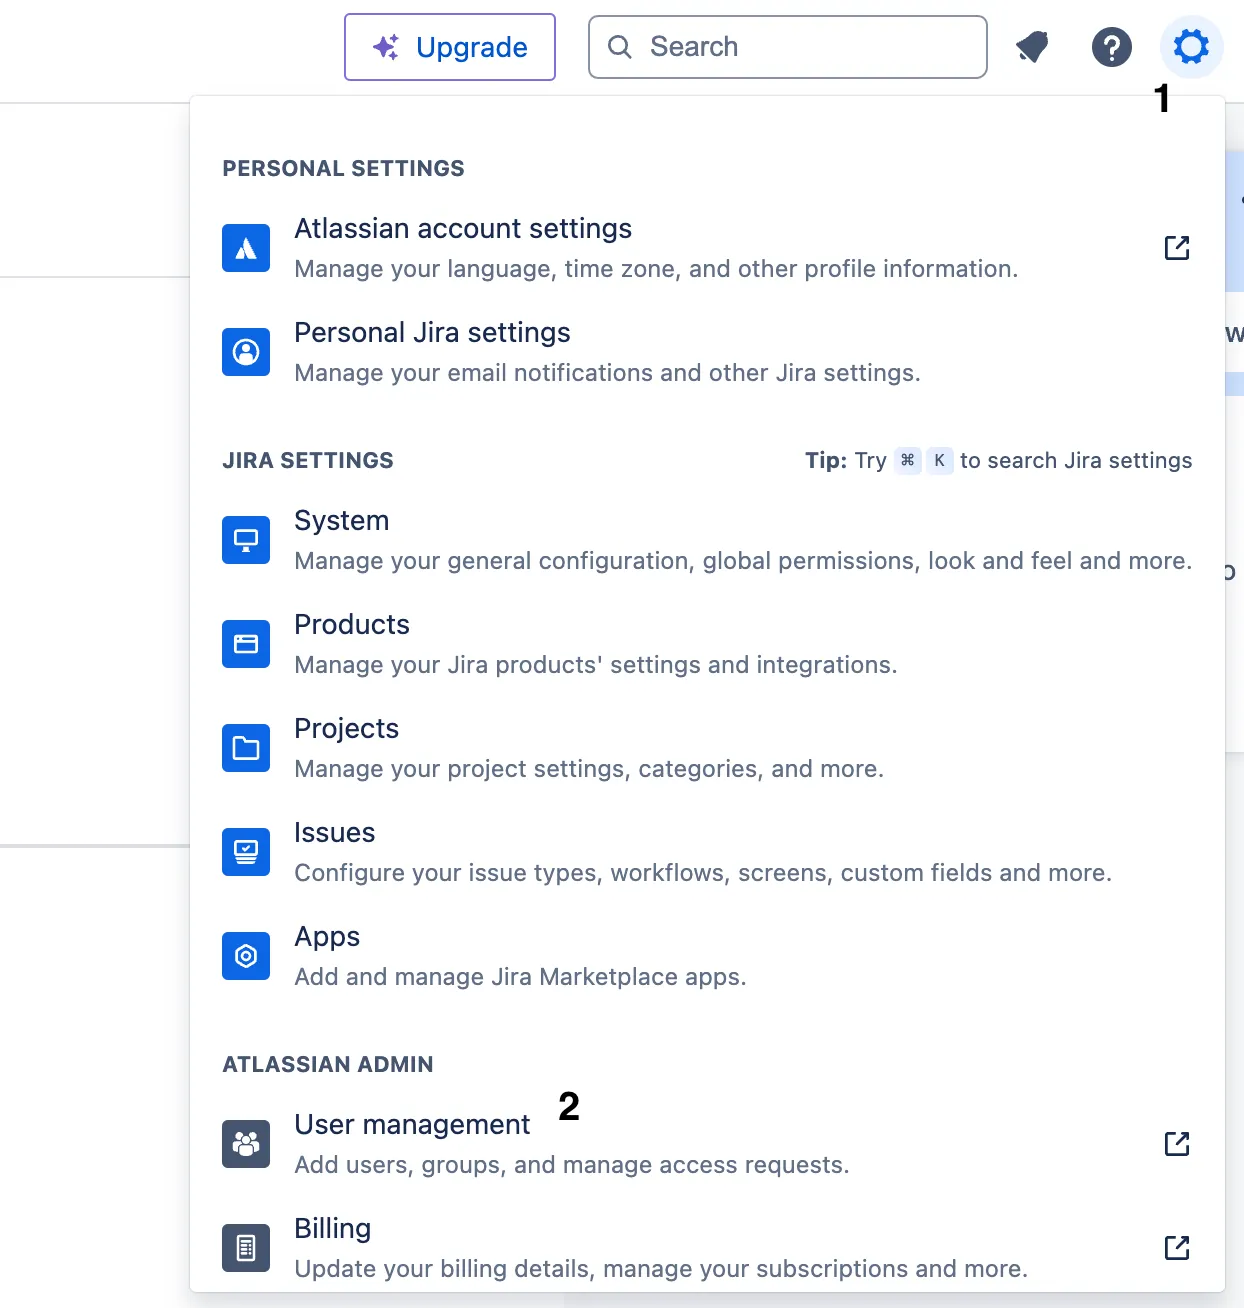
2. Select the settings icon and then click on “User management”
You should see a circular icon next to your initials. You can click on it and then click “User management” to reach your admin page.
3. Click on the “Settings” tab and then select “API keys”
By default, you’ll land on the “Directory” tab. Hover to “Settings” and then select “API keys.”

Related: A guide to generating Confluence API tokens
4. Select the “Create your API key” button
You should now see a button that lets you create a new API key. Go ahead and click it.

5. Create your API key
Finally, you can give your API key a unique name and assign it a specific expiration date (which has to be within a year).
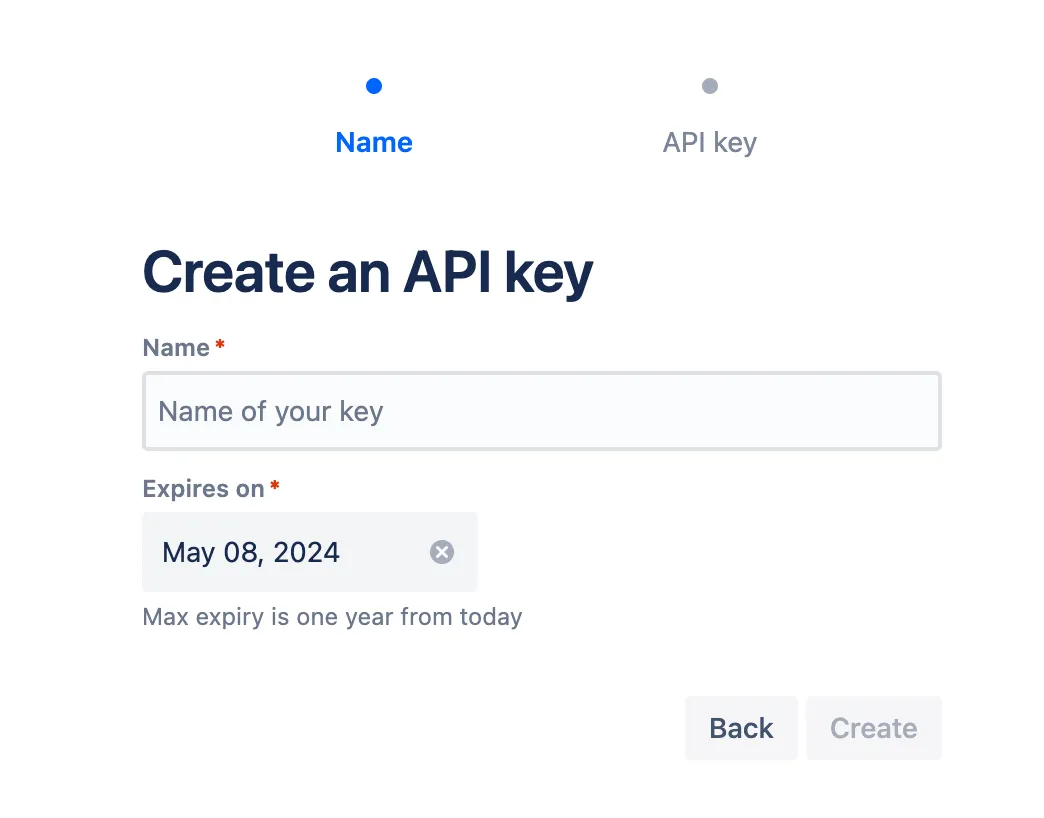
After you’ve completed both fields, you can go ahead and create the API key!
Note: Remember to store the key in a safe place so that it doesn’t get compromised.
Related: How to get your access token in Asana
What else to consider for building to Jira’s API
Before building to Jira’s API, it’s worth familiarizing yourself with the following.
Pricing
Jira offers four different pricing plans: Free, Standard, Premium, and Enterprise.
Each comes with unlimited goals, projects, tasks, and forms. Moreover, they all come with reports and dashboards.
However, their more advanced plans also come with higher quality support (e.g., 24/7 support for critical issues), more granular user roles and permissions, AI features (e.g., Atlassian Intelligence), and more.
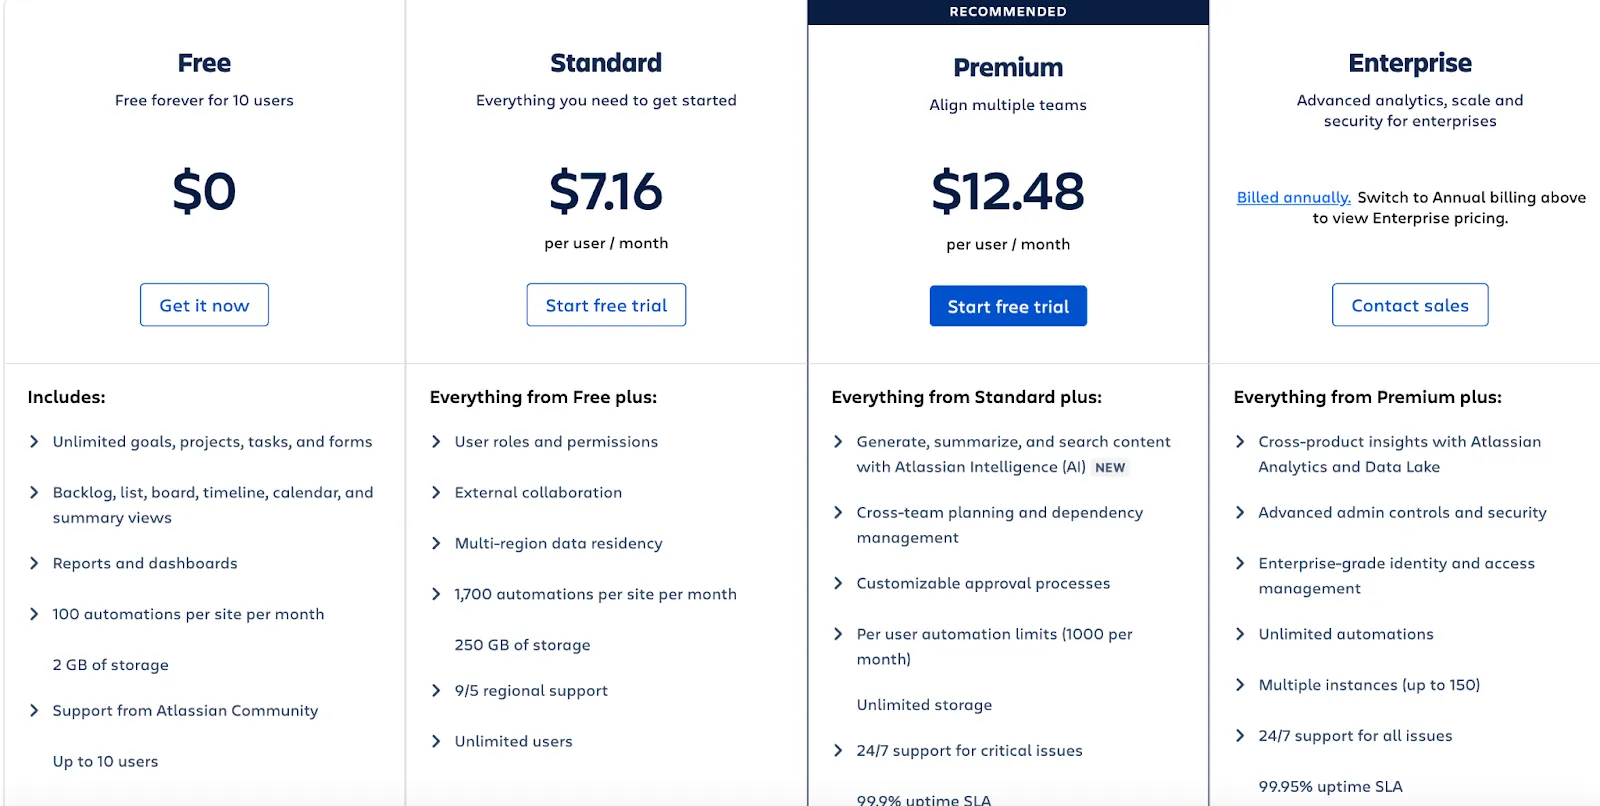
Their pricing page also allows you to filter by different numbers of users and by monthly or annual plans, both of which can give you a better sense of how much you can expect to pay.
Learn more about Jira’s pricing plans.
Rate limits
Jira doesn’t share their specific rate limits. According to their documentation, “REST API rate limits are not published because the computation logic is evolving continuously to maximize reliability and performance for customers.”
That said, Jira's rate limits vary depending on the source of the request, which they can determine based on the authentication method that's used. For example, if an app is making a request, it’ll have a different rate limit (or “Cost Budget”) than requests that come from an app that’s based on a user interaction.
Errors
Like any API interaction, you can expect to receive a wide range of API response errors. Here are just a few examples:
- 400 Bad request: there was an issue on the client side, which can be due to missing required fields, malformed URIs, incorrect field values, etc.
- 401 Unauthorized: the request wasn’t authenticated, which can be due to missing or incorrect authentication credentials
- 429 Too Many Requests: you’ve hit the rate limit of API requests in a given window and can’t make more requests until the current window elapses
- 503 Service Unavailable: the server can’t process the request because it’s temporarily overloaded or undergoing maintenance
Final thoughts
Jira is a popular project management solution, but it isn’t the only one your clients use. They may also be using ticketing tools like Trello, GitLab, or GitHub—among countless others.
You can offer integrations with any of the tickets solutions your clients have by building to Merge’s Ticketing Unified API.
To learn more about the unified API, and Merge’s platform more broadly, you can schedule a demo with one of our integration experts!




.png)
.png)

