How to GET All Issues with the Jira API in Python

Jira is one of the best-known tools in the software industry for tracking work items. Originally created for bug and issue tracking, it has evolved into a more general workflow management tool. Jira can be used for IT service management, project management, planning, and tracking bugs. It's also flexible enough to let you track custom workflows like HR management processes or sales processes.
As an increasing number of people in your organization use Jira to track more things, you'll likely want to use APIs to interact with it to extract data automatically. One of the benefits of Jira is that its REST API lets you get issues from different projects. You can use this data to analyze issues from different projects and create centralized data analytics.
In this article, you'll learn how to use the Jira REST API to write issues from Jira into a CSV file by using a simple Python script and by using a Jira webhook with a Python Flask application. You can get the sample code used in this tutorial on the following GitHub repository.
{{this-blog-only-cta}}
Getting Issues from Jira Using Python
This tutorial shows you how to interact with Jira to extract data from your project and save them in a CSV file.
Jira API Authentication
The Jira REST API has security measures to protect your data. Its different authentication options depend on the configuration of your Jira instance. A common authentication method is using an API token, which is what this tutorial uses.
To access your Jira instance with this method, you need to create an API token. Go to the following URL, click on API tokens , and then click on Create API token.
In the pop-up that appears, type <code class="blog_inline-code">Jira-Python-Token</code> as the label, and click on Create.

A new pop-up will appear that contains the token but with it hidden. Click on Copy, and save this token somewhere in your notes because you will need it later.

Keep the token safe since it can give others access to your Jira instance with your permissions.

Related: How to get attachments from Jira
Preparation
To follow along with this tutorial, you'll need Python installed on your local machine. You'll also need to create a new project in your Jira instance with some issues with which to test your script.
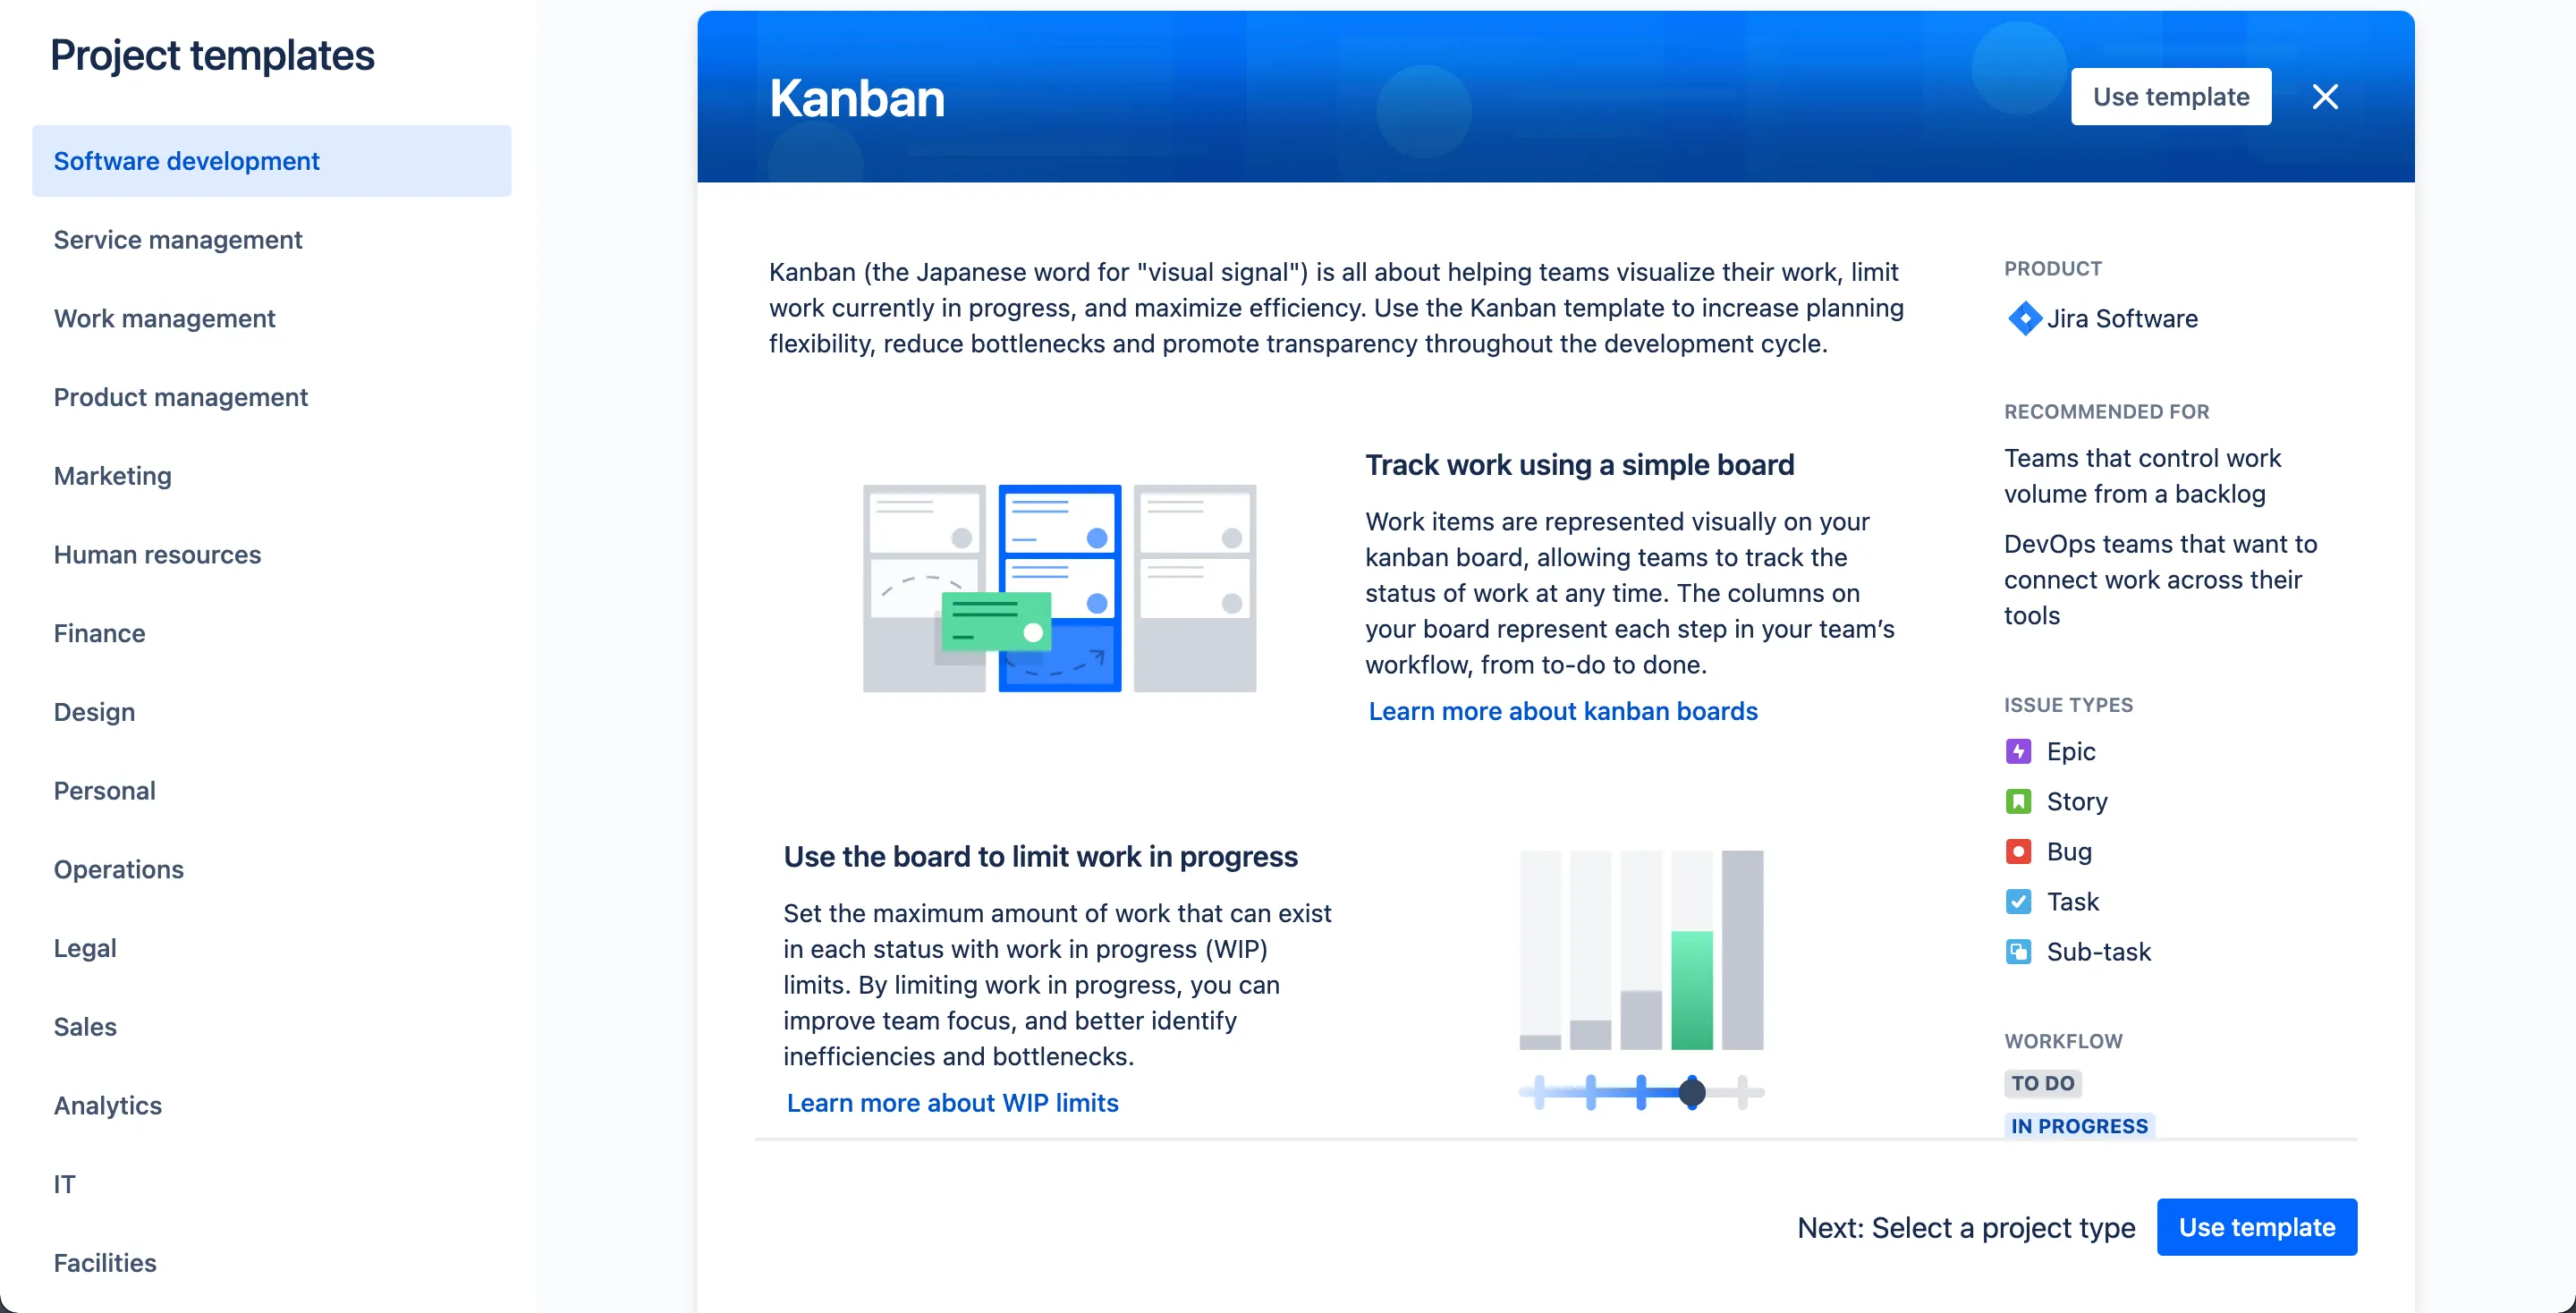
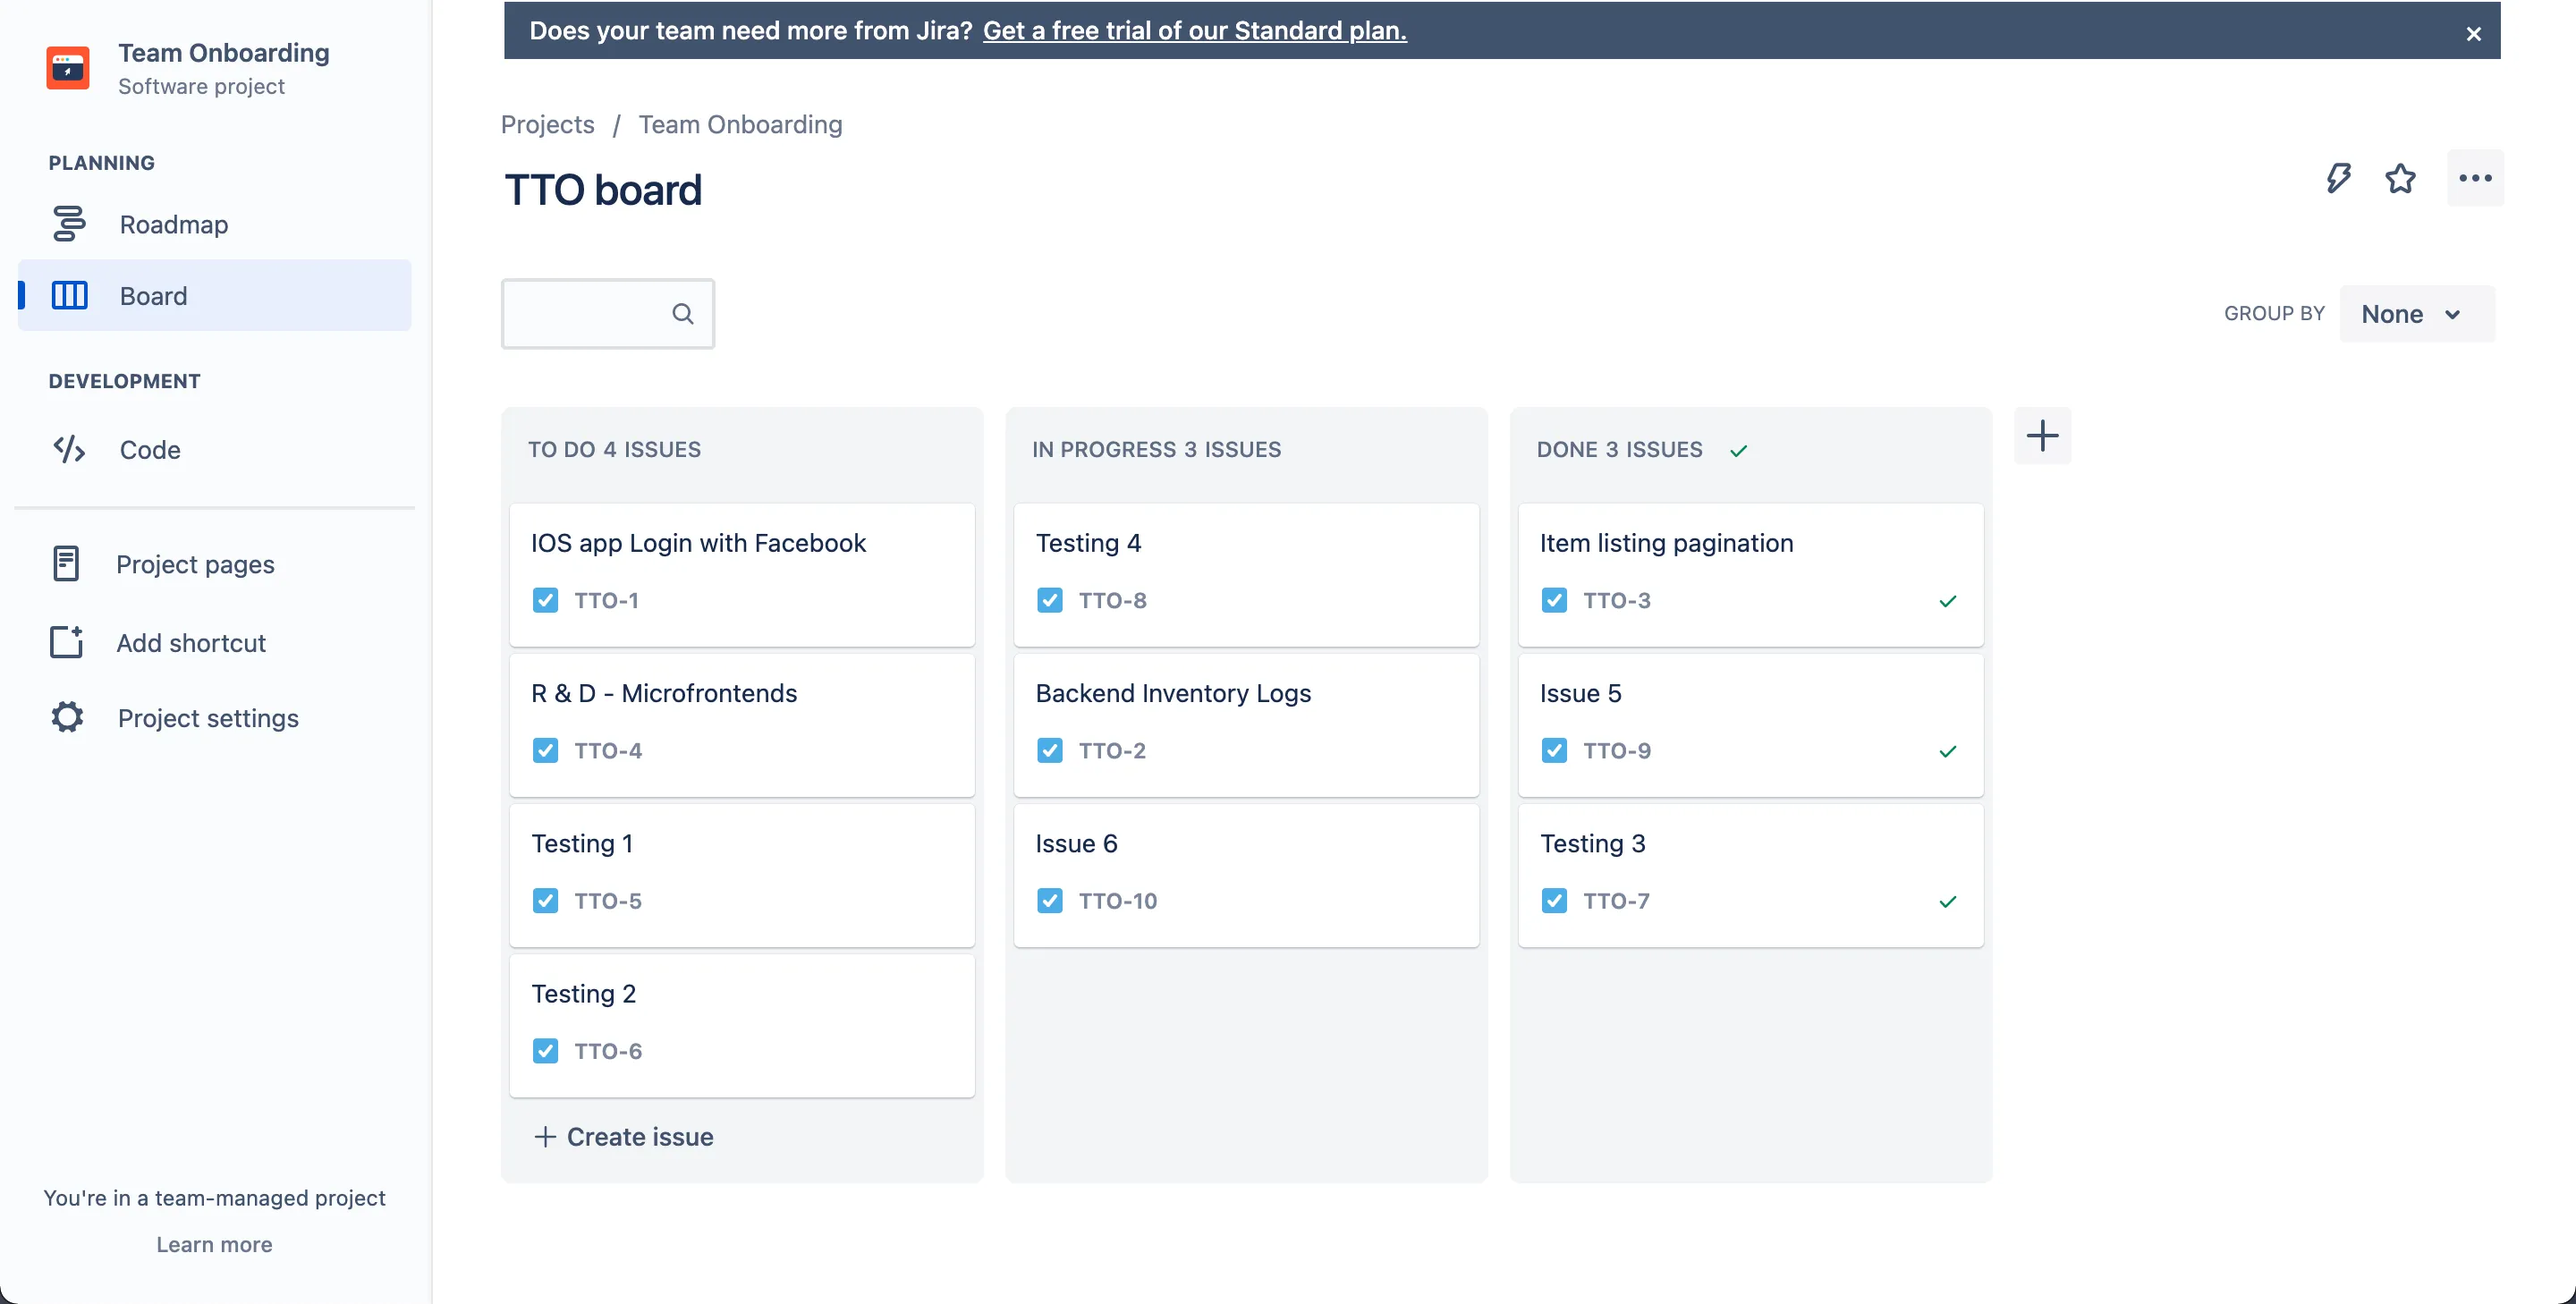
Go to Projects > Create Project and choose a template that you would like to use. For this tutorial, choose Software Development as the template and Kanban. Next, click on Use template and Select a team managed project.
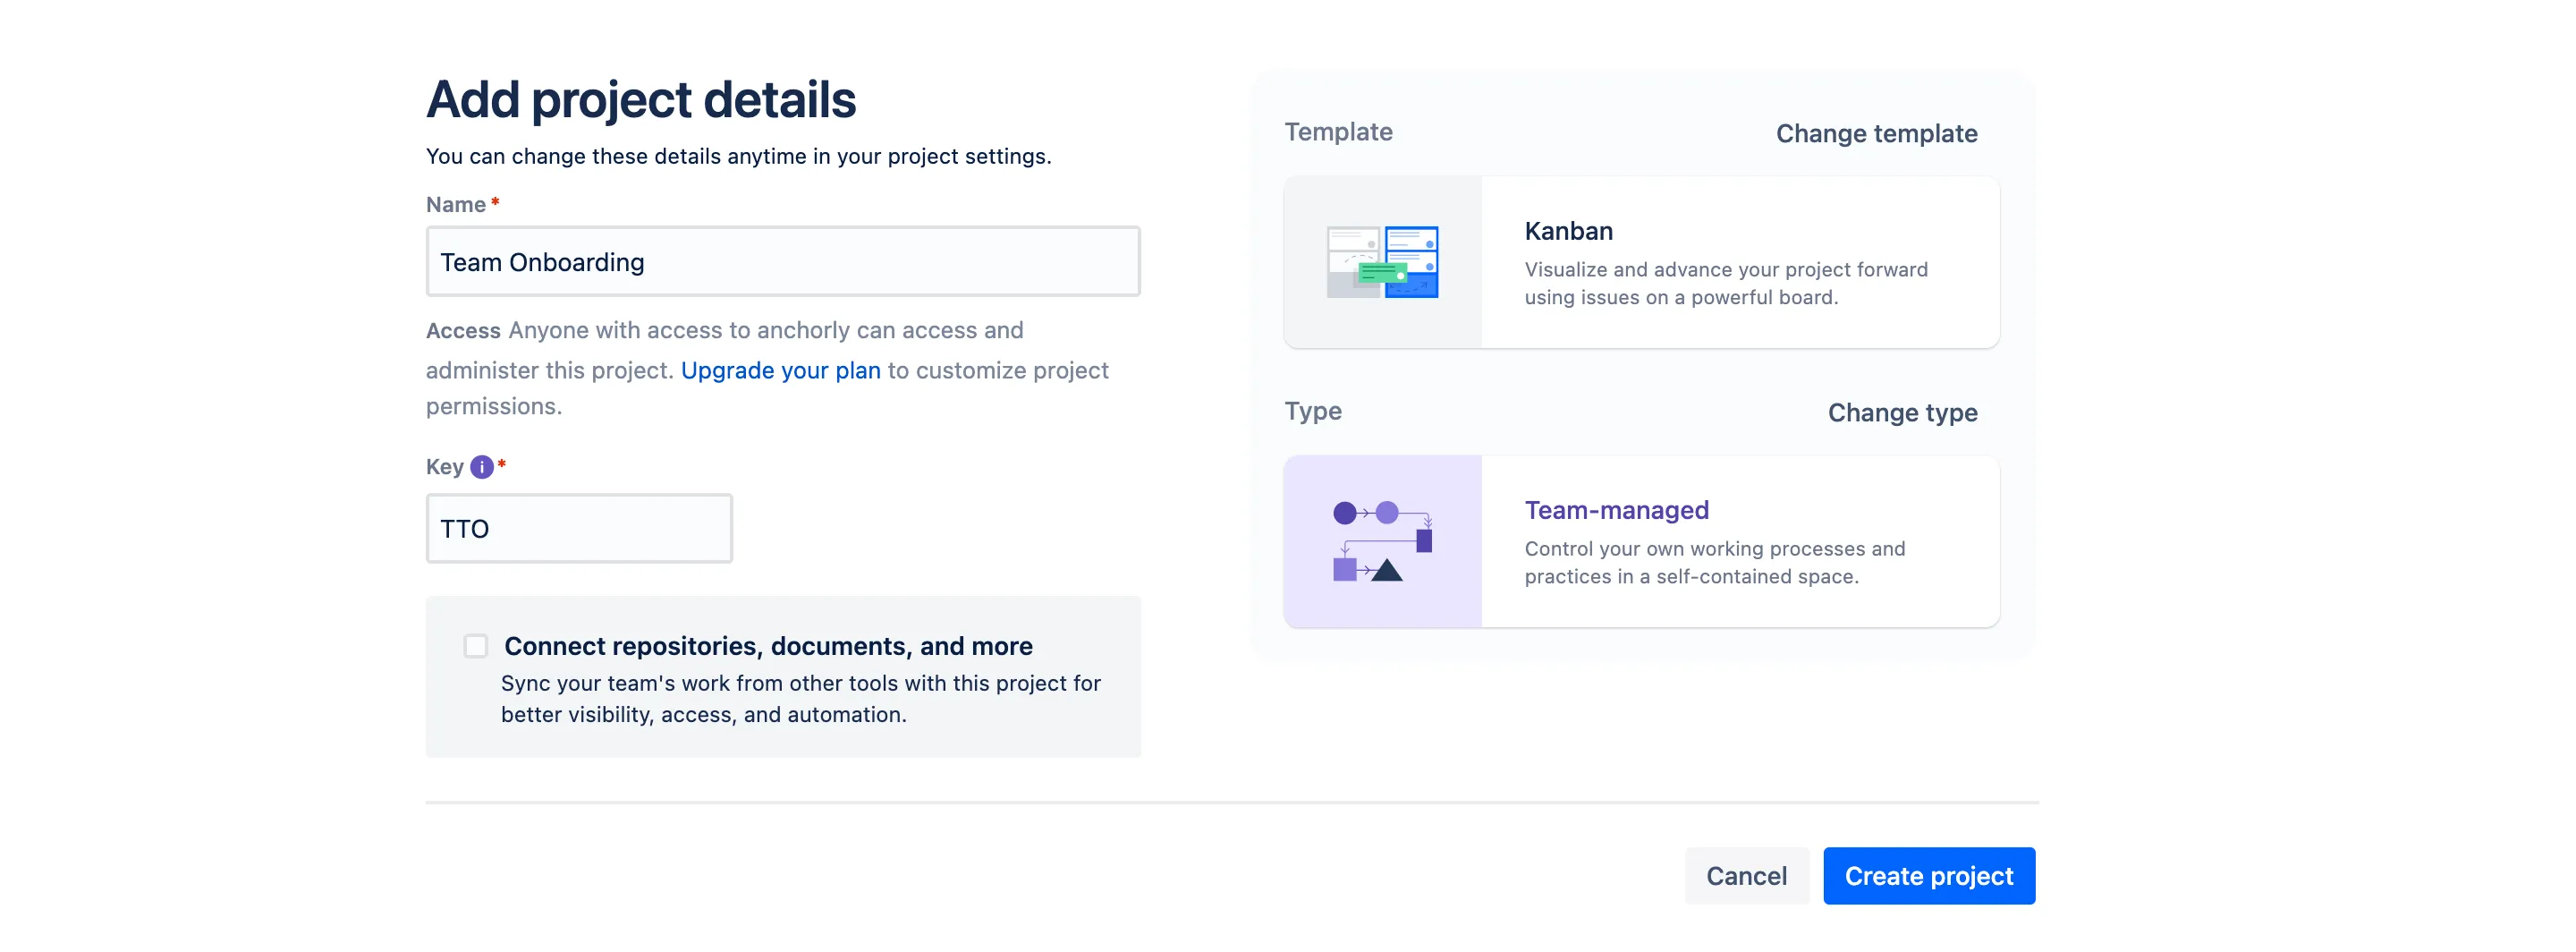
Set TTO as the project key and name your project "Team Onboarding".
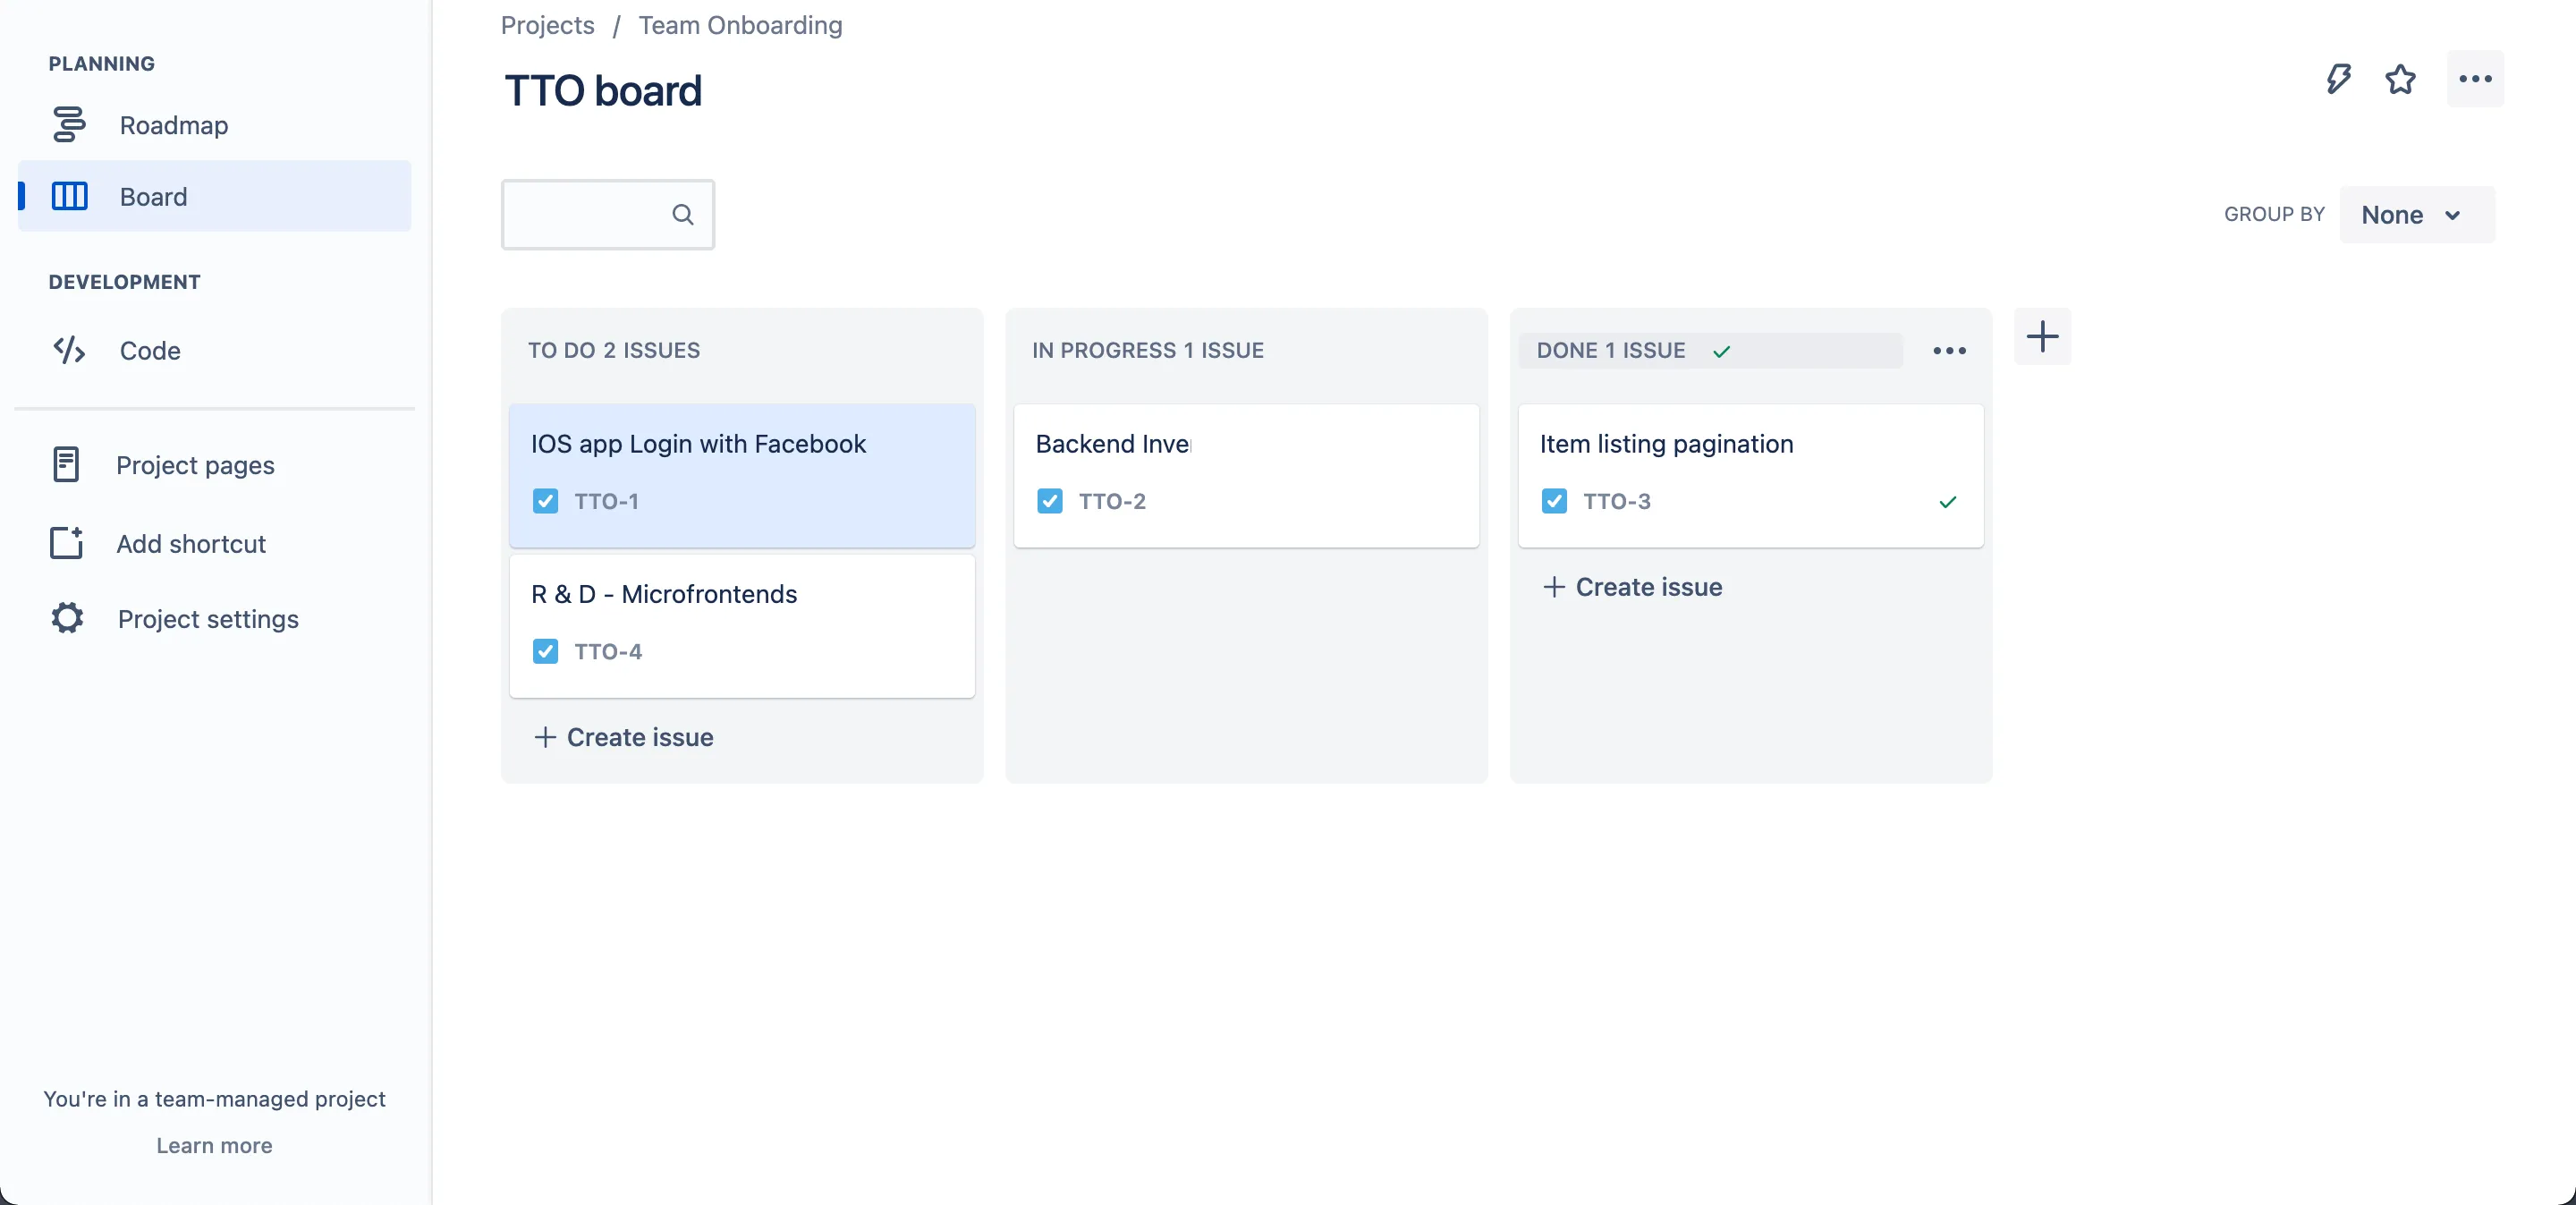
Next, create a few issues in the project.
Now that you have your project set up, you'll write some code to interact with Jira using Python.
Related: The steps for fetching projects from Jira via Python
Reading Data from Jira
Open your terminal and install the following Python library using pip.
You will use the requests package to access Jira using the search REST API endpoint.
Create a new Python file named JiraBoard.py and paste the following code into it:
The above code does an HTTP GET request using the requests library to the Jira search API. In the header of your request, you specify the type, which is <code class="blog_inline-code">application/json</code>, and in the parameters, you put the Jira query language as <code class="blog_inline-code">jql</code> with the value of the <code class="blog_inline-code">project : {project-key}</code> that you defined when creating the Jira project . Then, you add the authentication using the <code class="blog_inline-code">HTTPBasicAuth</code> function that takes as parameters your username, which is your email, and the token that you created in the previous step.
The request result is a <code class="blog_inline-code">string</code> stored in the response variable, which is transformed into a JSON format using the <code class="blog_inline-code">json.load()</code> method. All issues are added to the <code class="blog_inline-code">selectedIssues</code> object, and they are saved into a CSV file named <code class="blog_inline-code">Issues.csv</code>. <code class="blog_inline-code">JiraBoard()</code> is the function that is called at the end to run all of these steps.
When you run the <code class="blog_inline-code">JiraBoard.py</code> code, you should see an <code class="blog_inline-code">Issues.csv</code> file created in the same directory as your script. When you open the CSV file, it should have the details of your Jira issues there.

Jira Webhook
Webhooks are used to synchronize data between two systems to make the data flow between these systems in real time. For example, if you have Freshdesk or Zoho as a CRM, you might want to integrate it with Jira to push issues reported by your customers to your board on Jira for the technical team to investigate.
To create a webhook using Jira, you first need to have a public URL of our application. When you create or update an issue, Jira will push these changes to the webhook URL that you will specify. To do so, you either have to host a Python application on the cloud, or you can expose your application publicly. To keep it simple, you won't be hosting your application on the cloud for this tutorial; you'll use a tool to expose your application publicly.
Flask Application
First, create a flask app using the <code class="blog_inline-code">JiraBoard()</code> function from the previous step. To start, install the following library:
Next, create a file called <code class="blog_inline-code">app.py</code> and paste the following code into it:
Note: Make sure that the files <code class="blog_inline-code">JiraBoard.py</code> and <code class="blog_inline-code">app.py</code> are located in the same directory.
The above code defines a simple Python flask application with two HTTP routes. The first route is the default one, which returns a simple welcome text. The second route is <code class="blog_inline-code">/webhook</code>, which will run the function <code class="blog_inline-code">JiraBoard()</code> that will collect and save the Jira issues locally.
Open your terminal, and run the following command to run the flask application:
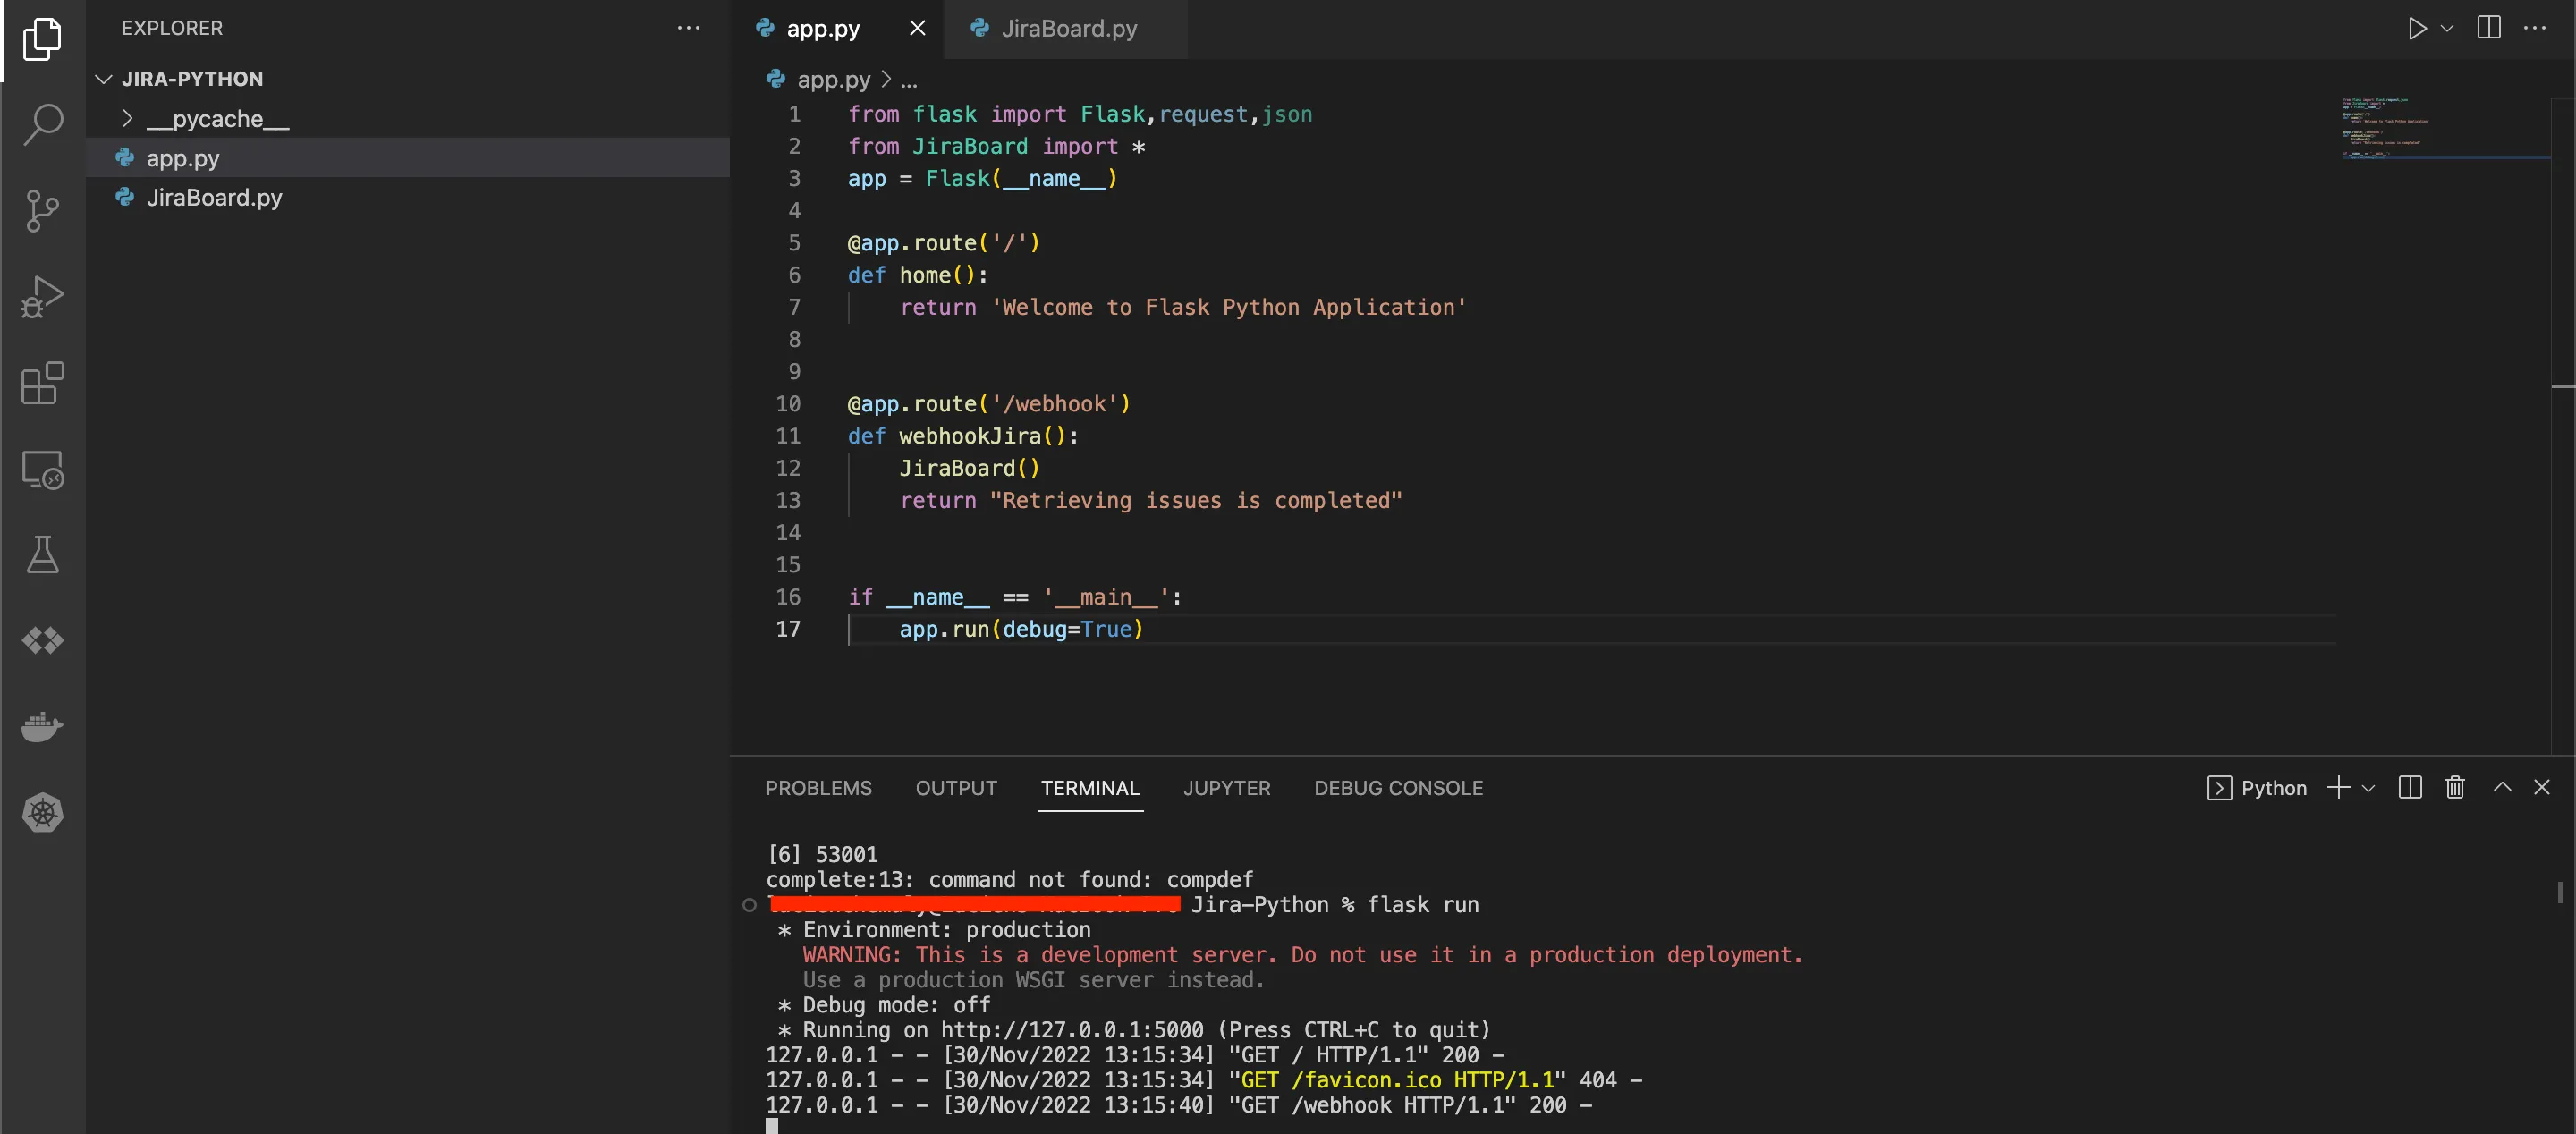
Your application is now running on your localhost, which is http://127.0.0.1:5000/. When you open the URL in your web browser, you should see this home page:

Next, go to the webhook URL on your browser, which is http://127.0.0.1:5000/webhook. You should see the message Retrieving issues is completed, meaning that the code finished and the <code class="blog_inline-code">Issues.csv</code> file has been generated:


Exposing Your Application Publicly
Now that you have your application ready, you need to expose the application publicly so you can use it with the Jira webhook. To do so, you need to set up ngrock on your machine following the instructions from their website.
After you finish installing ngrock, open your terminal and run the following command:
After running the command, you should see the URL that will redirect your localhost:5000 port to a public URL. Check the forwarding field and open the link that ends with <code class="blog_inline-code">.ngrok.io</code> in your browser. You should be able to see the application on the public link:


Next, open <code class="blog_inline-code">/webhook</code> using the public URL. The <code class="blog_inline-code">Issues.csv</code> file containing your Jira Issues should have been generated.

Create a Webhook with Request Bin
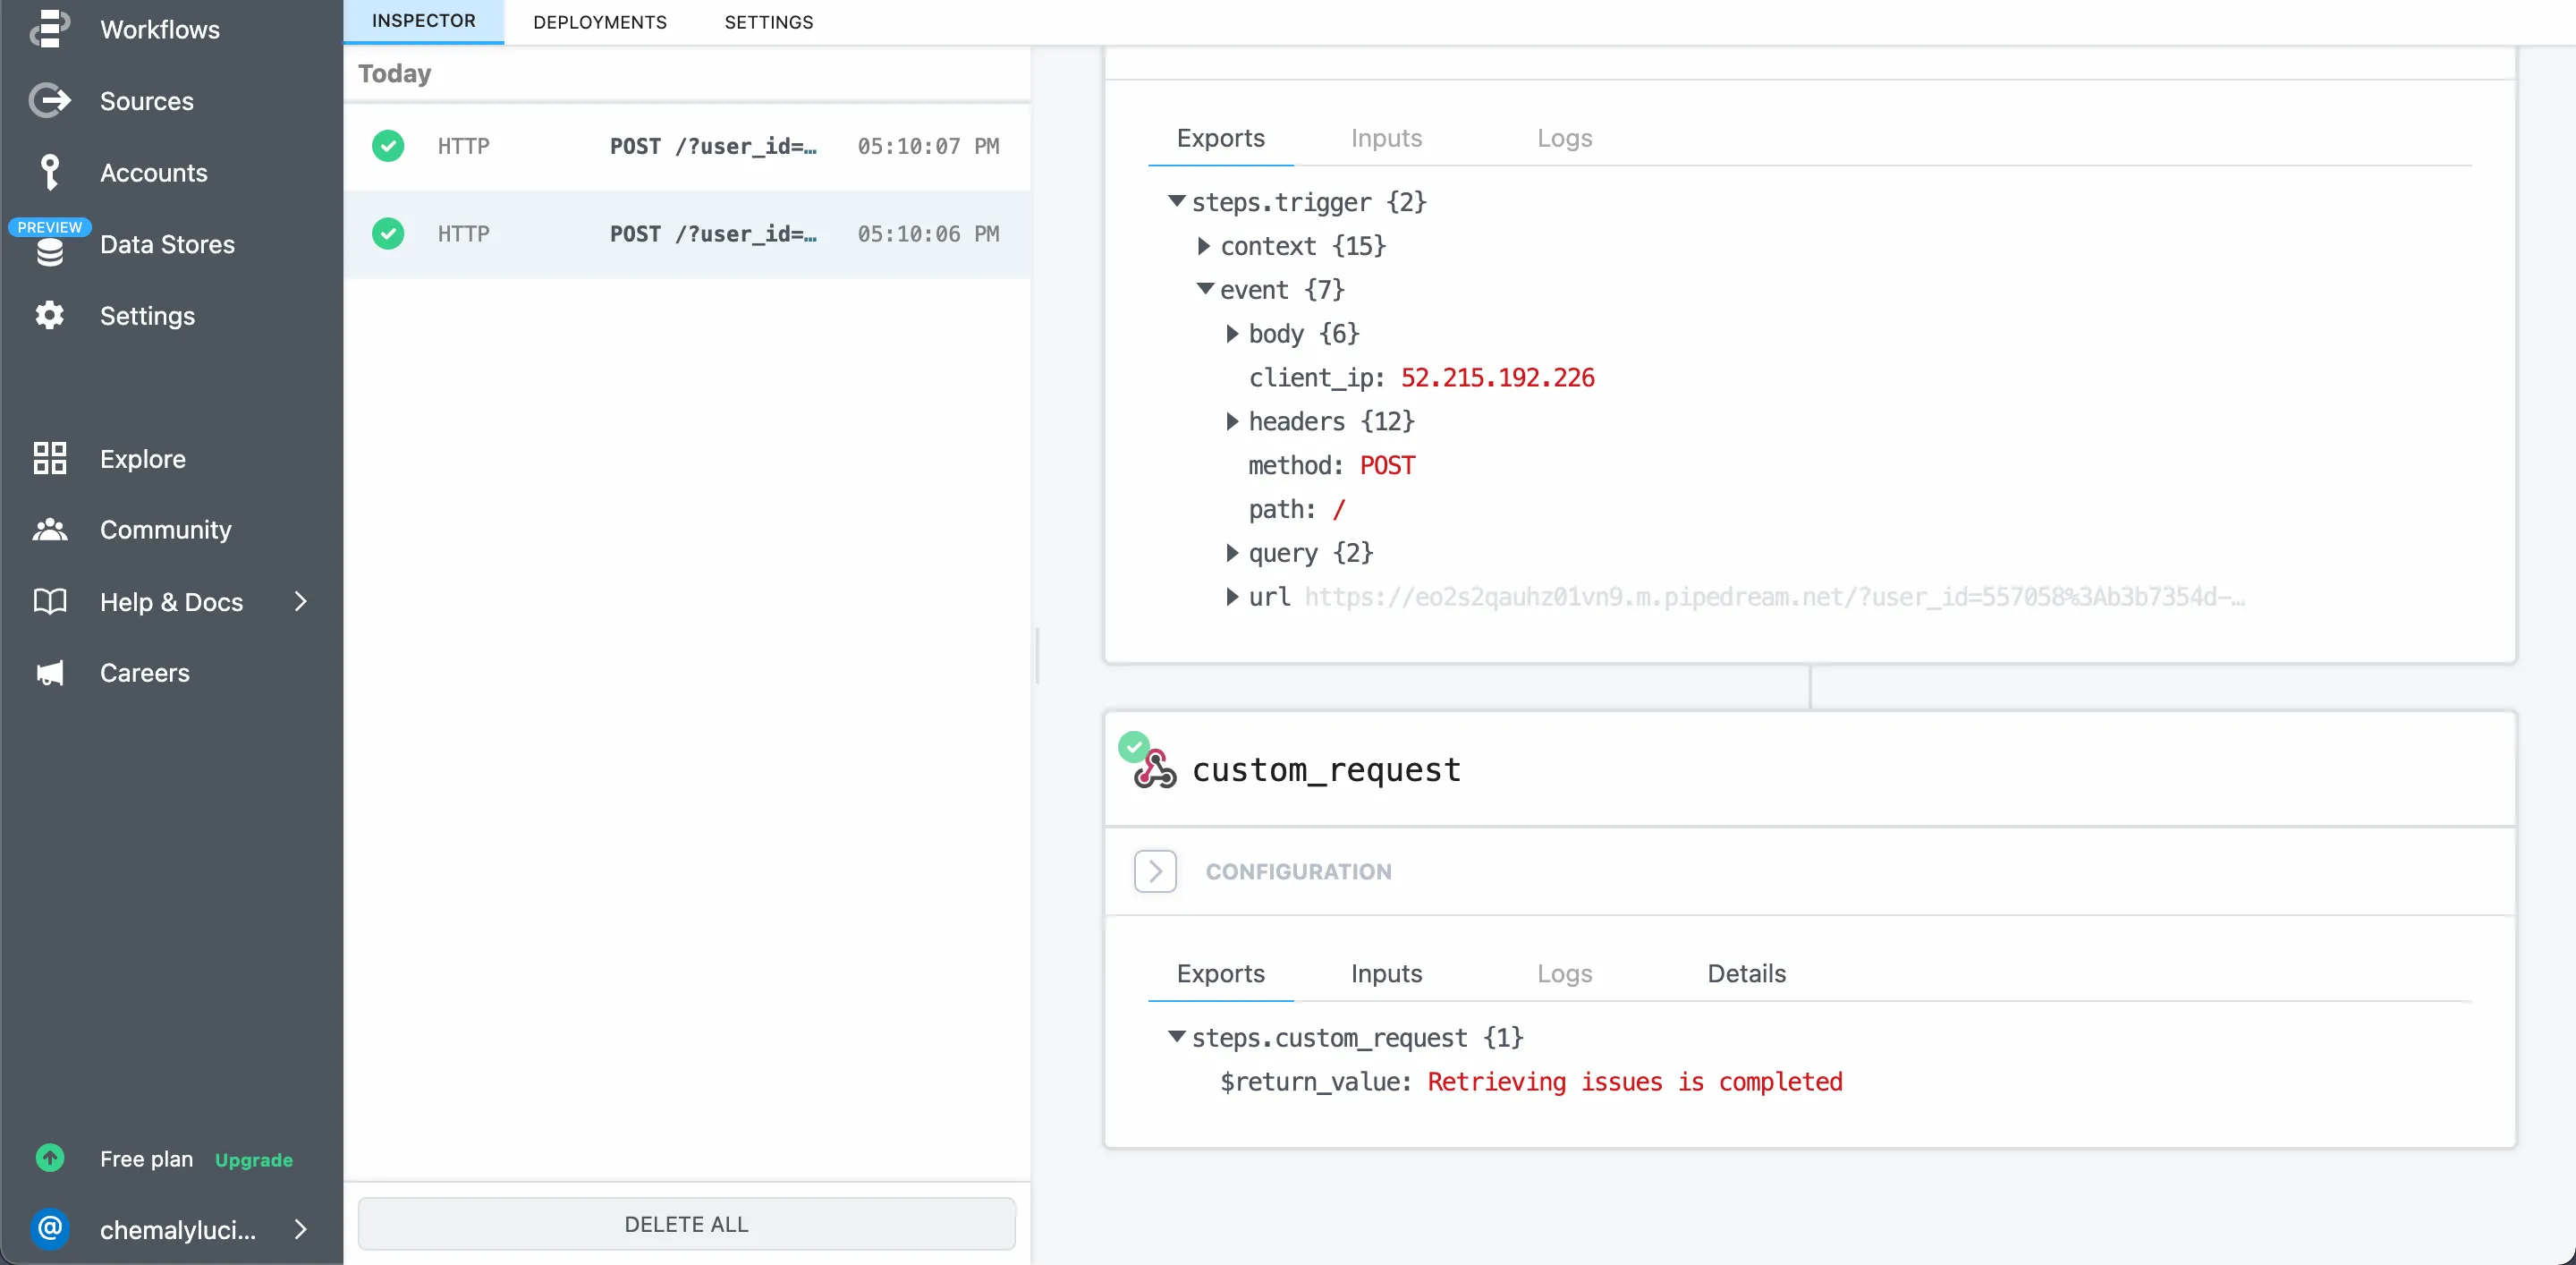
When a change happens on your Jira board, the change will call a webhook, then the webhook will initiate a workflow that you'll define, which is, in this case, calling your local Flask application. To do so, you will use RequestBin, a tool used to create webhooks.
To start, create an account, and log in to the dashboard.
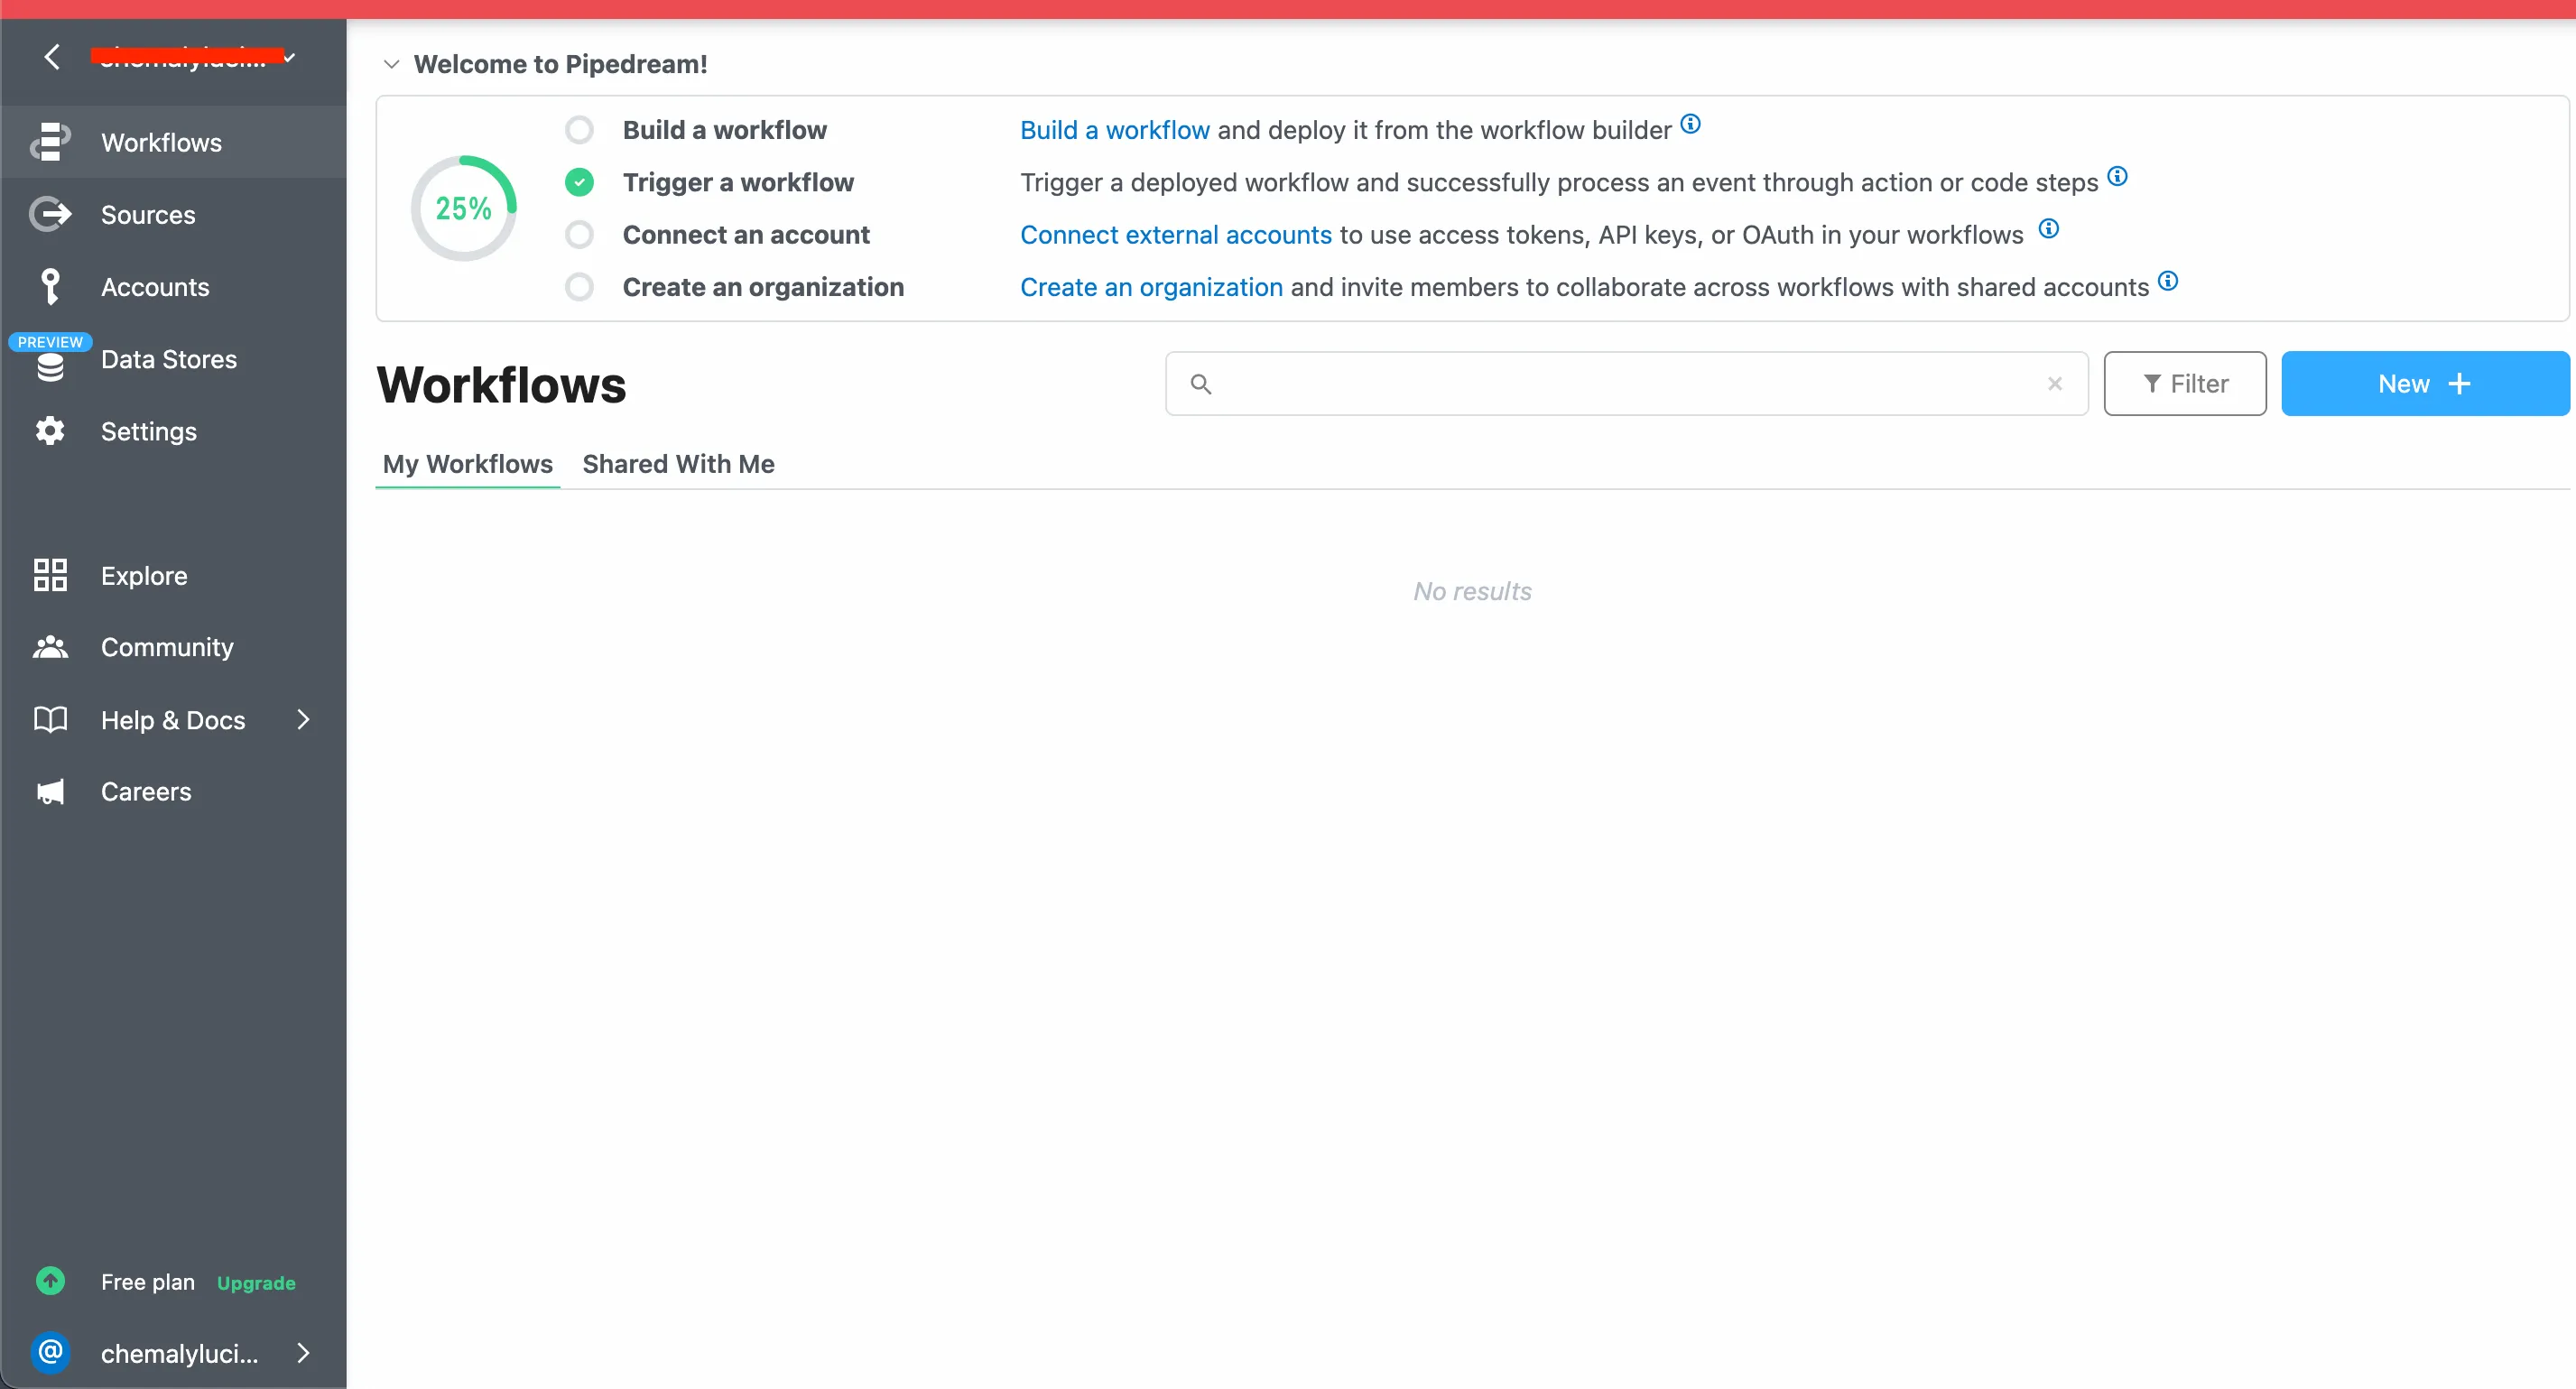
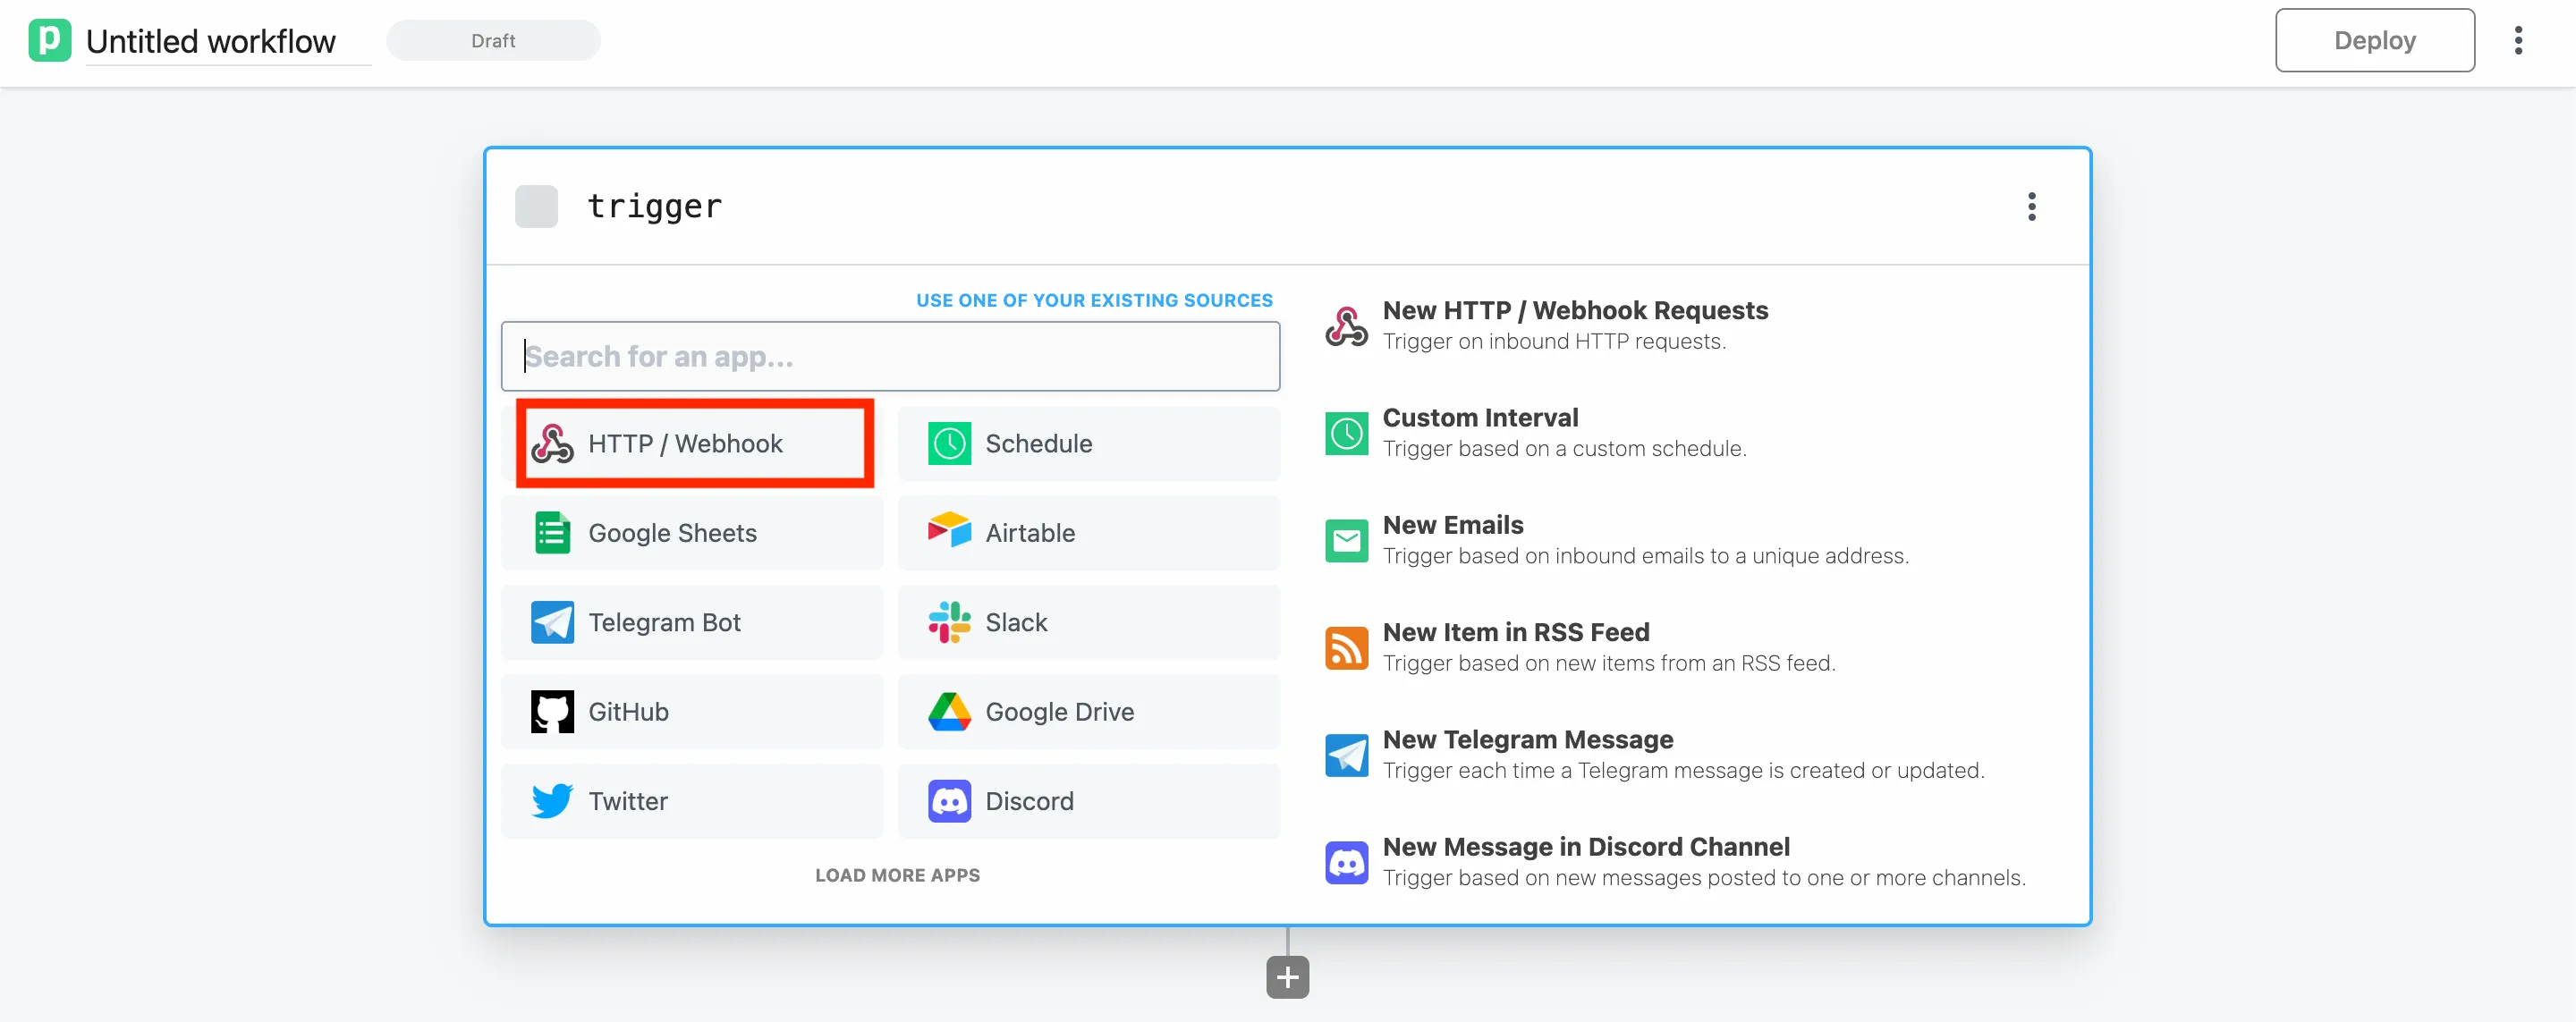
Go to the workflow section, click on New +, and select the HTTP/Webhook option.
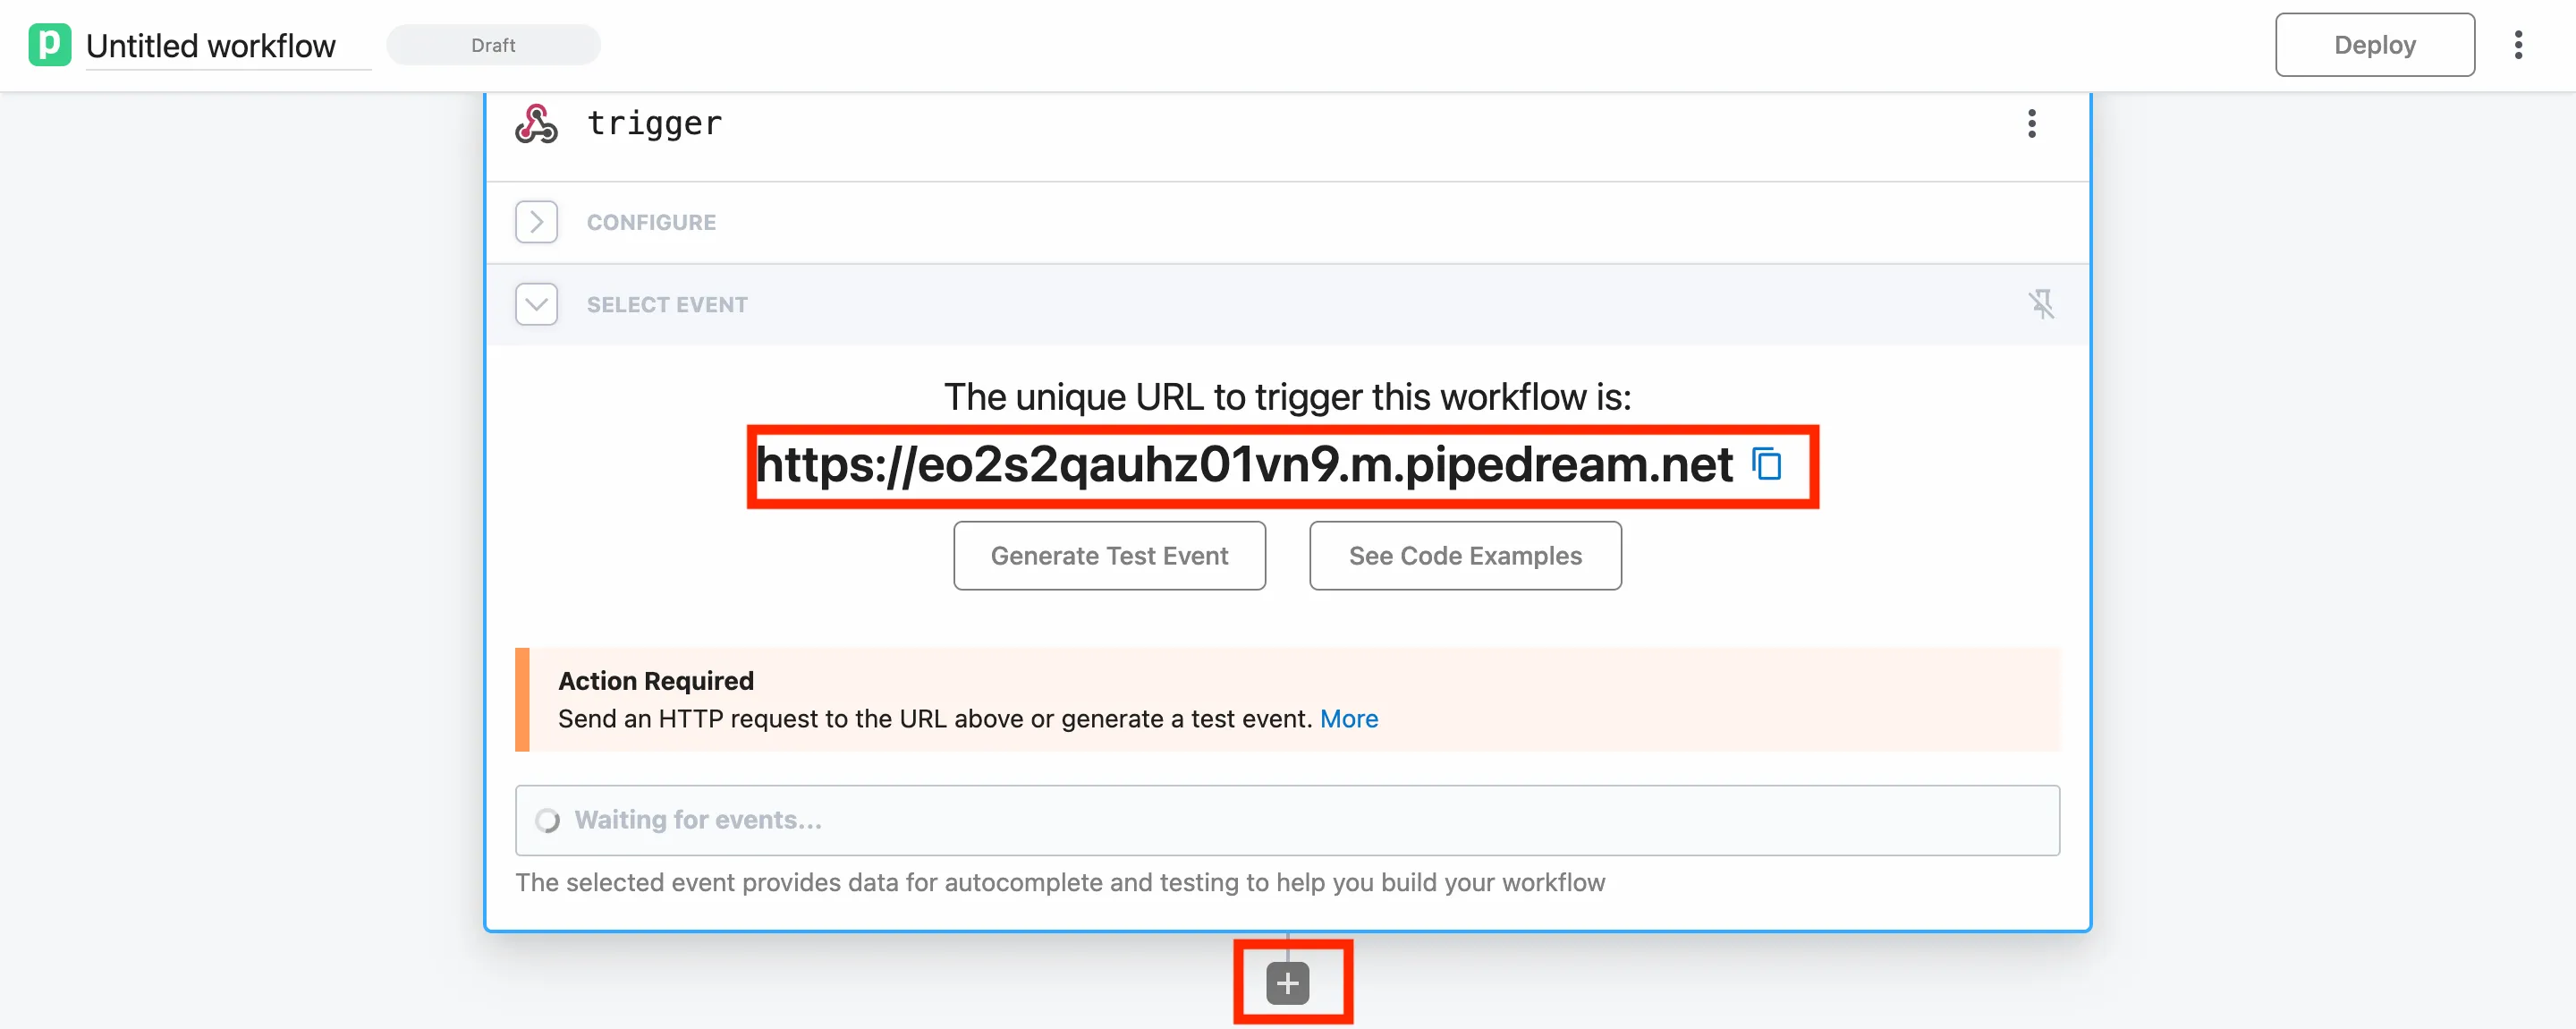
Next, select HTTP Requests and click on Save and continue. A unique URL will appear that you'll use to trigger the workflow. Take note of this URL because you'll need it in the next step.
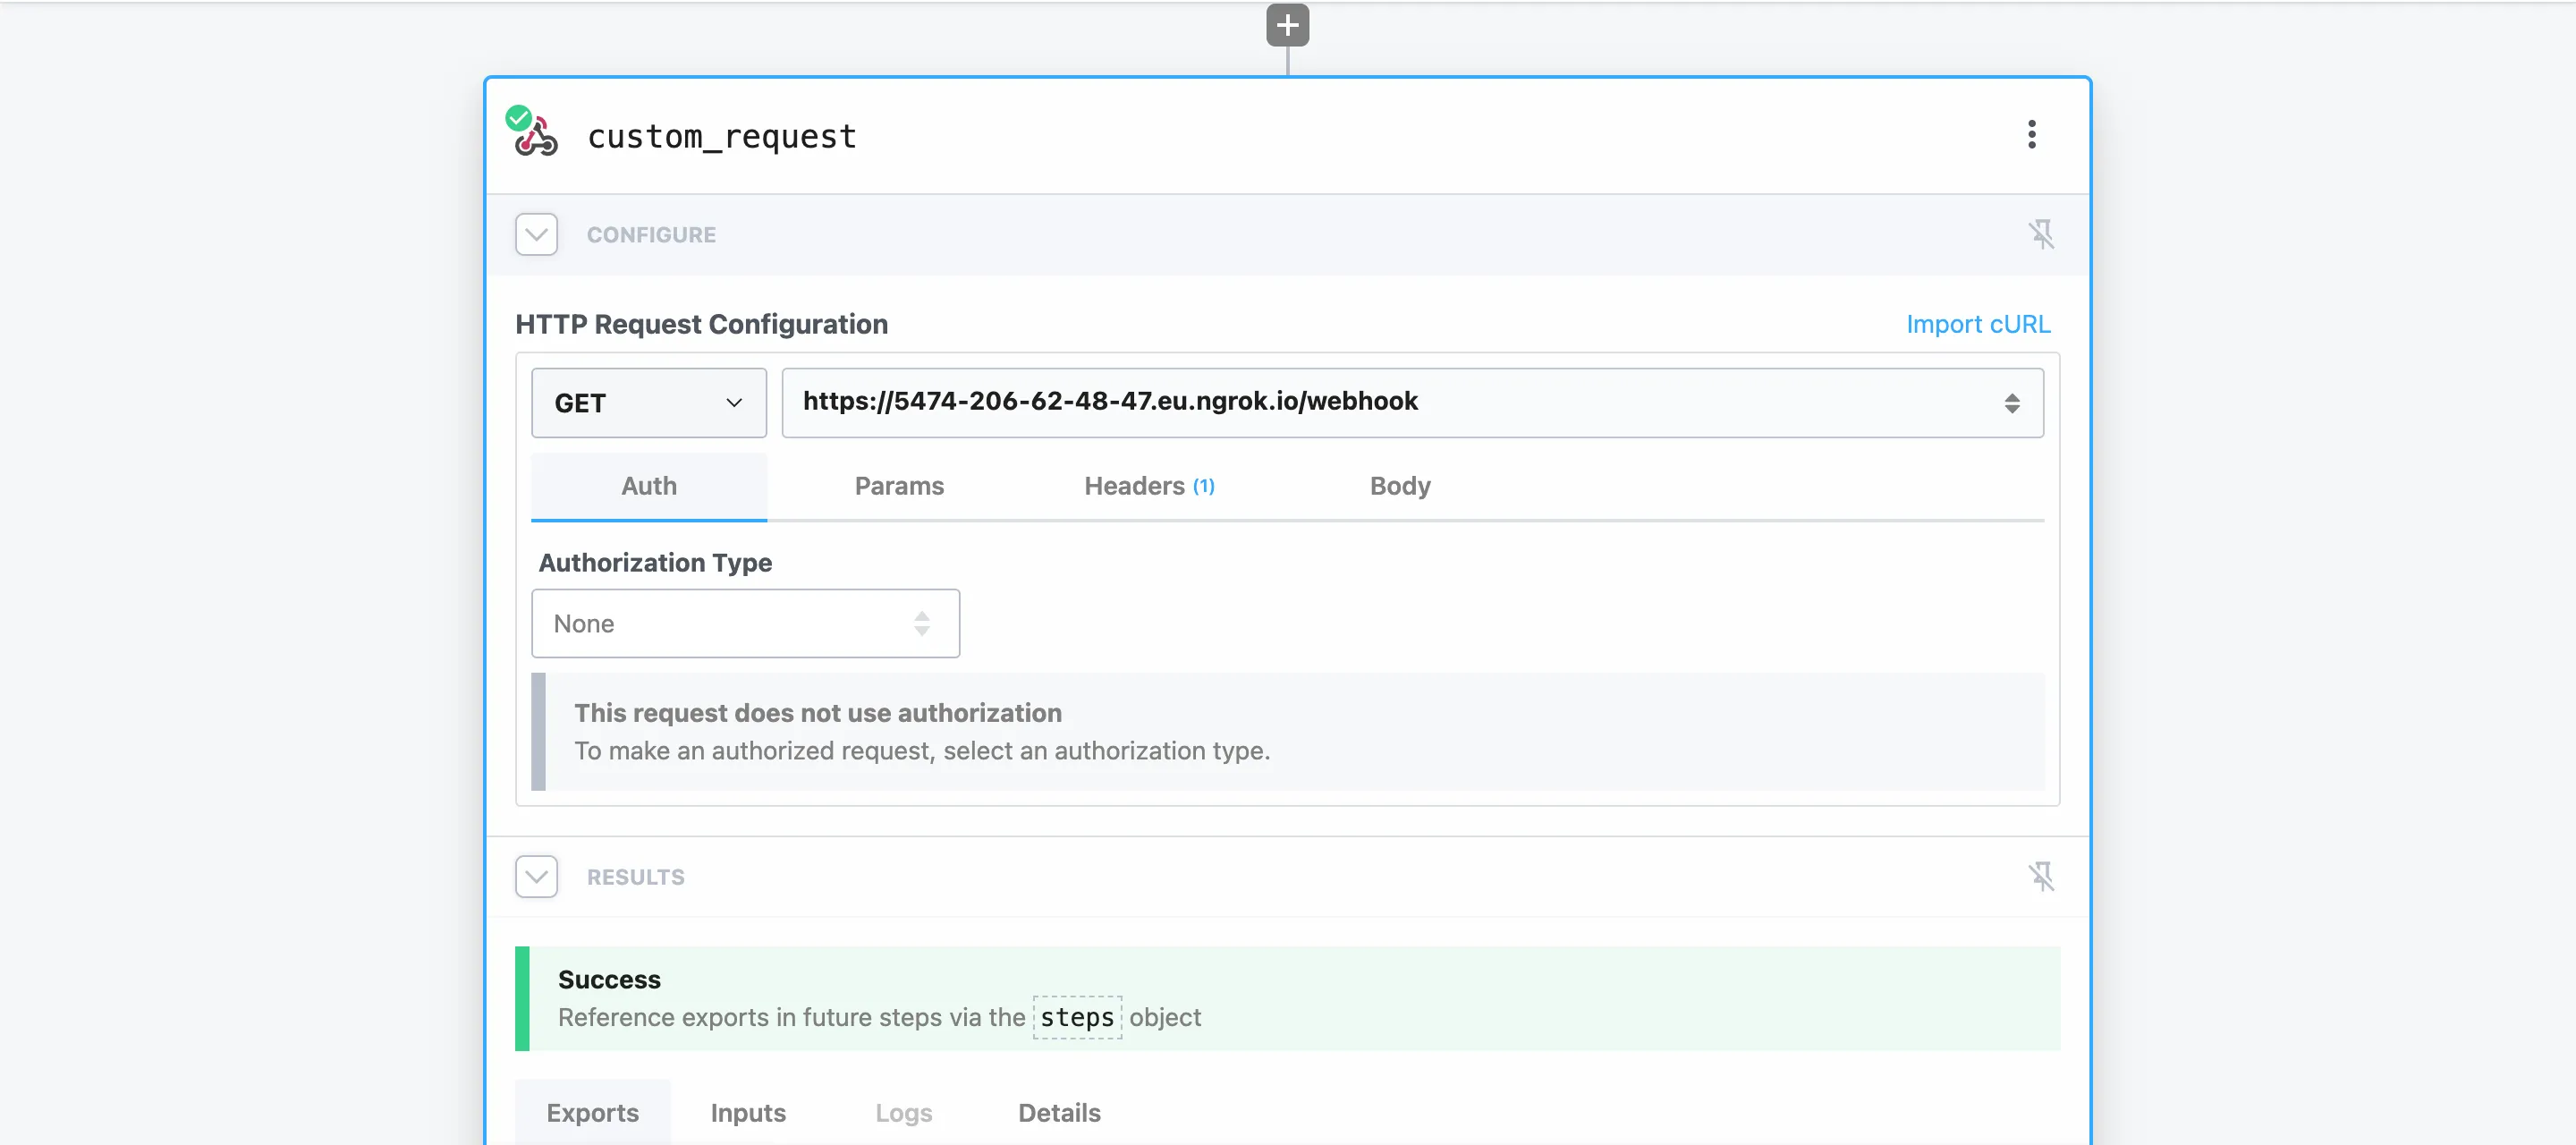
Click on + to add the next step, which will indicate what will happen once this workflow is triggered. In this case, you'll add a simple HTTP request to call the Flask application. Select Send any HTTP Request, and add the public link of the Flask application generated with ngrock.
Finally, click on Deploy so that the workflow is deployed and ready.
Set Up Jira
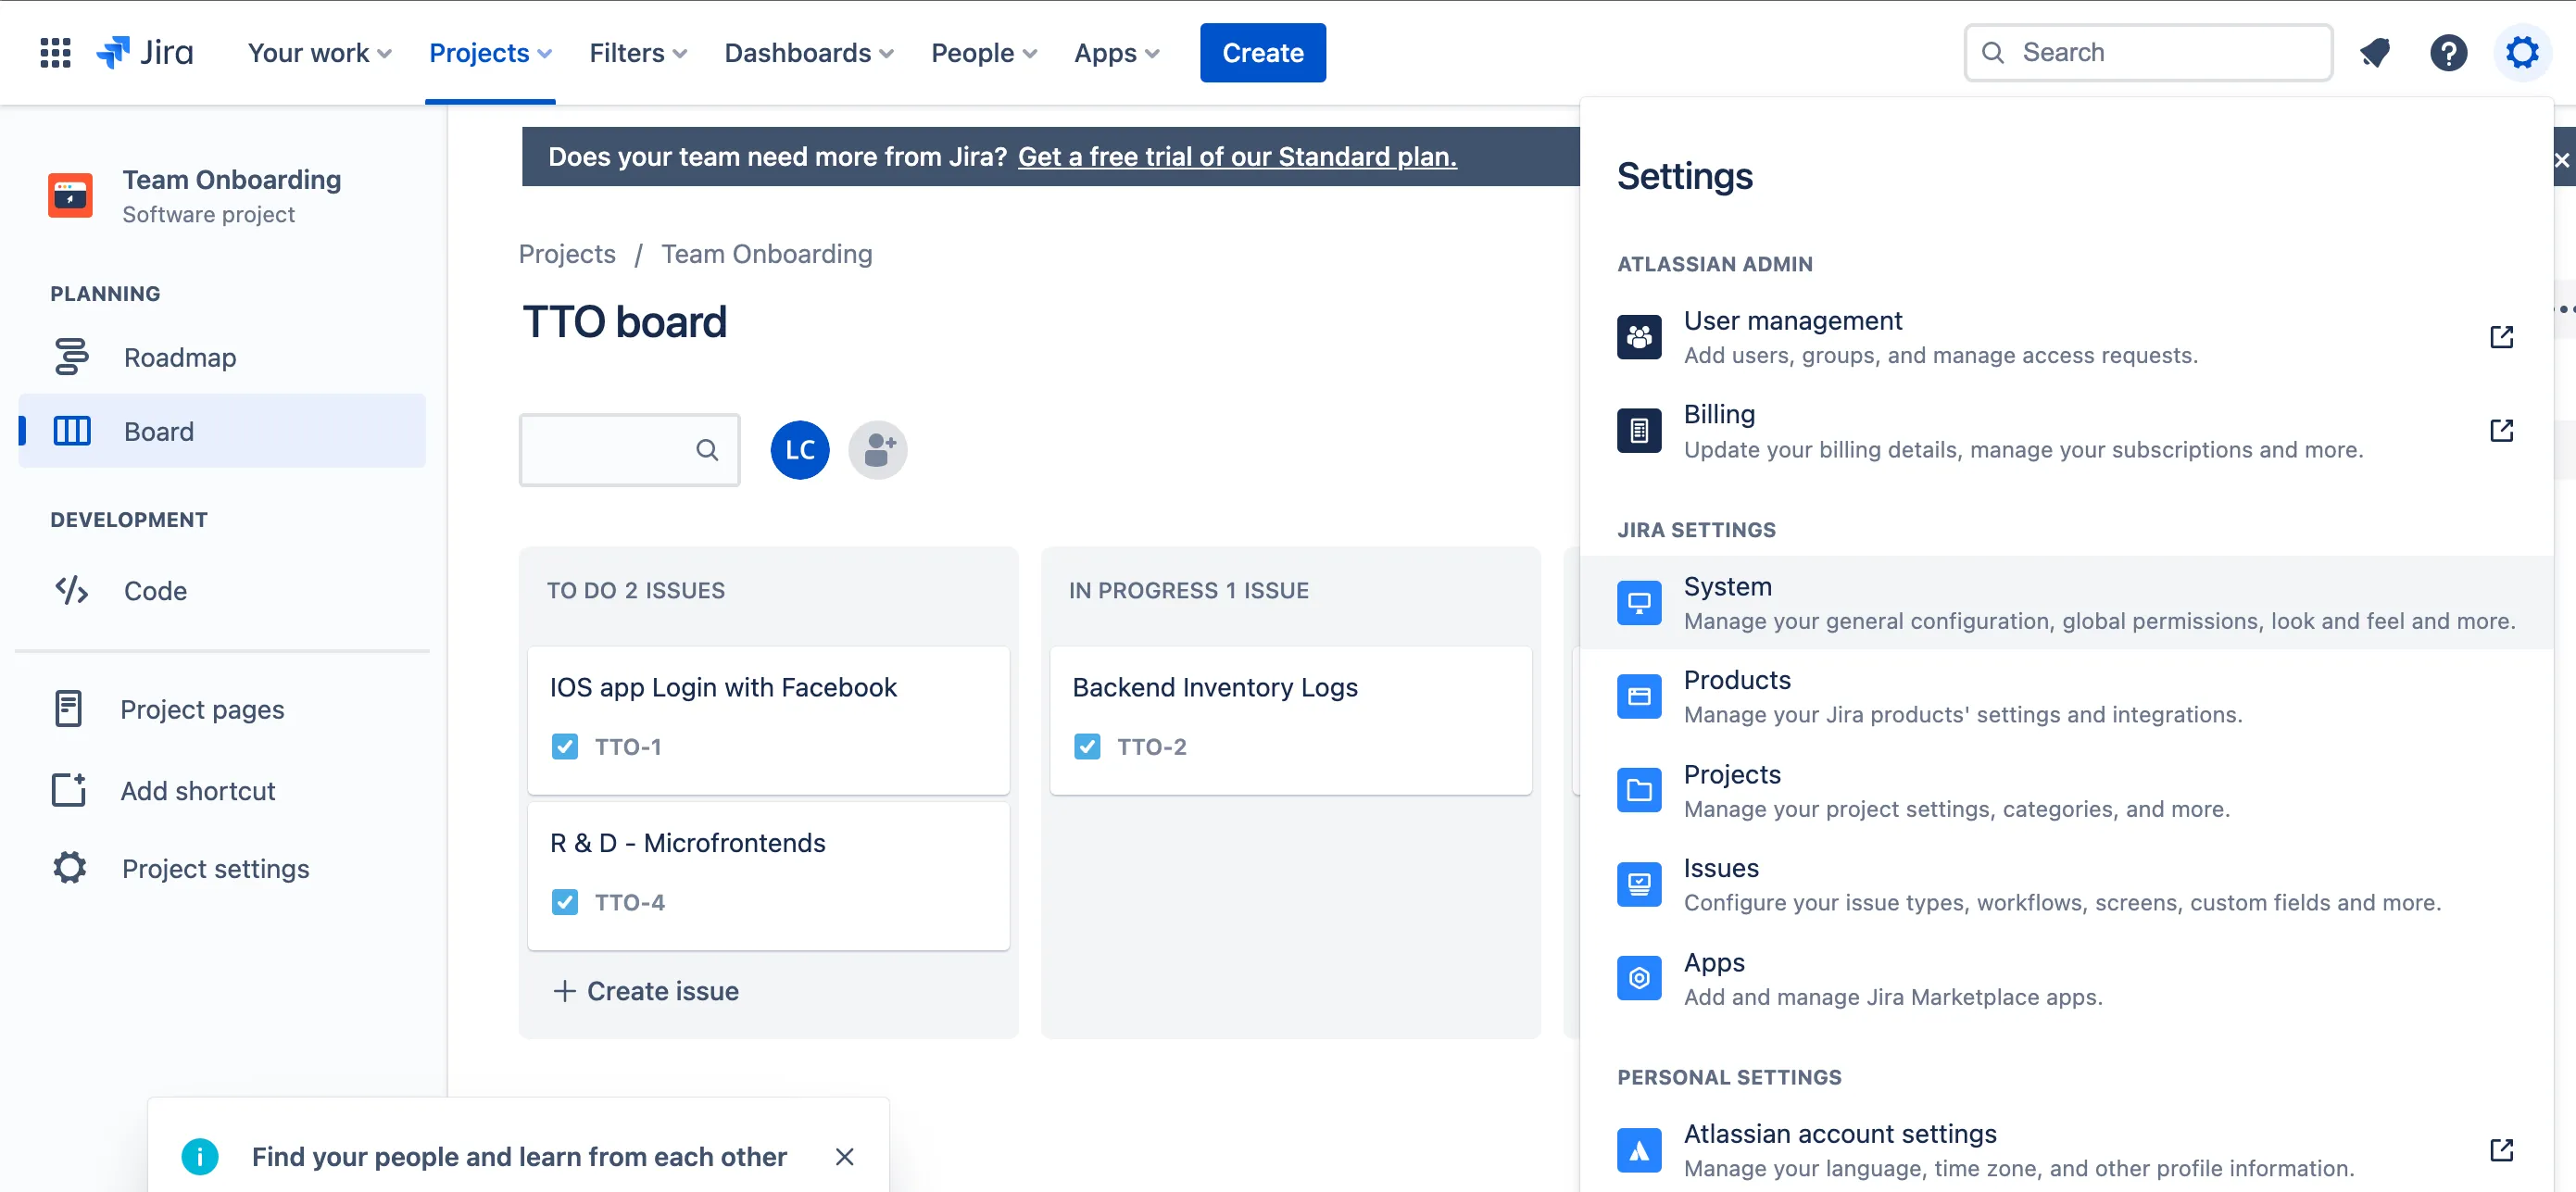
Now you're ready to set up your Jira webhook. To create a webhook on Jira, go to the settings menu in the top right and select System from the drop-down menu items:
Next, go to Webhooks on the left navigation bar, and click on Create a webhook:
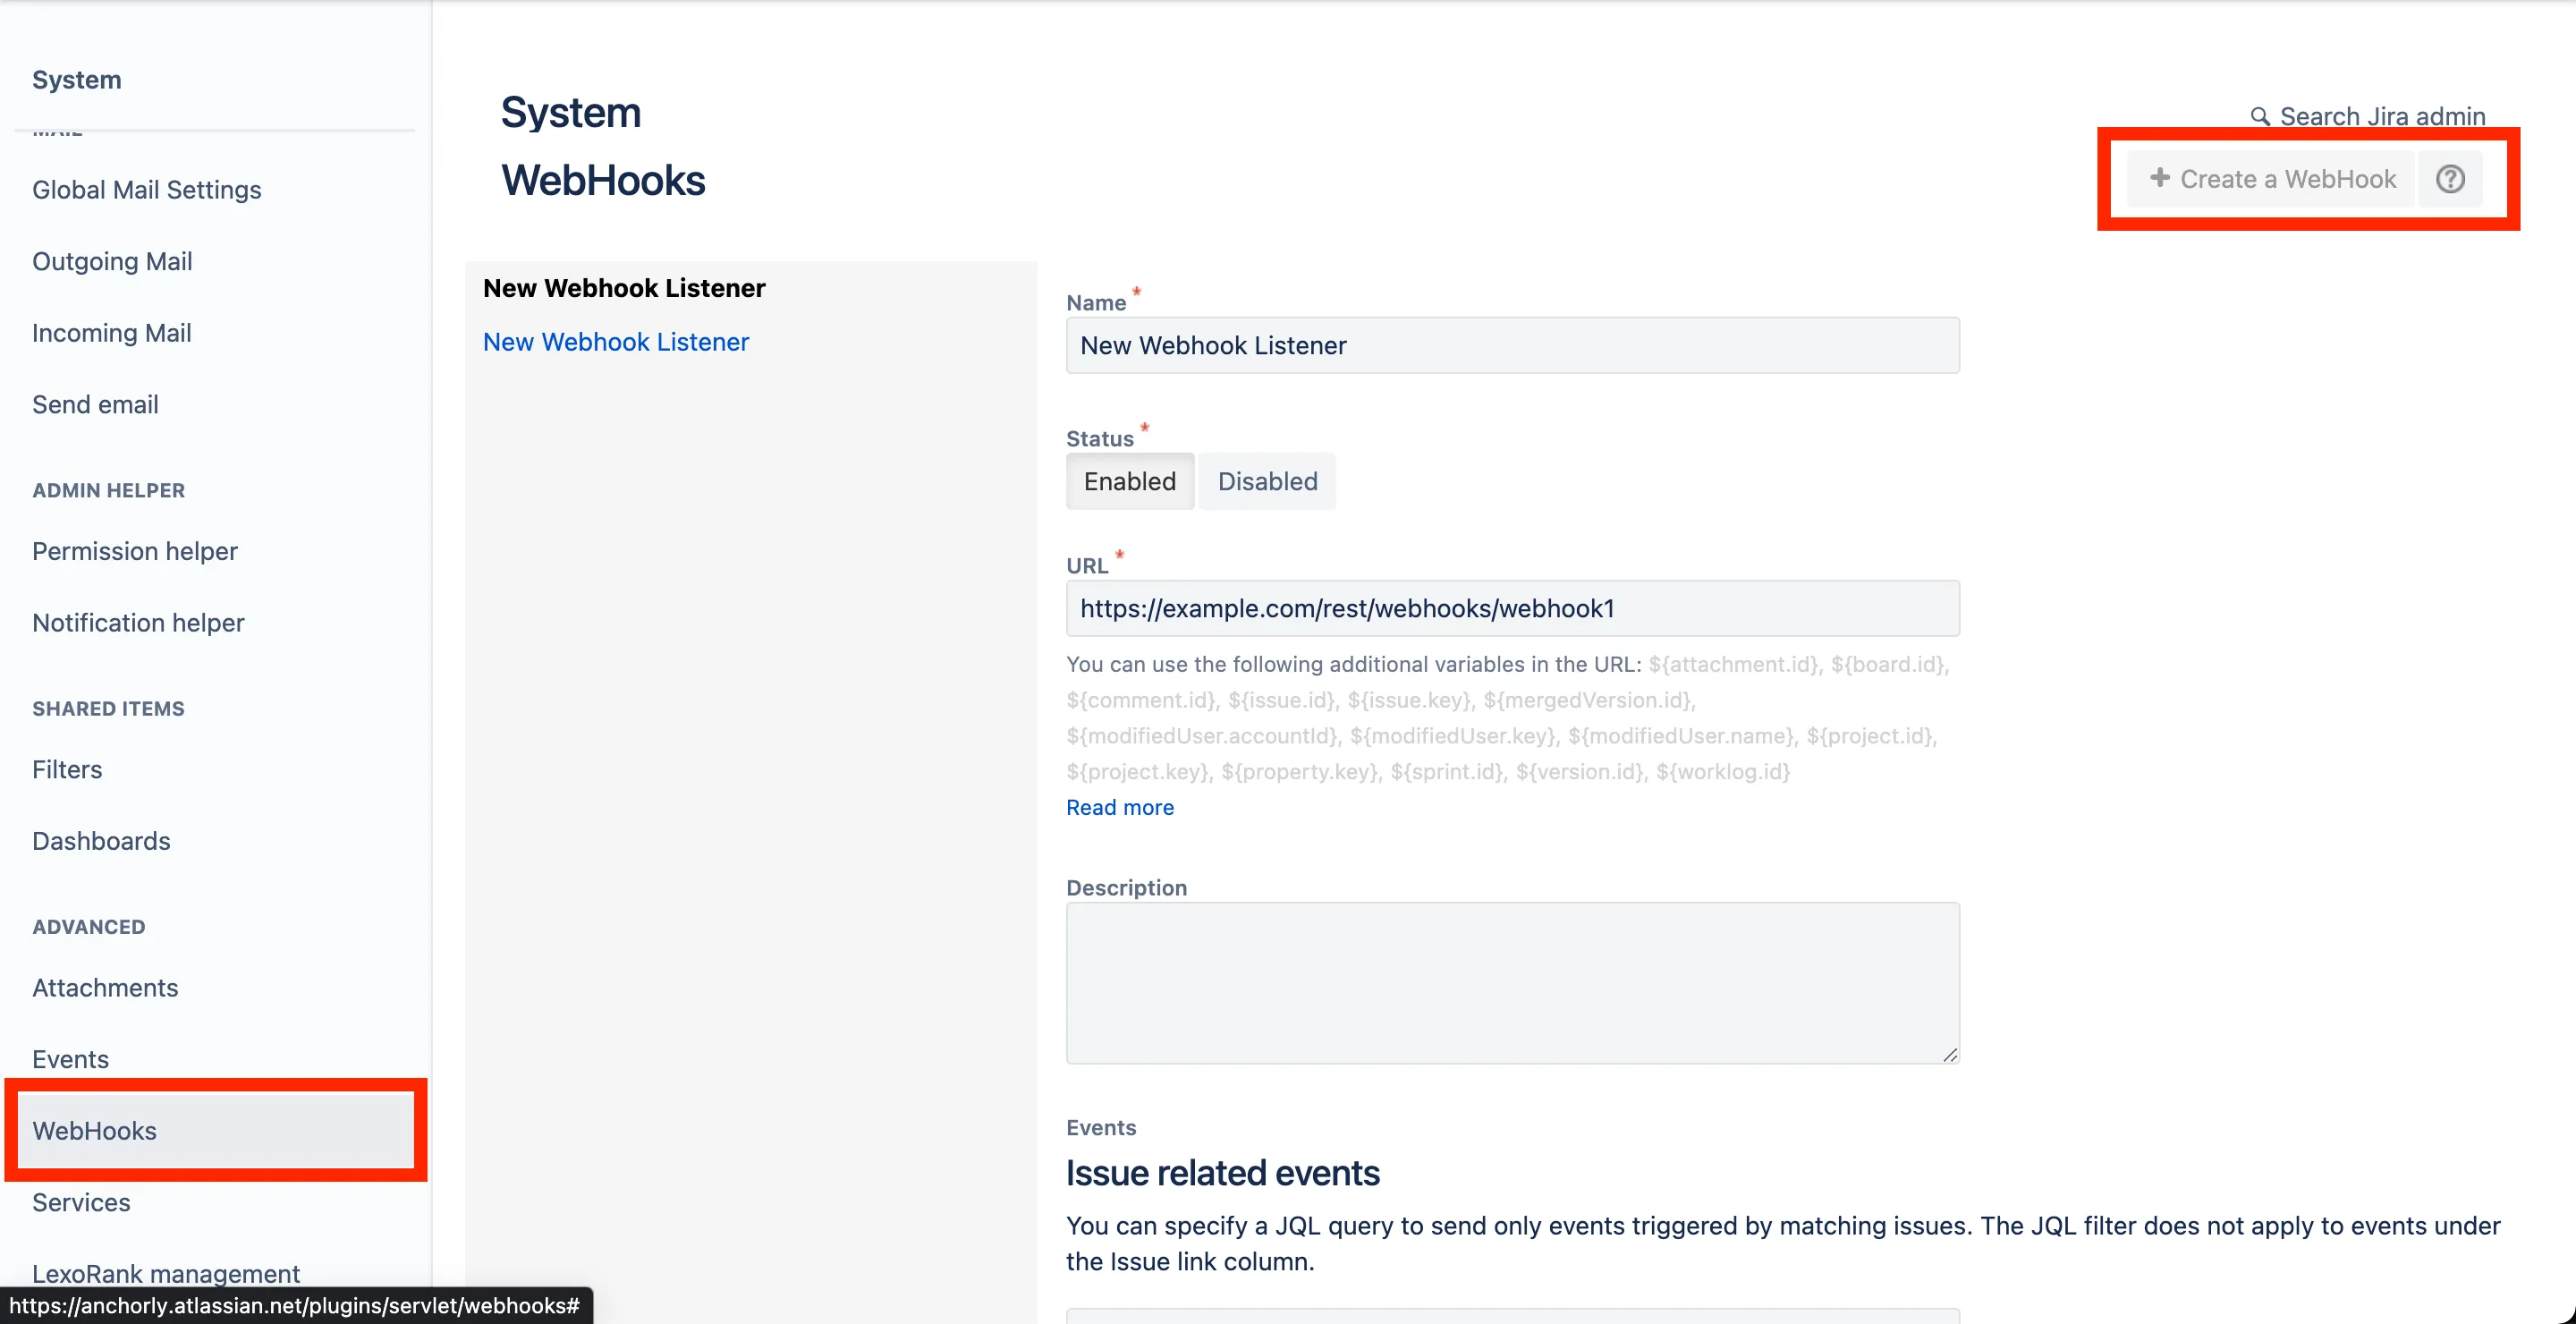
Fill in the details: use "Jira Webhook" as the name and the URL you got from RequestBin.
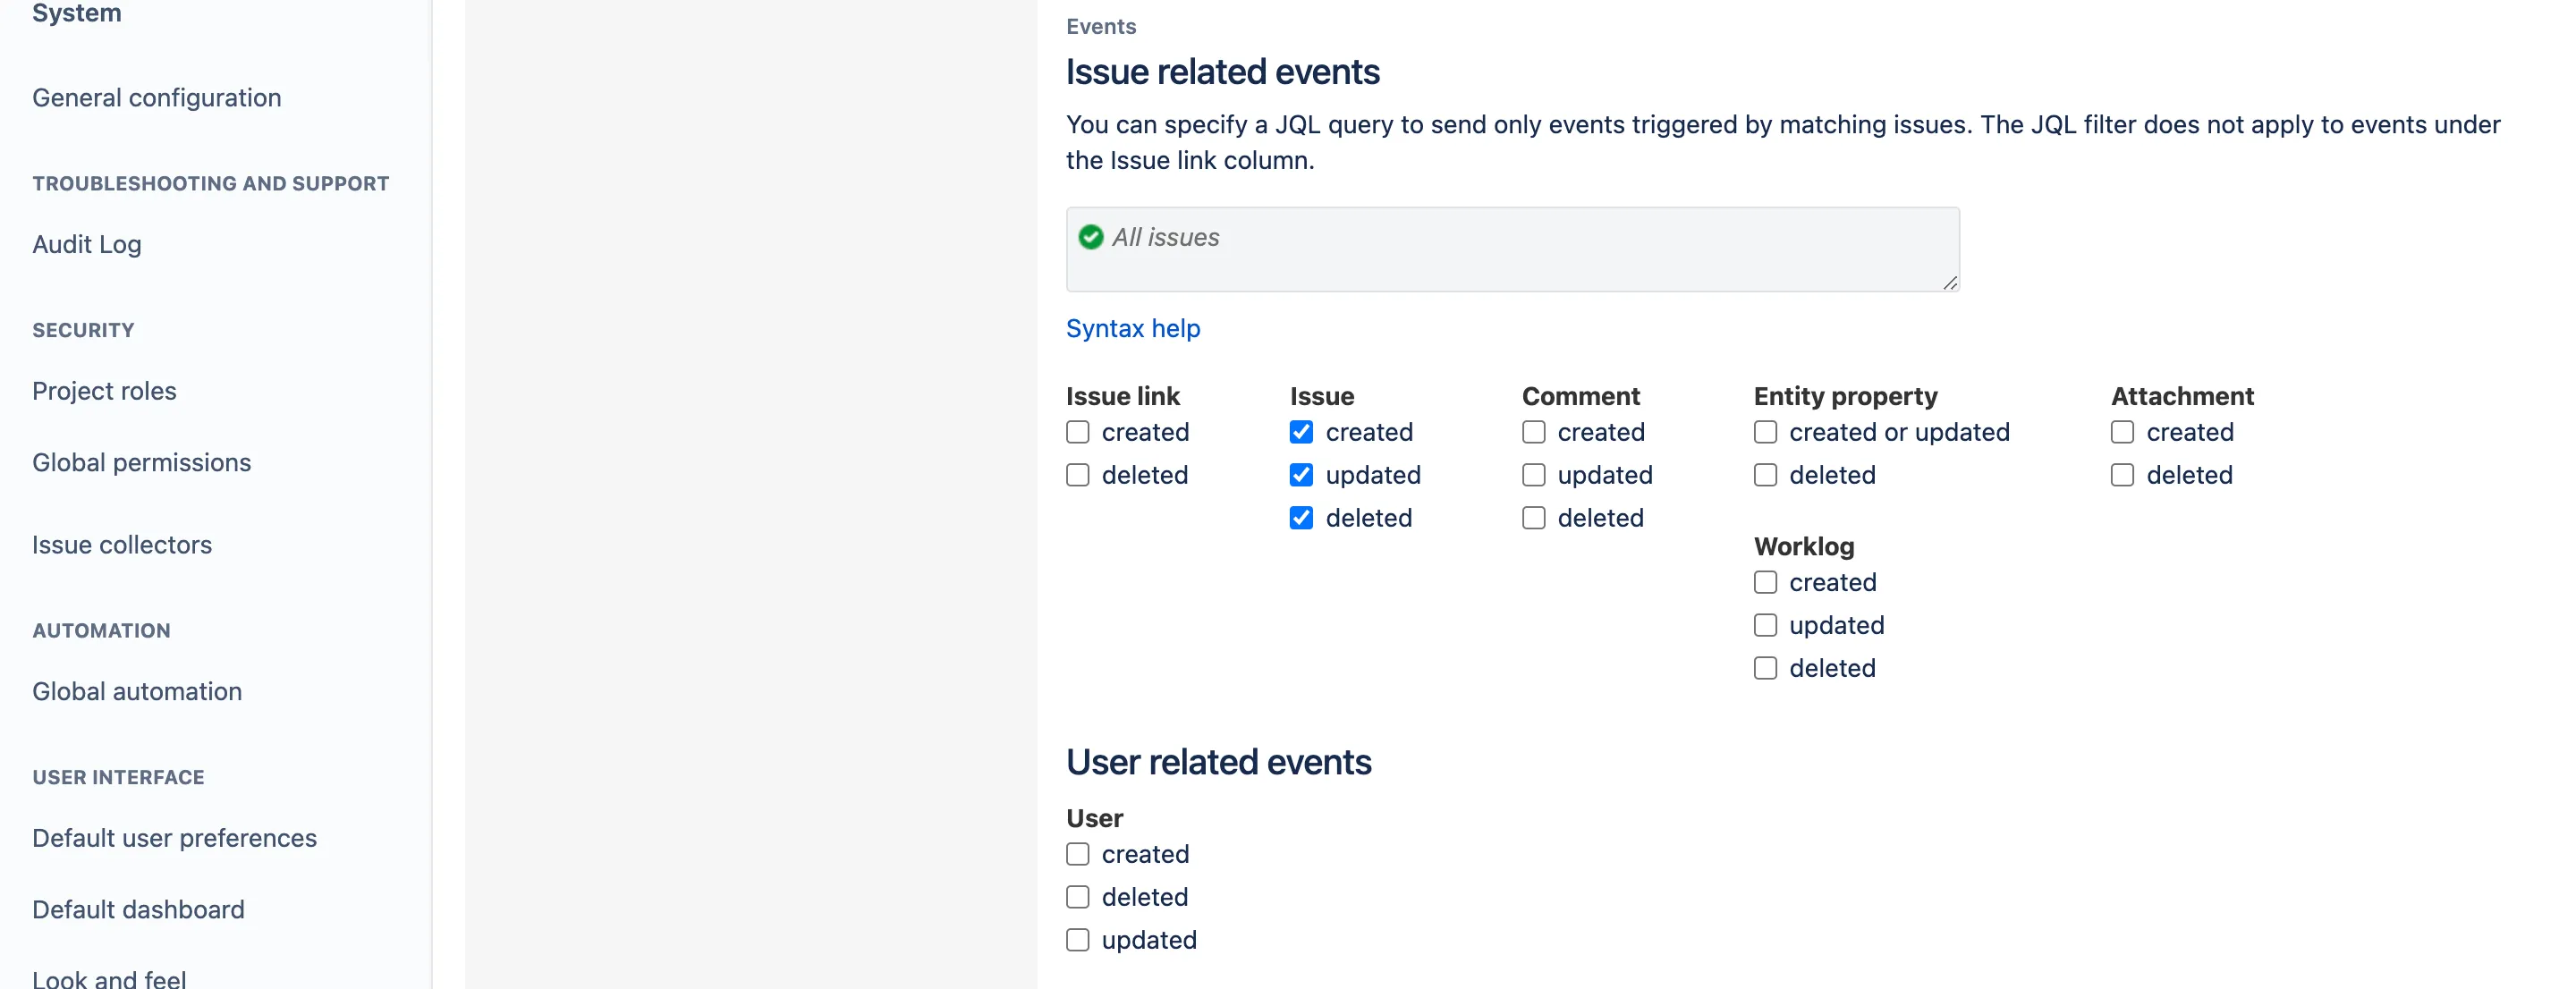
For the configuration on when the webhook should be called, select created, updated, and deleted under Issue. Scroll to the bottom and click on Create.
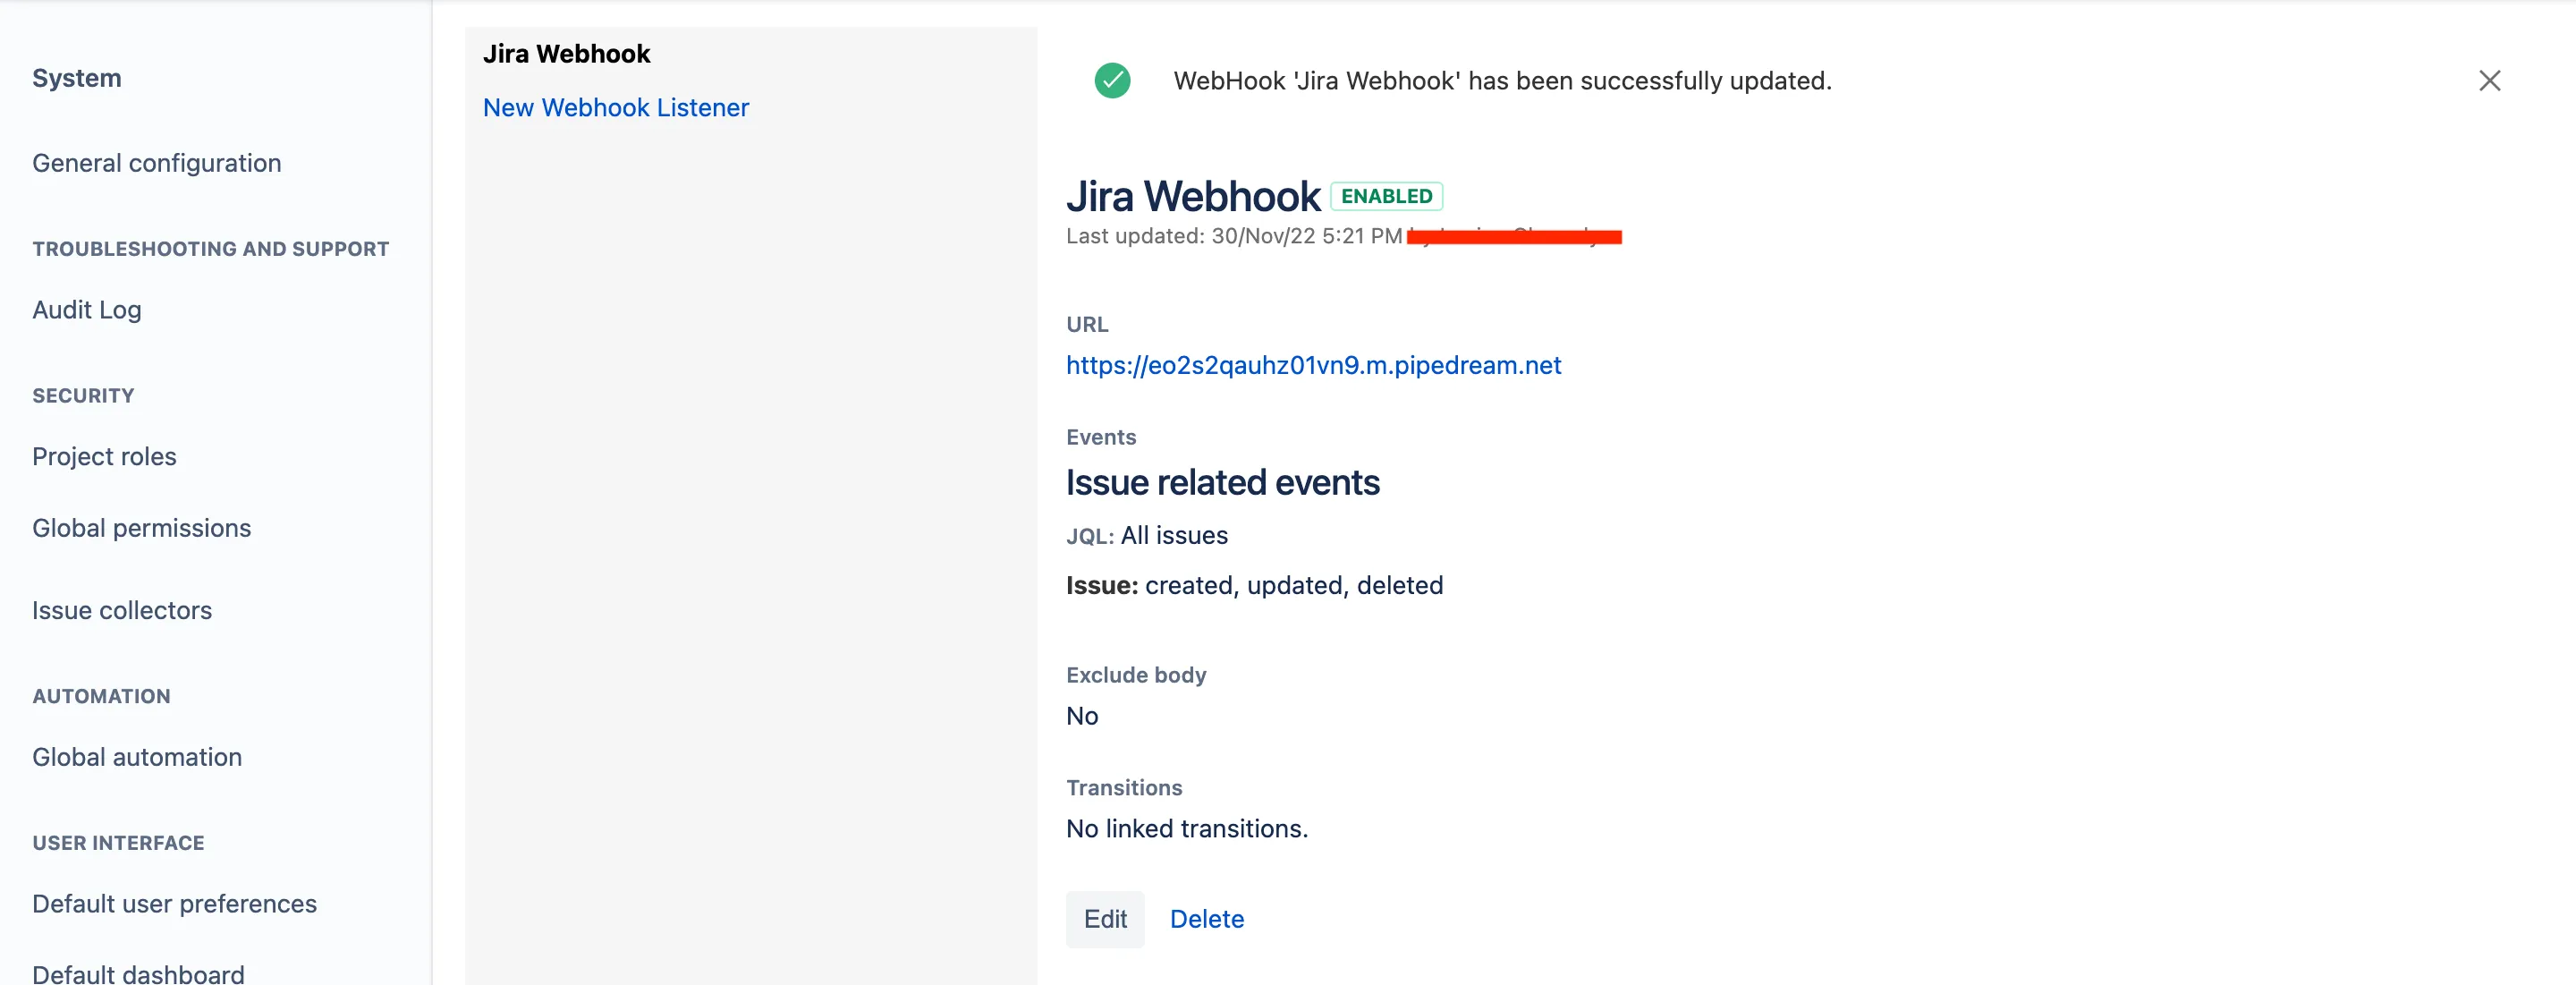
And, congratulations! You're done creating your webhook with Jira.
Testing
Now that you have everything set, go to your Jira board and create or update some issues to test your solution.
If you do, you should see the request intercepted on RequestBin, the workflow triggered, and your Flask application app called. You should also see the <code class="blog_inline-code">Issues.csv</code> file with the latest issues you created.
Related: How to get comments from Jira using Python
Accessing Multiple Jira Instances or Other Similar Data Sources
As you increase your Jira usage, especially in a bigger organization, you might want to integrate different Jira instances with each other or connect to other data sources.
For example, if you're using ServiceNow for your IT service management processes, you might want to correlate ServiceNow incidents with items in your Jira instance. ServiceNow also offers a REST API that you could connect to. However, it would be difficult to maintain both implementations and connections. You'd need to map between different API responses manually as the response structure from the Jira REST API is not the same as the return structure from ServiceNow. Your scripts would also need to talk to at least two endpoints.
This is where tools like Merge are able to help. Their unified API lets you connect various data sources through setting up the connectivity in Merge. Merge supports various third-party APIs out of the box, especially for ticketing but also for HR management systems.
Interacting with the Merge API is as simple as interacting with the Jira REST API, but you can connect various integrations in the backend. Merge takes care of handling the connection to the backend services and returns results in the same structure across various providers. As an example, the Ticket object that the Merge API offers can be mapped to ServiceNow and Jira issues, which makes it easier for your script to handle the responses.
Conclusion
This article showed you how to interact with and export information from the Jira REST API using Python. You also learned how to set up a Jira webhook for newly created issues in Jira.
As your integration needs grow, Merge lets you centralize access to different tools and systems through a unified API. Merge comes with hundreds of out-of-the-box integrations with HR, recruiting, ticketing, CRM, marketing automation, and accounting platforms to help B2B companies speed up the integration of their systems.
Learn more about Merge by scheduling a demo with one of our integration experts.


.png)
.png)
.png)
